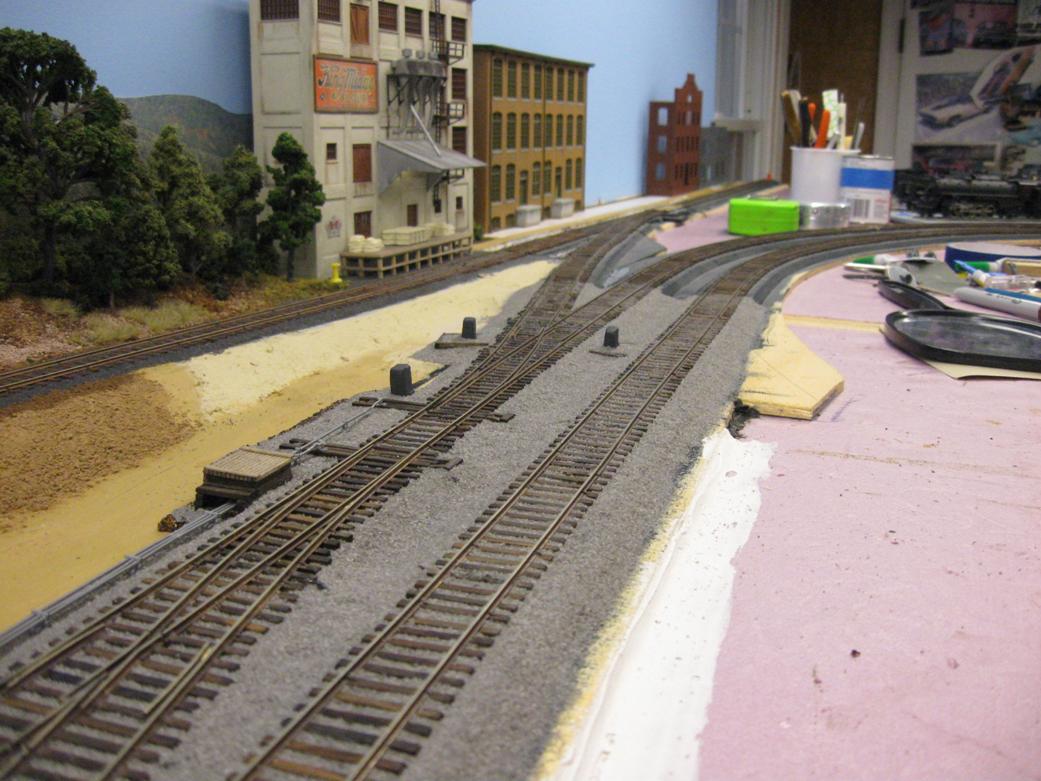
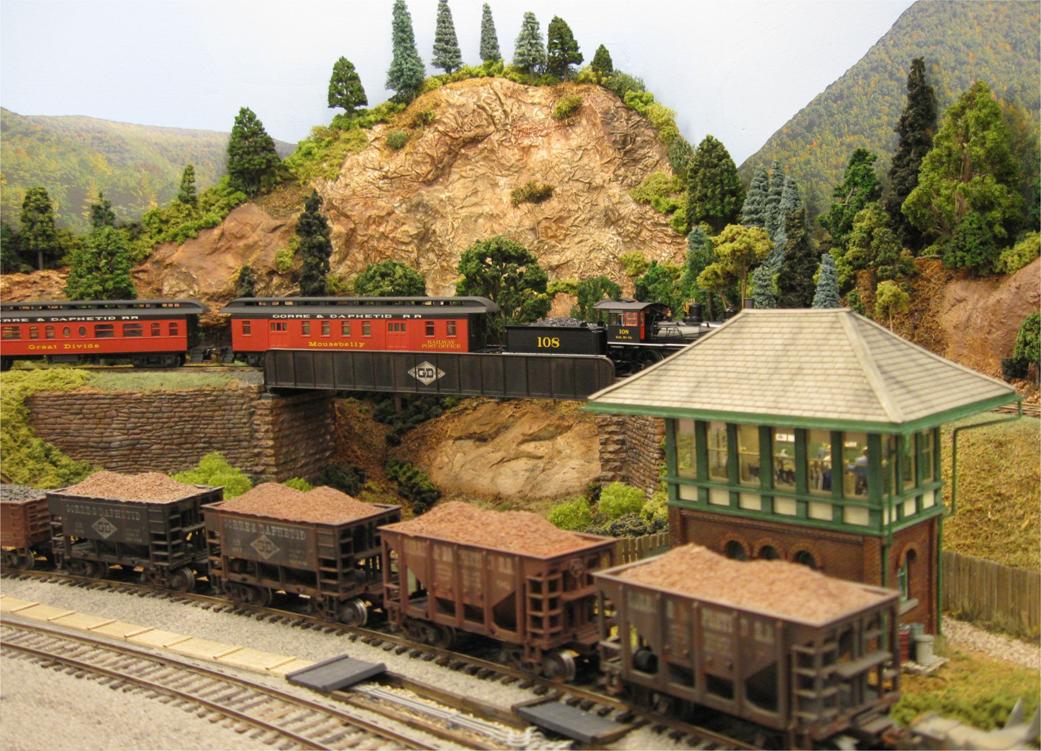
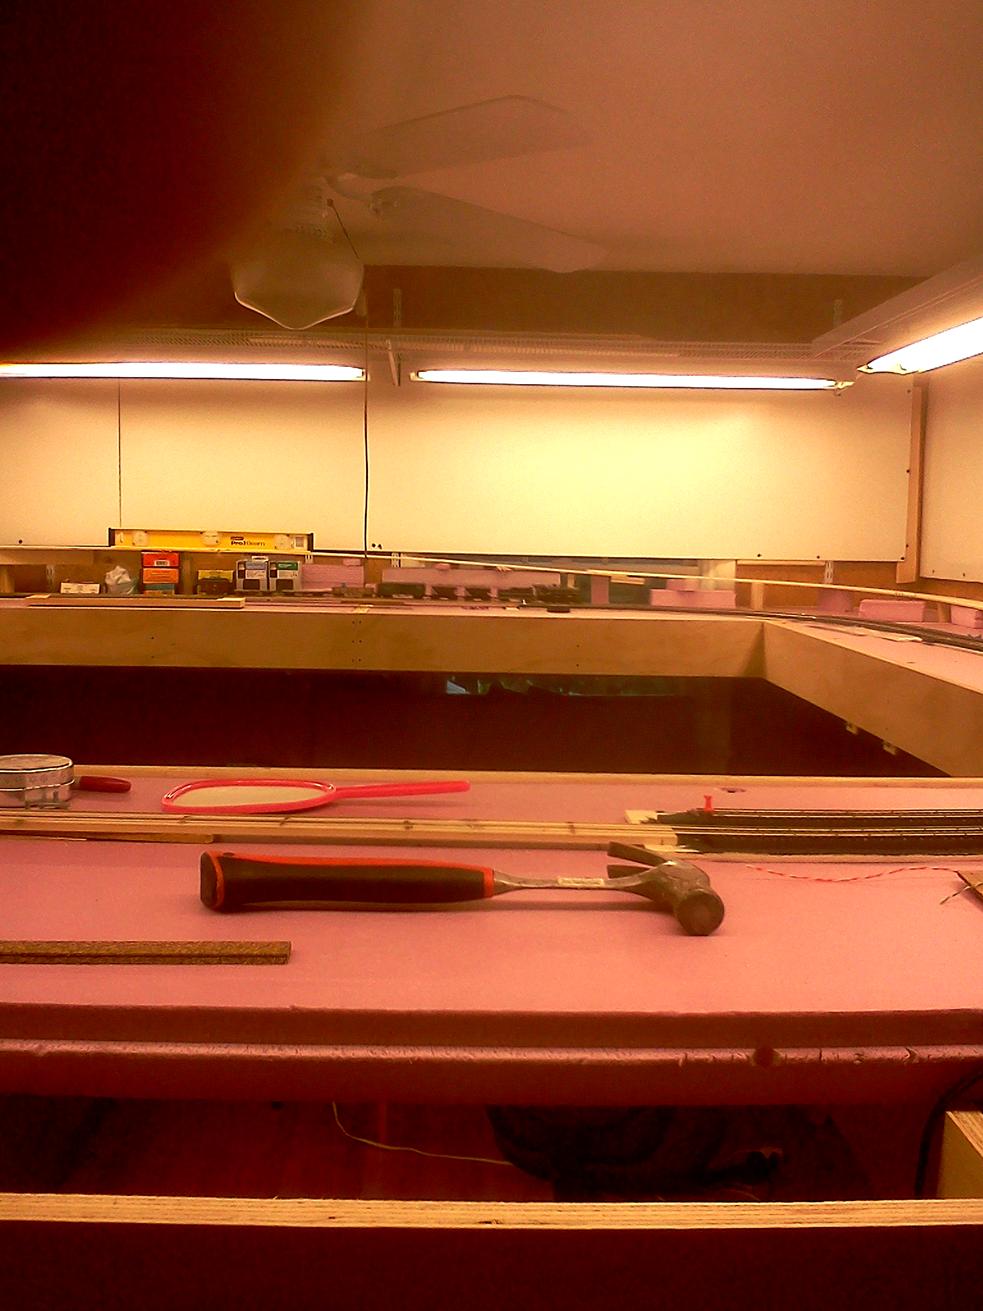
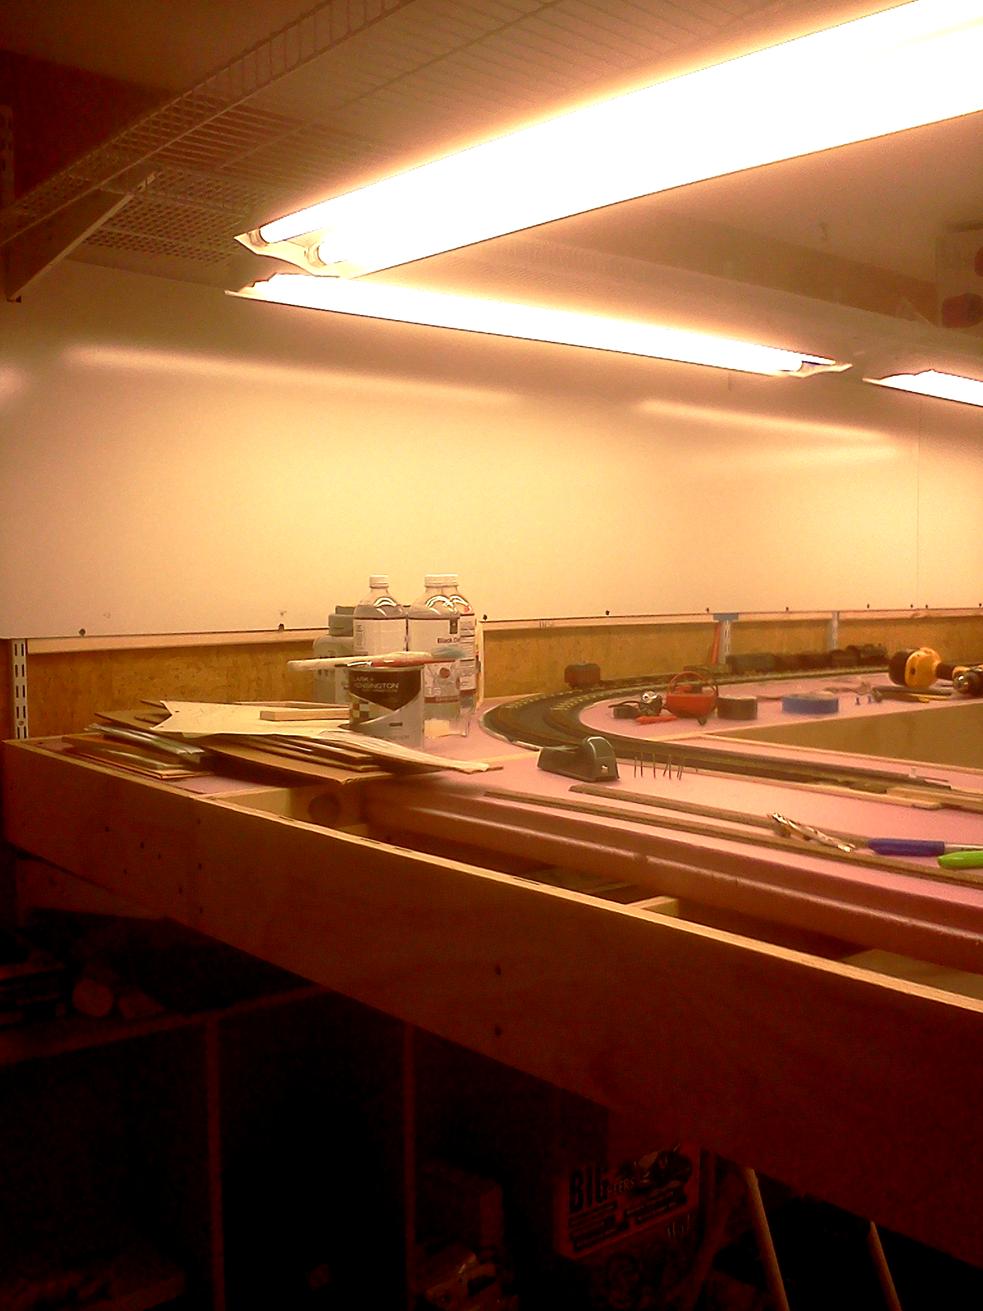
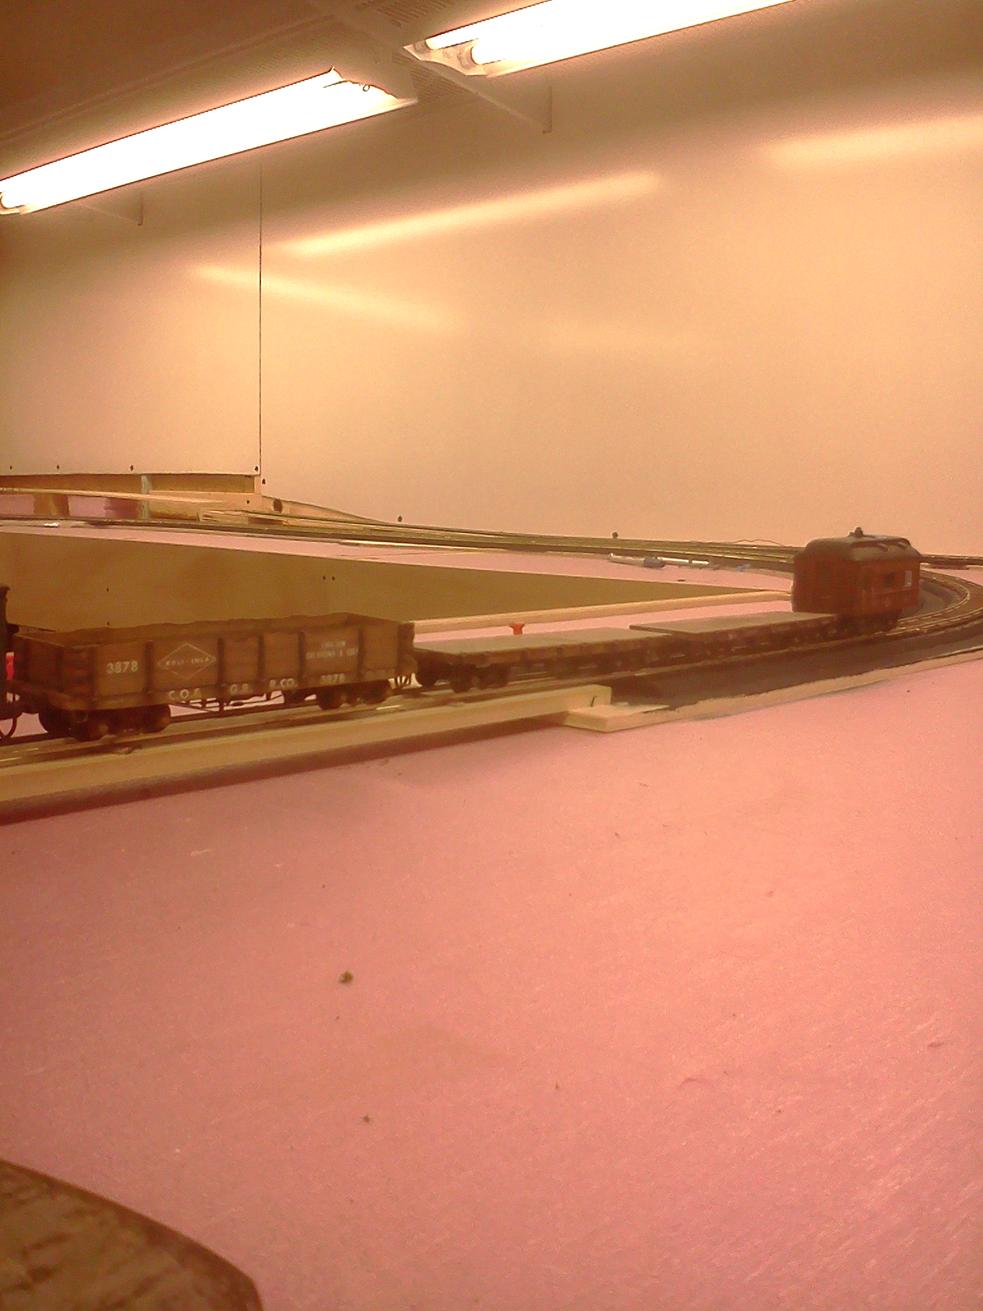
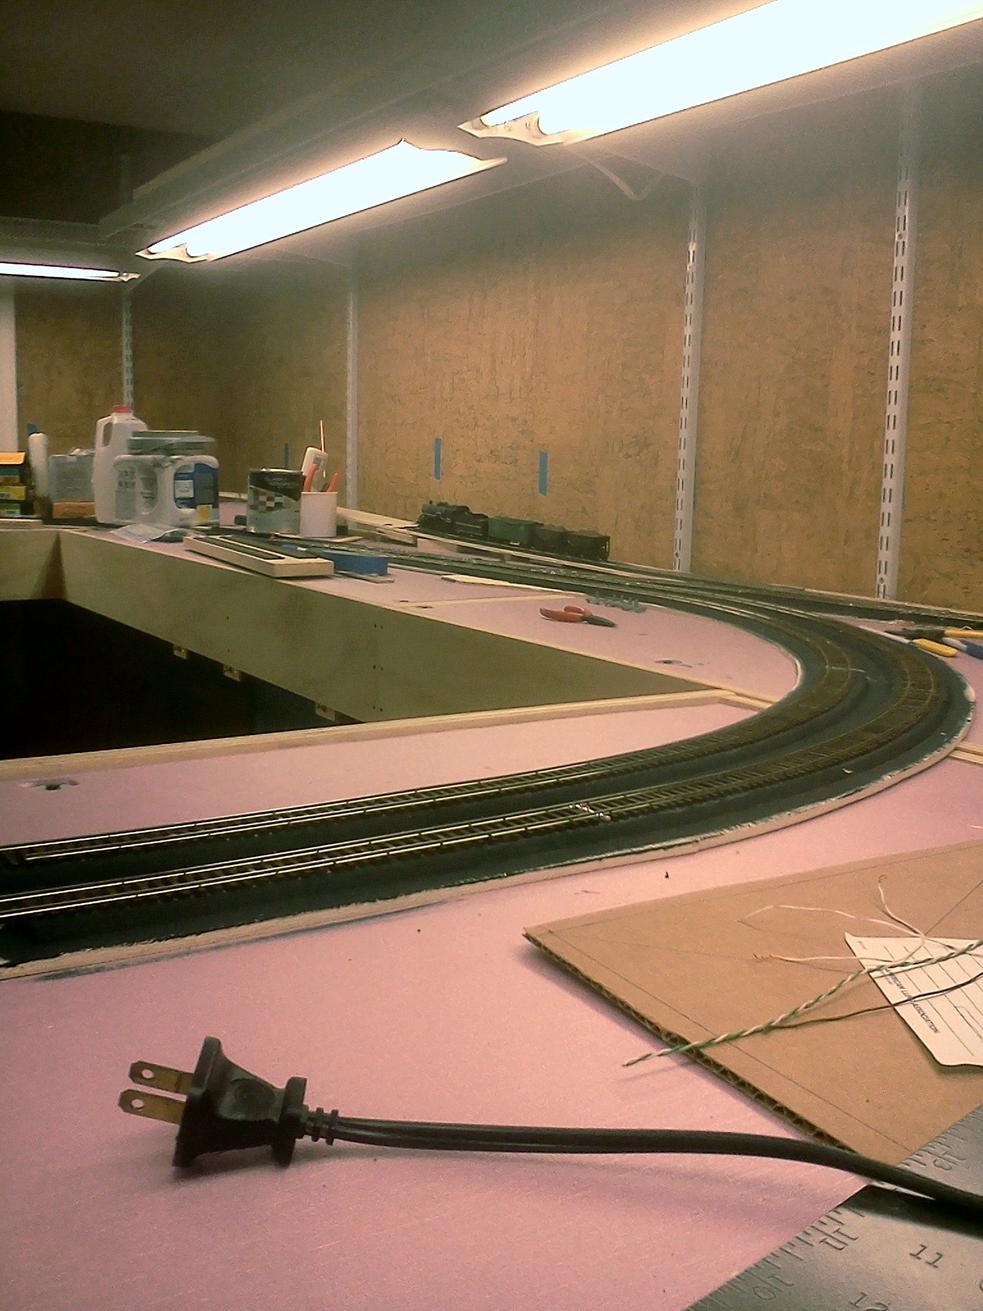
Taggart Transcontinental Layout Progress Pictures and Notes
The newest pictures are first, oldest at the end.
Updated 2022-01-09 Jeff Witt
Next tasks:
- ???????????????
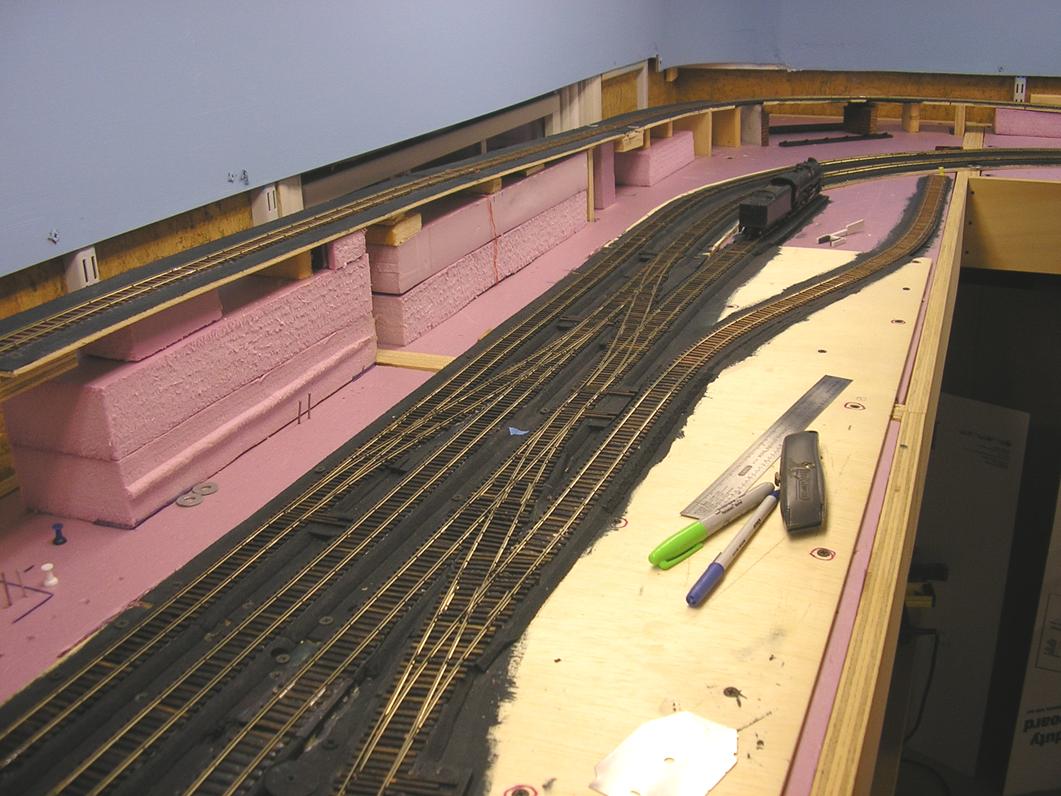
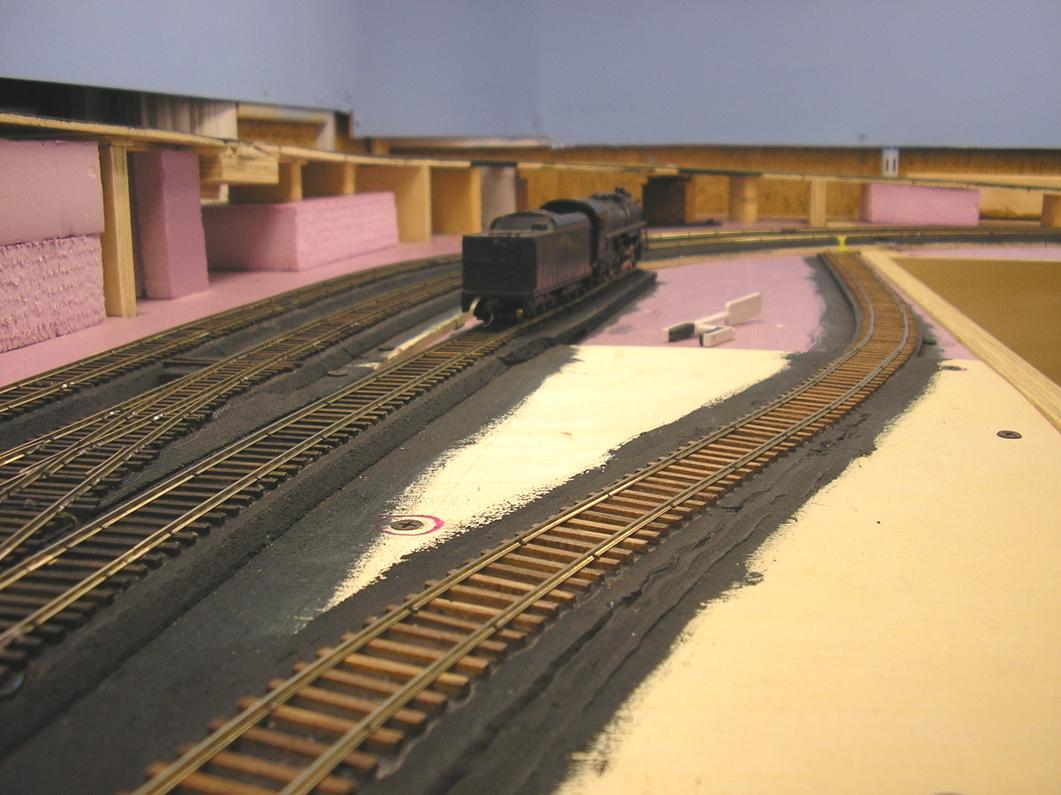
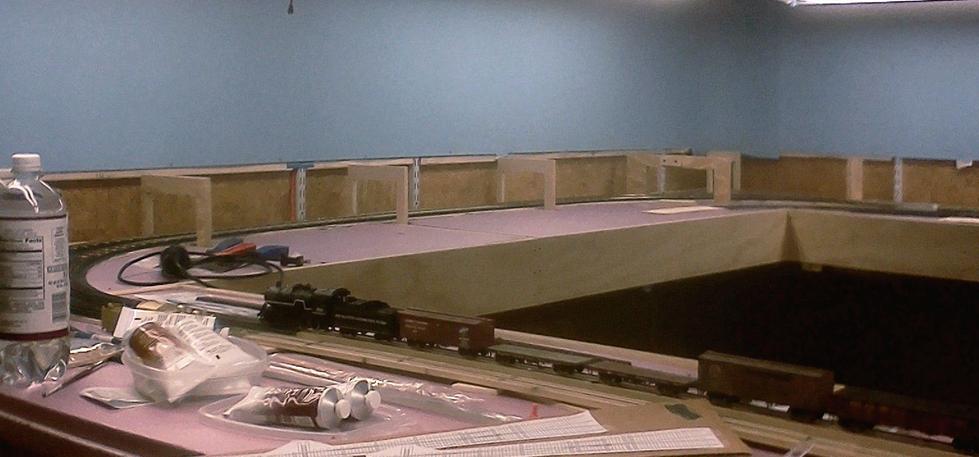
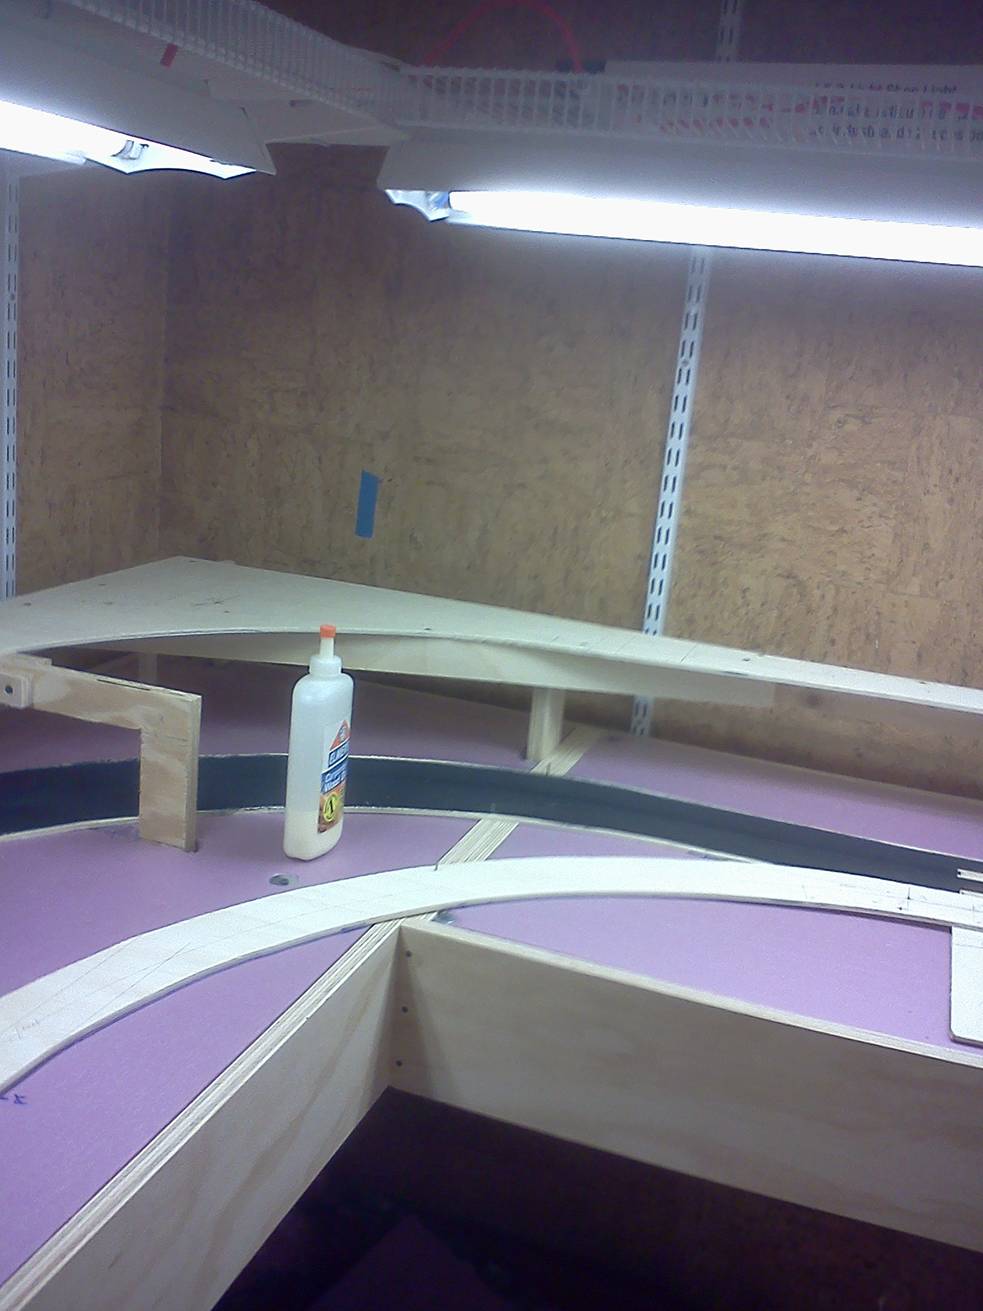
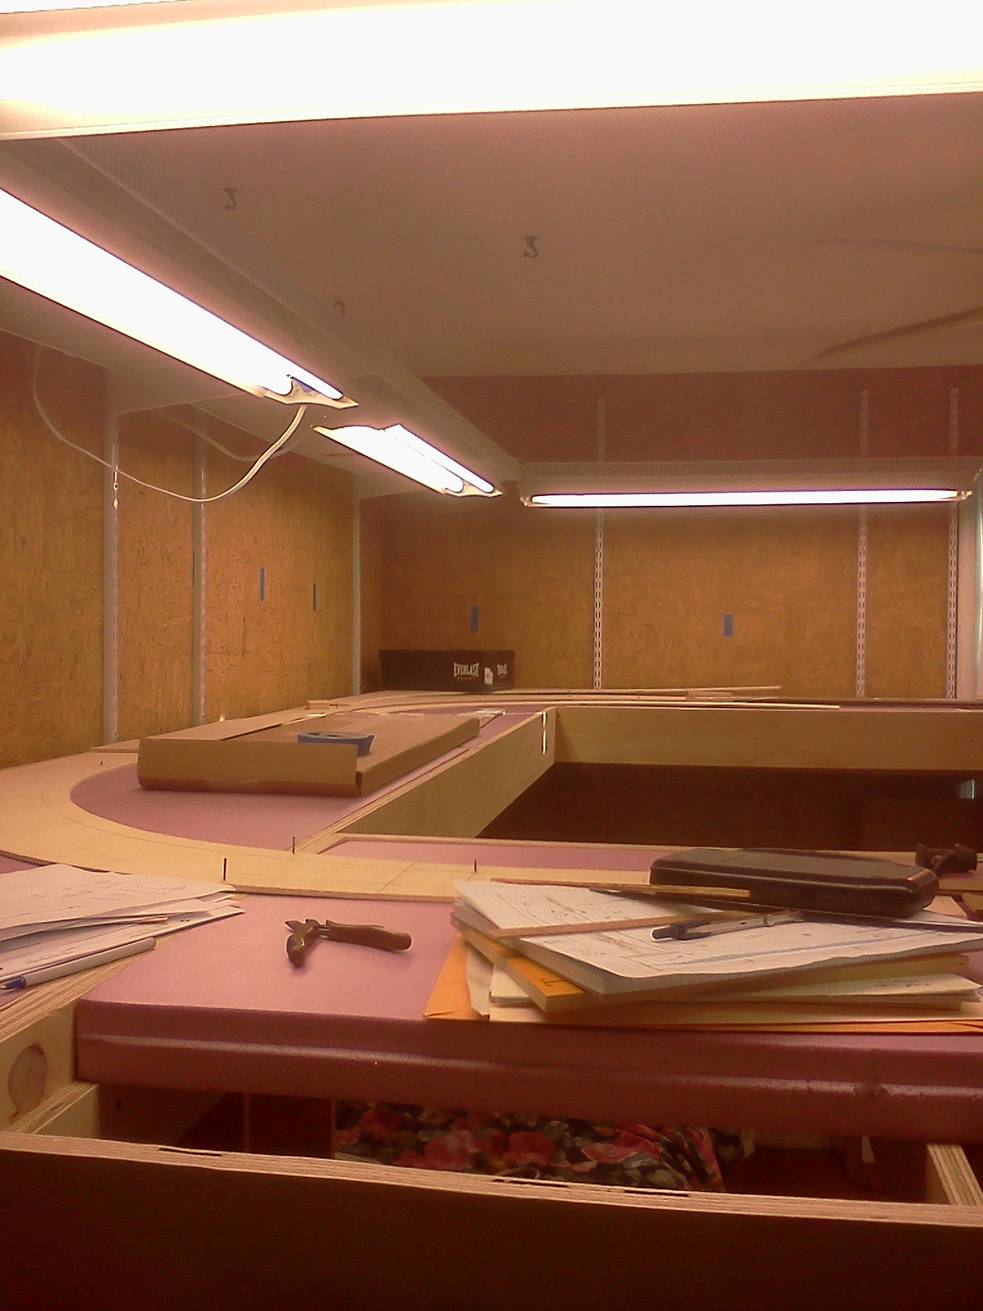
November 2020 through December 2021
It’s been over a year, with not as much progress as I would have liked. The pandemic hasn’t been the boon to progress one would expect:
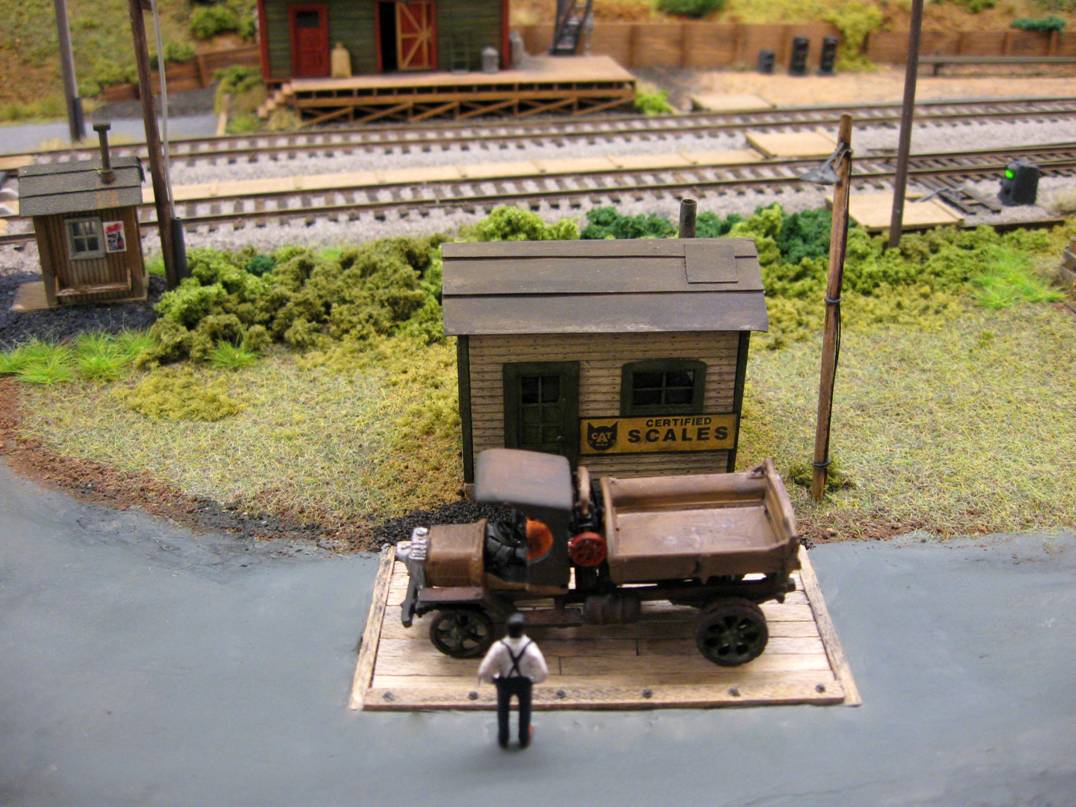
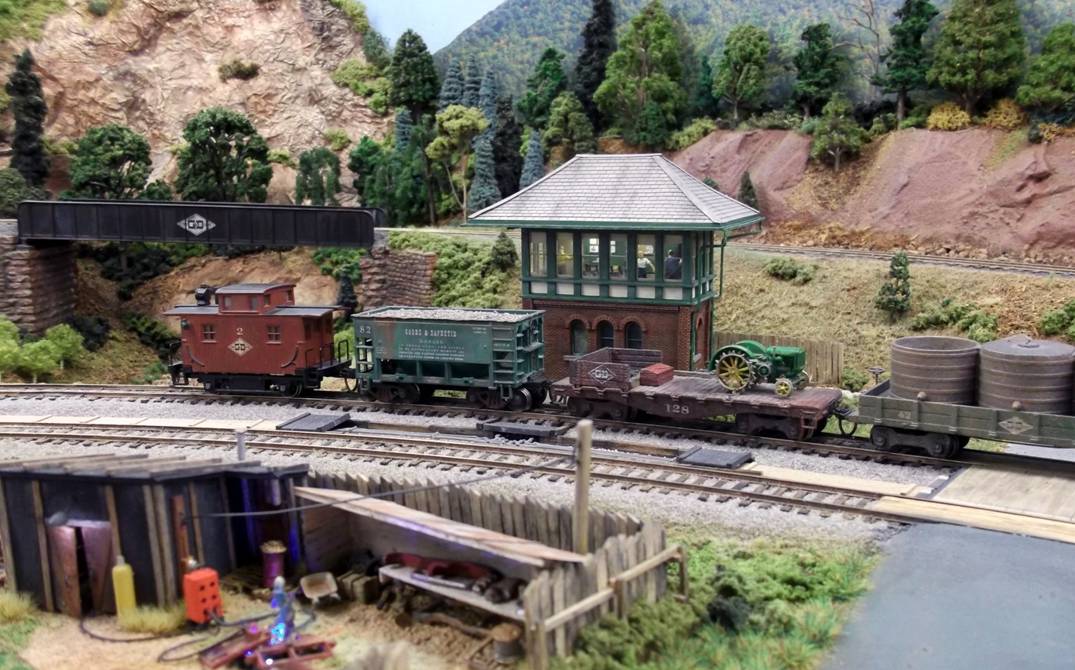
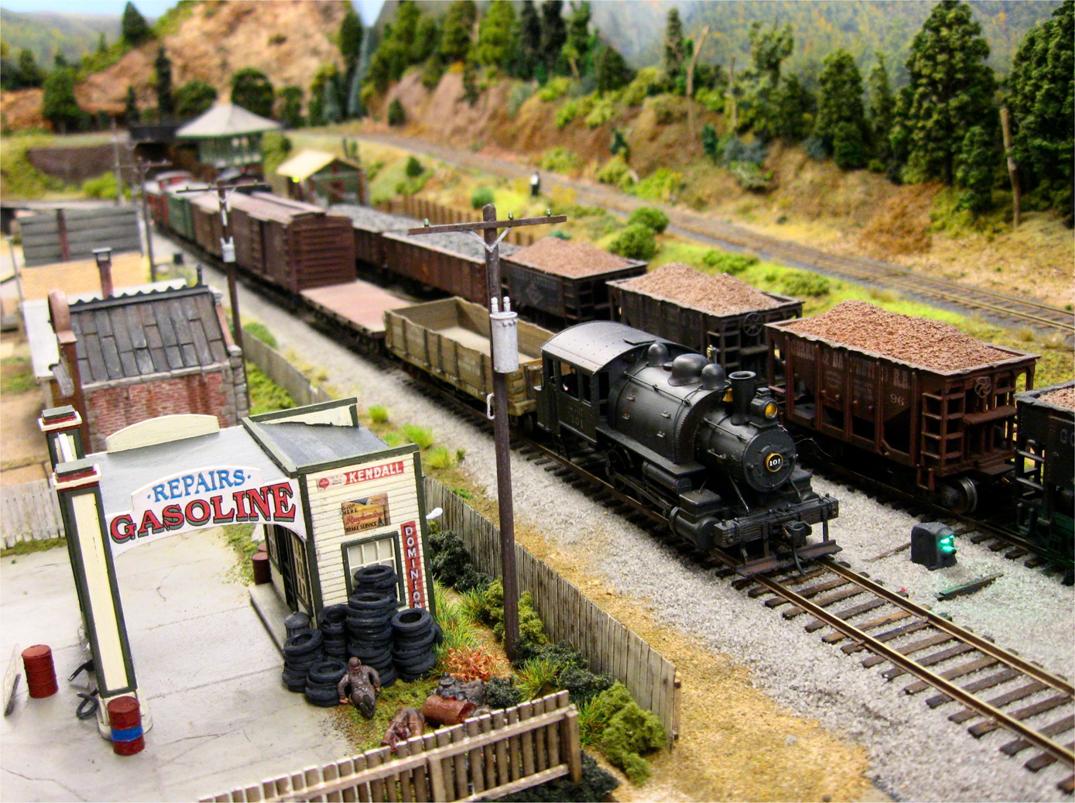
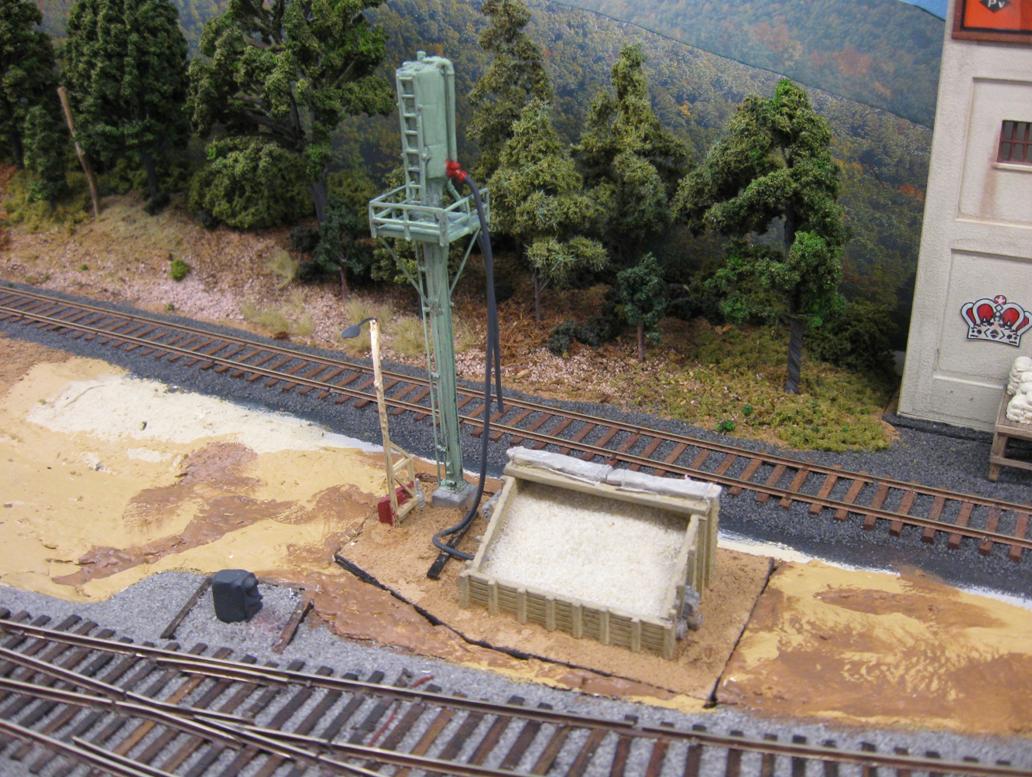
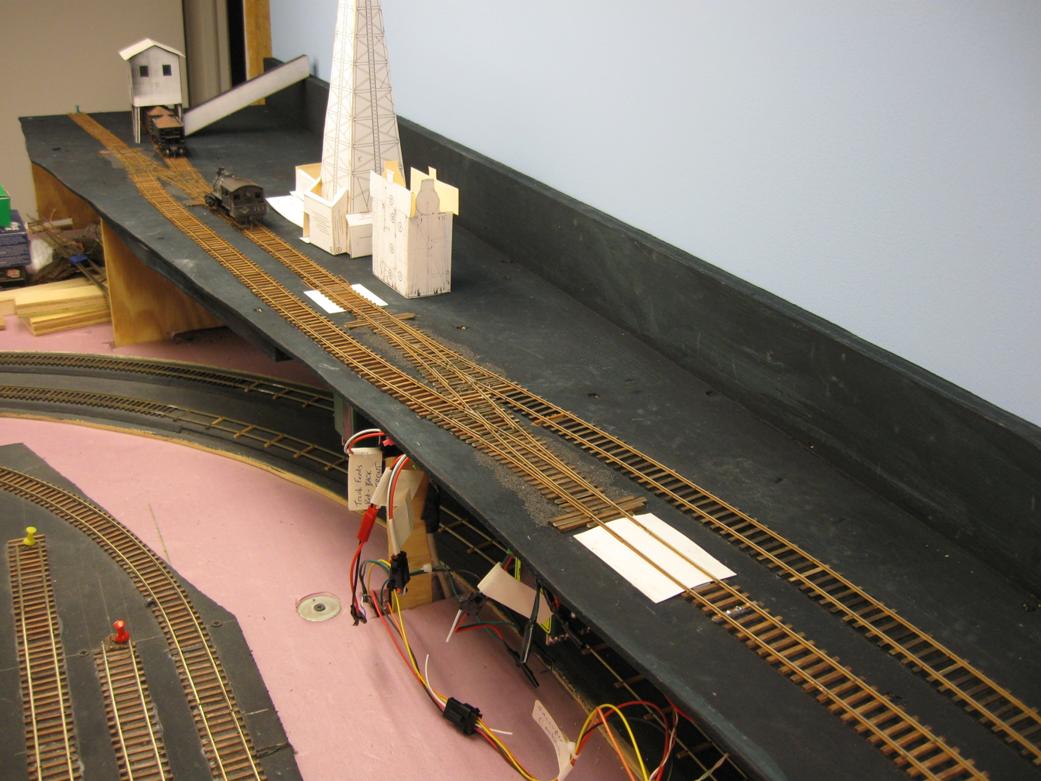
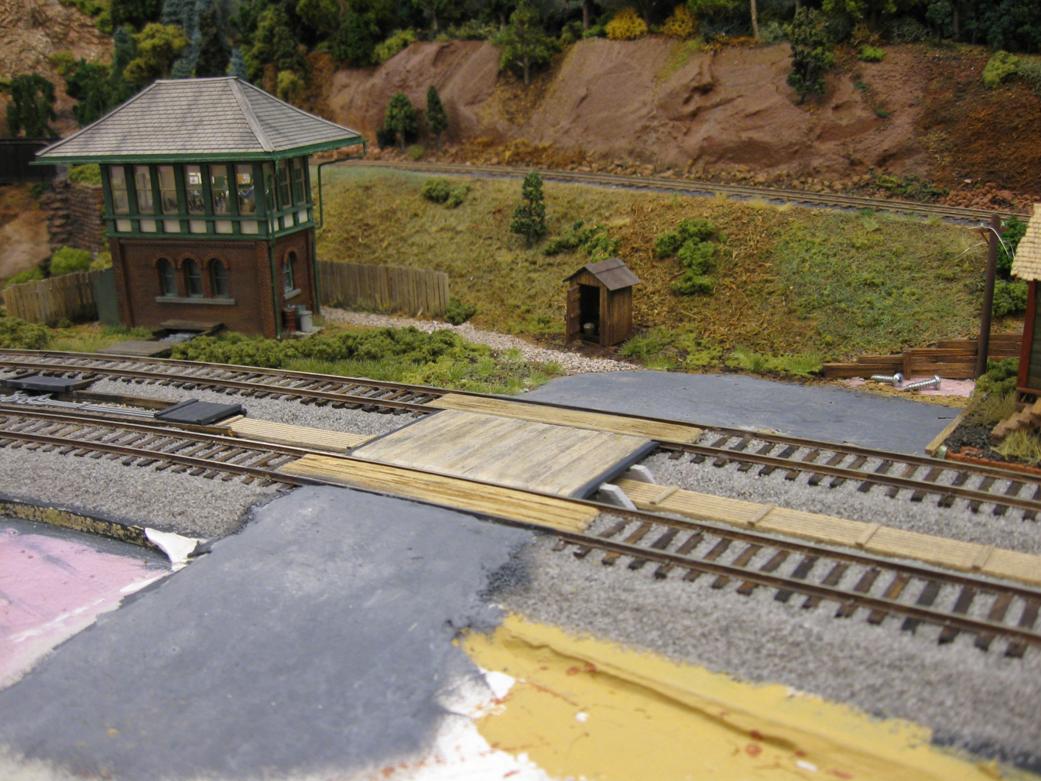
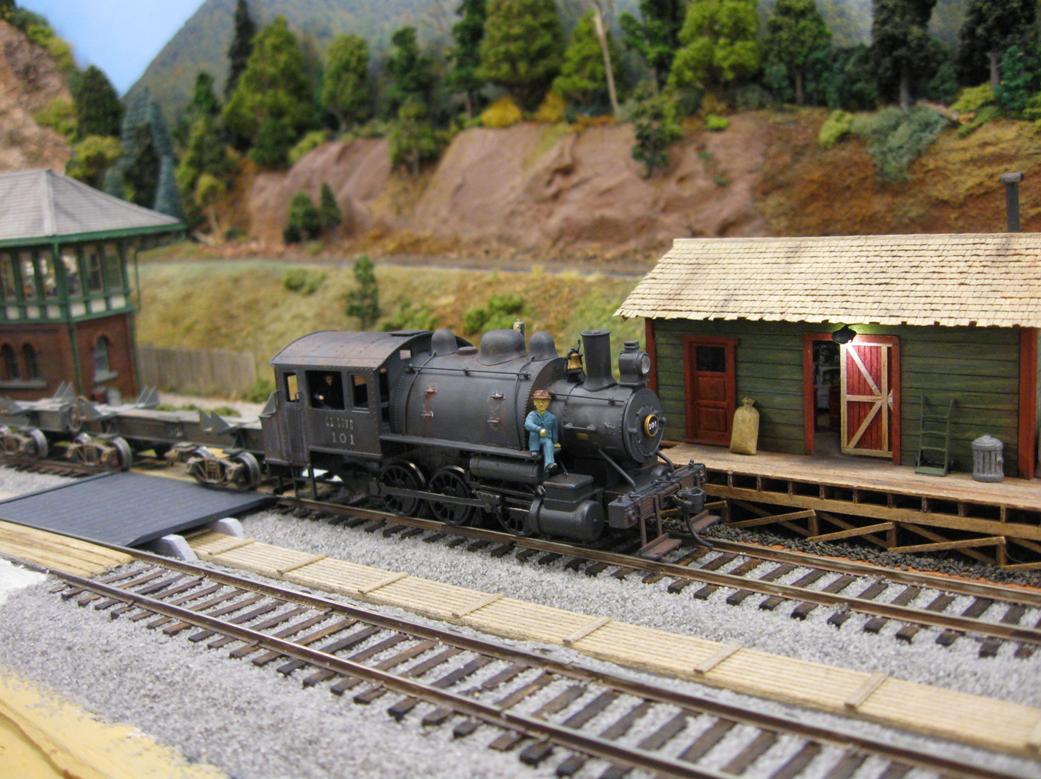
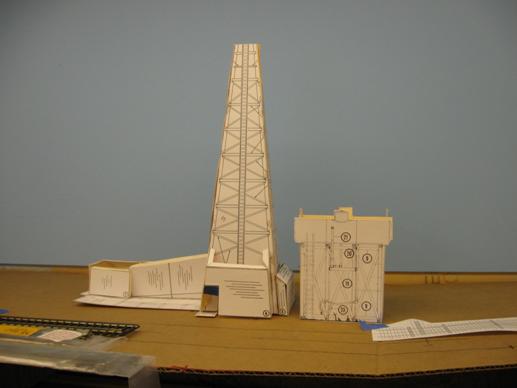
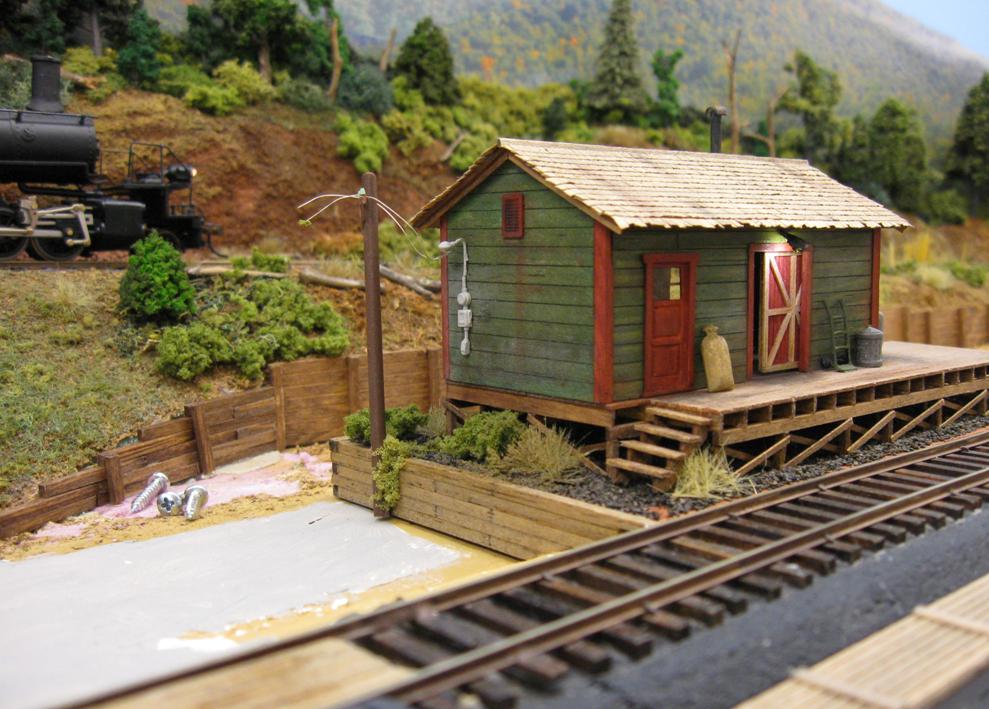
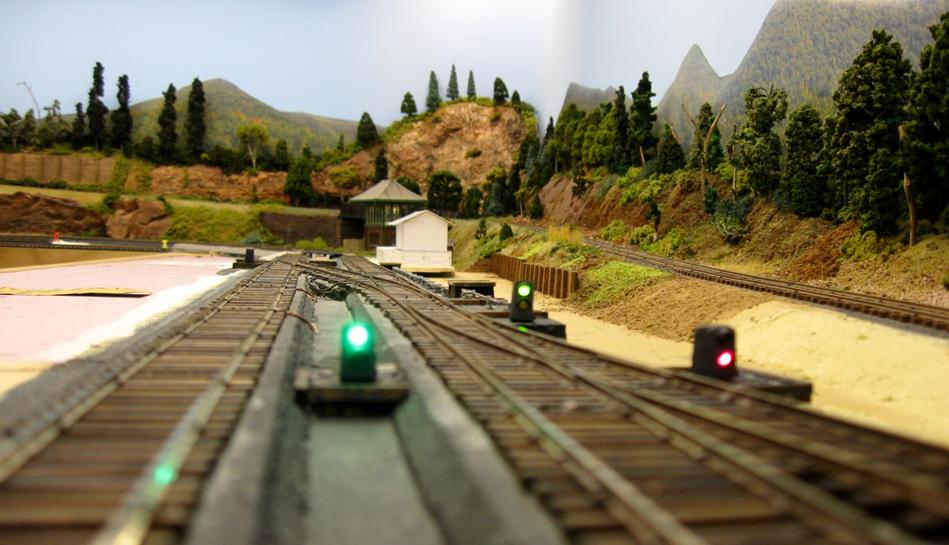
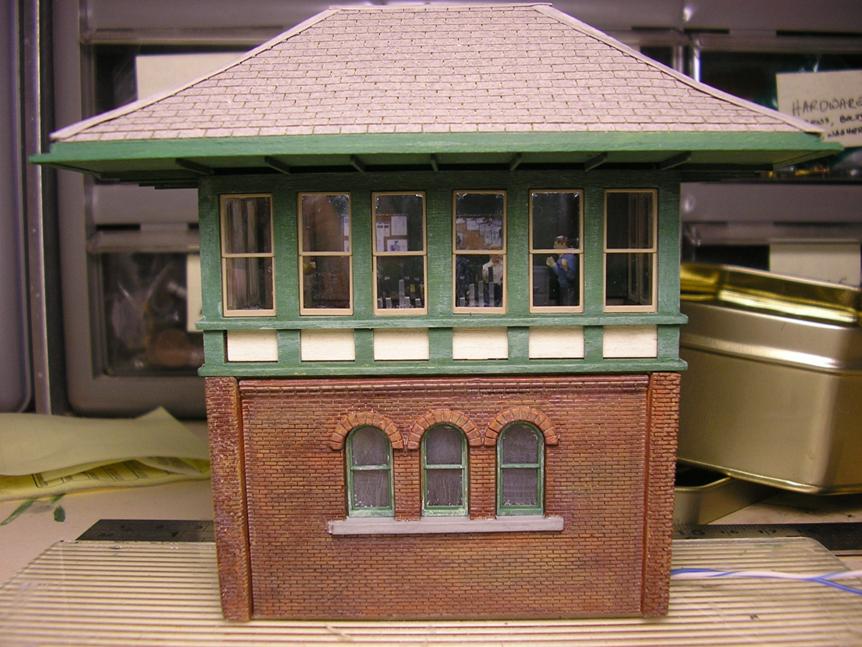
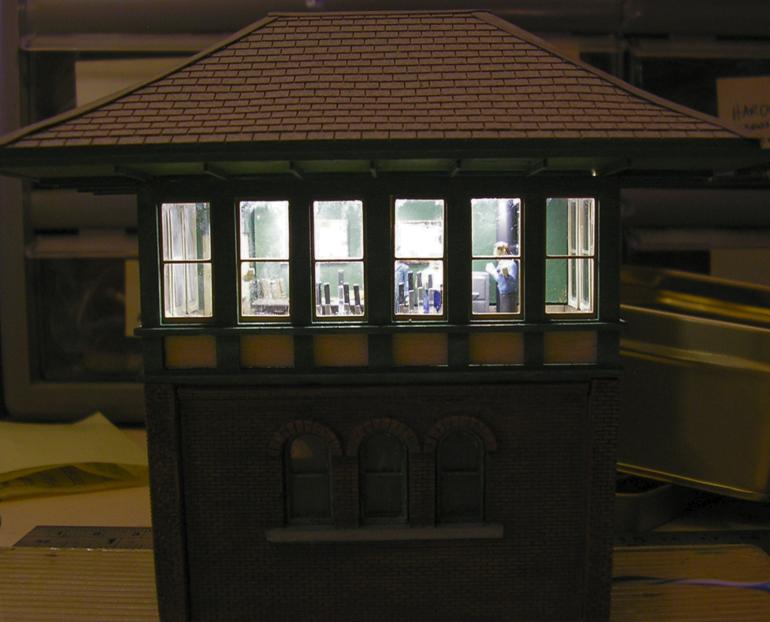
- Finished the scale house, including a light post and a scale in the road
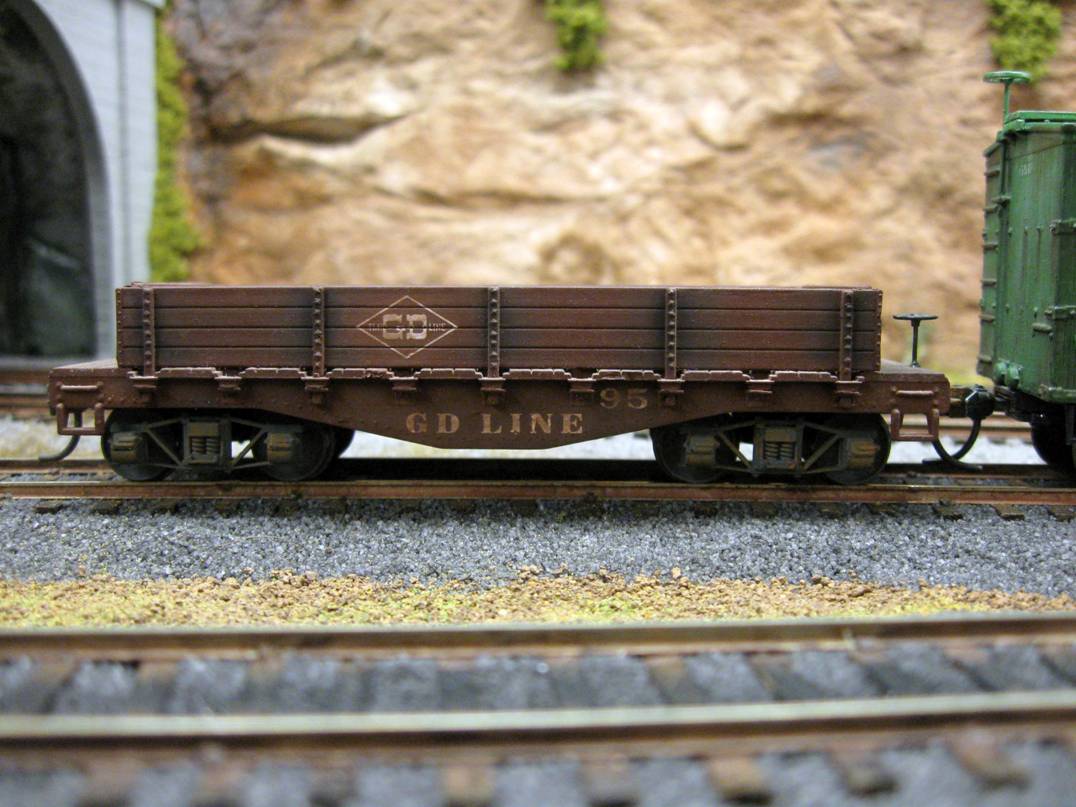
- Added G&D dry transfers to my MDC shorty flat car
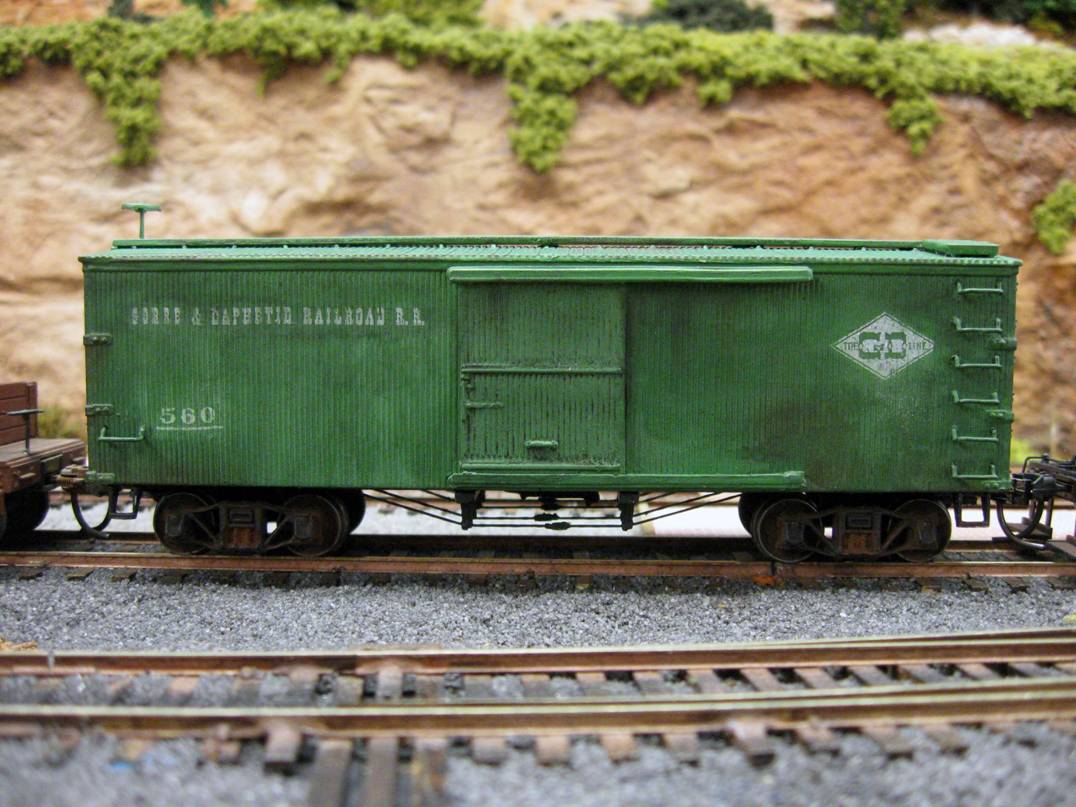
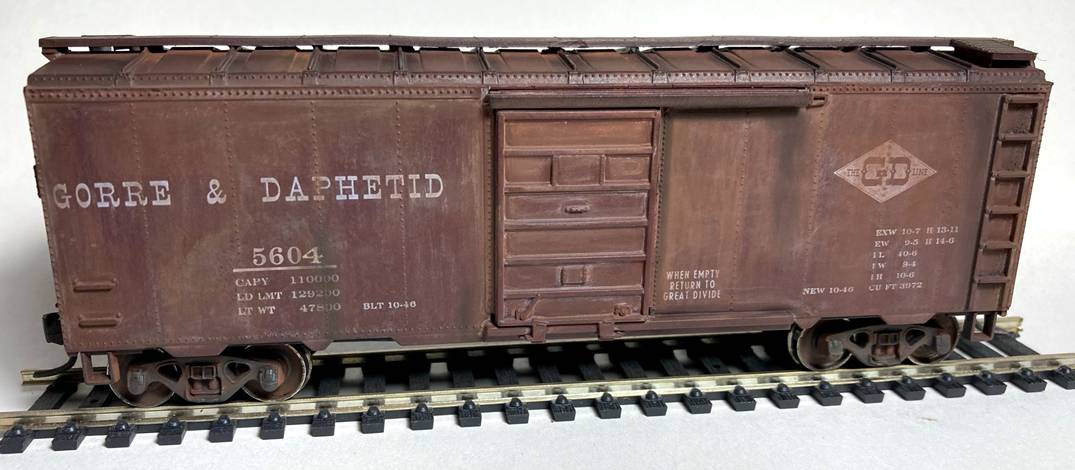
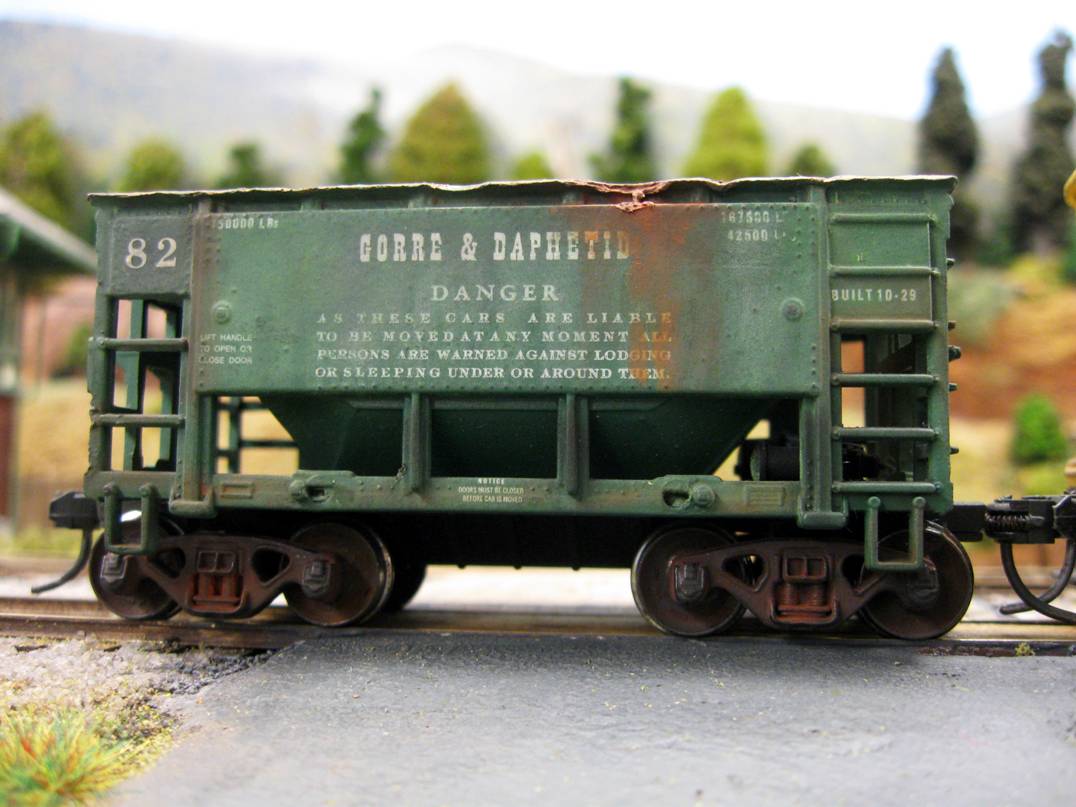
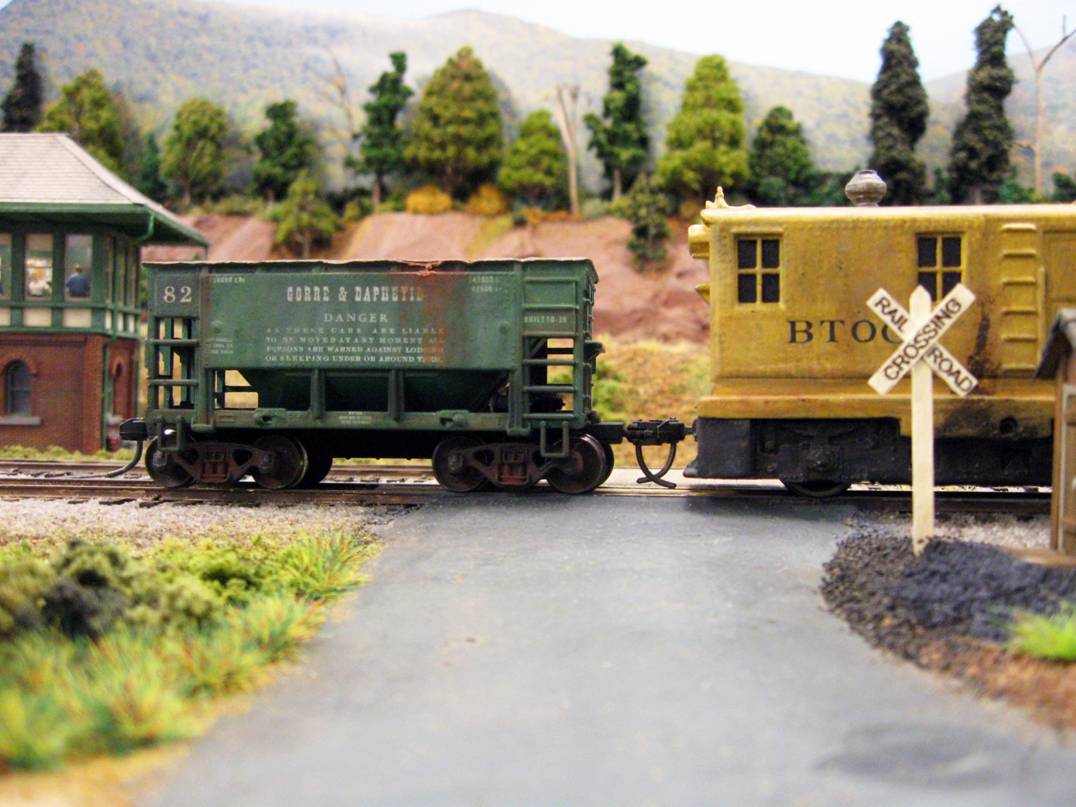
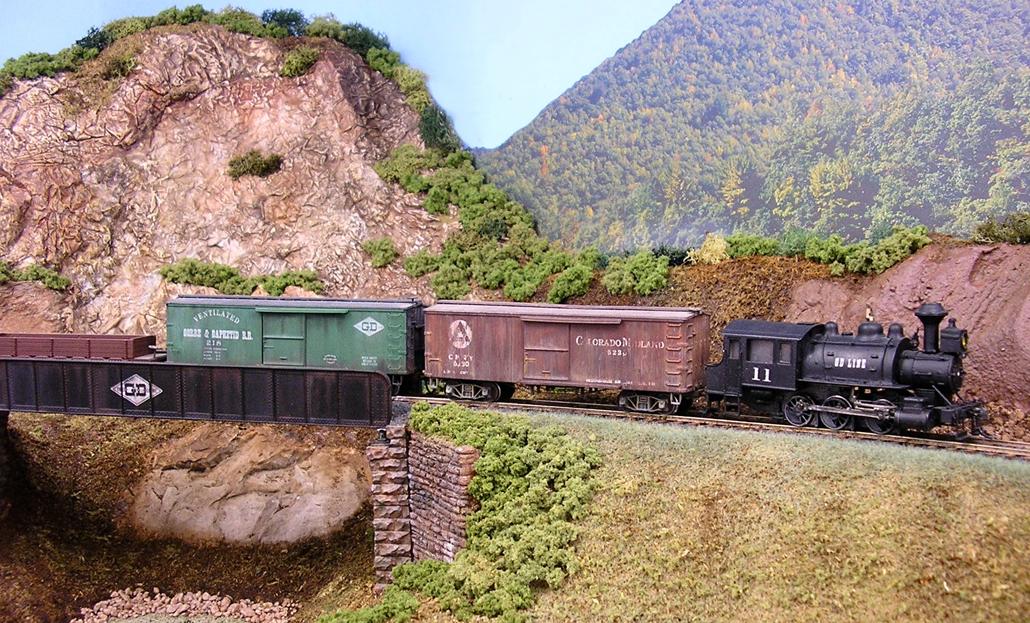
- Touched-up paint and weathered the green G&D boxcar Steve gave me
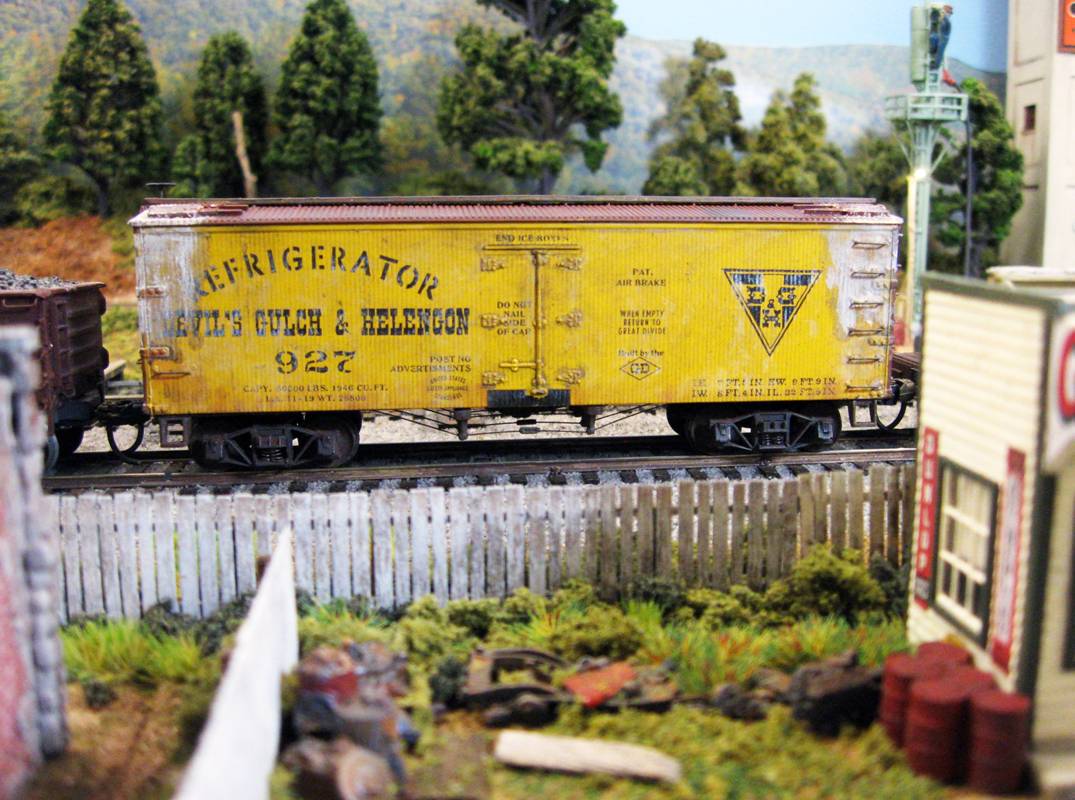
- Upgraded the DG&H reefer; replaced the grab irons, truss rods, brake wheel, weathering
- Detailed and weathered the Tyco gondola Steve gave me
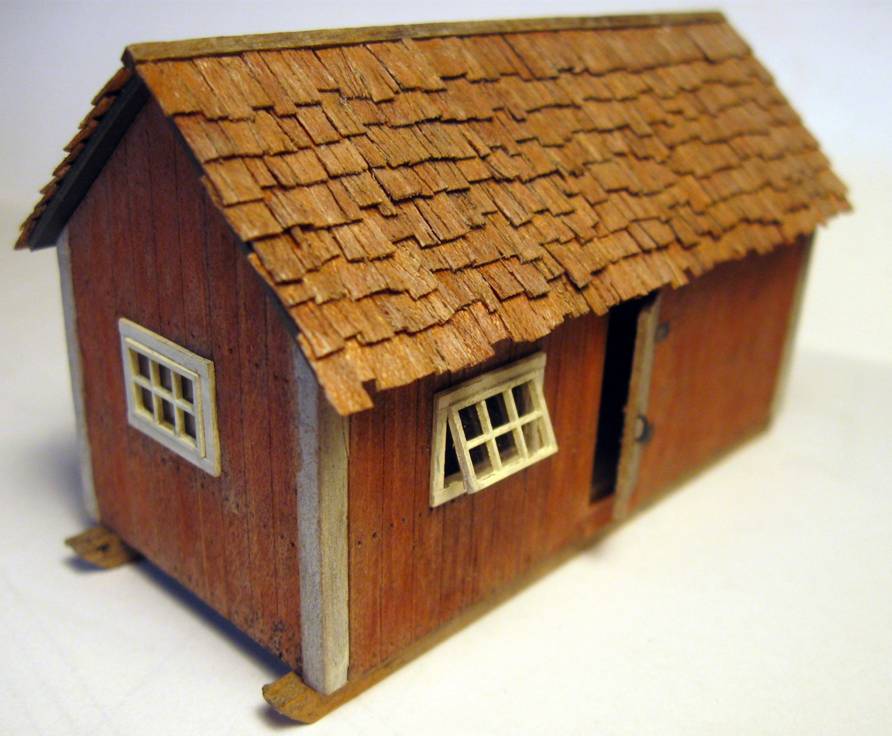
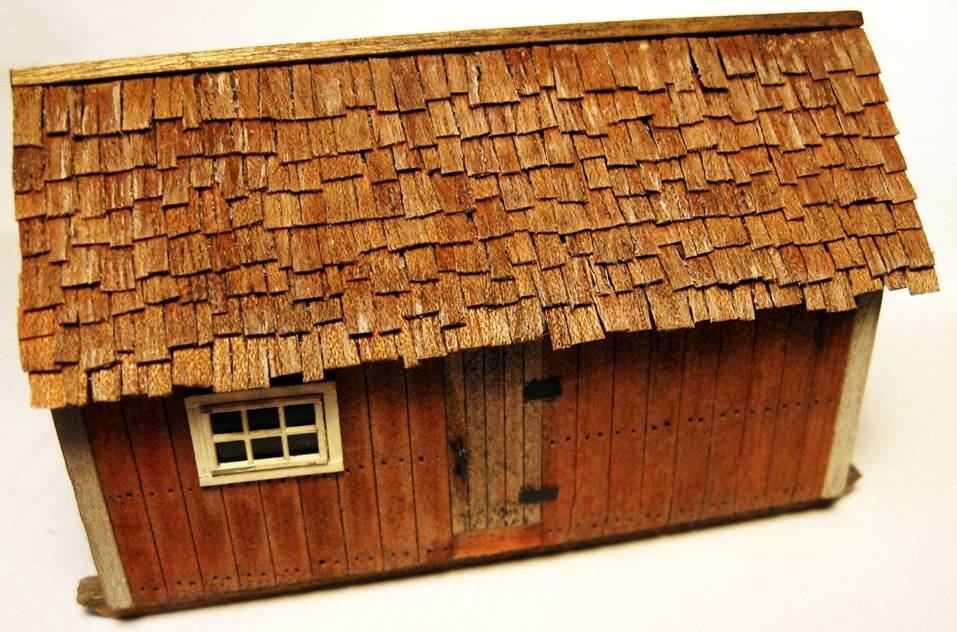
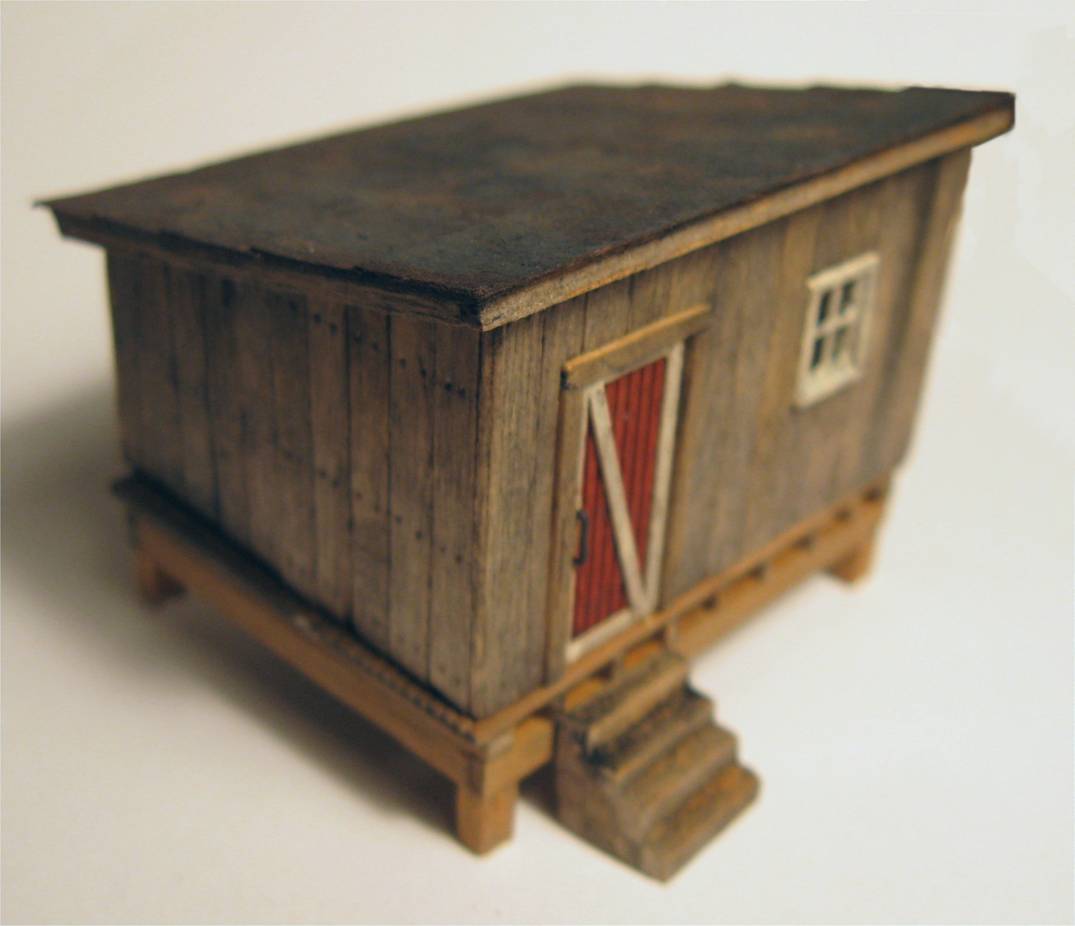
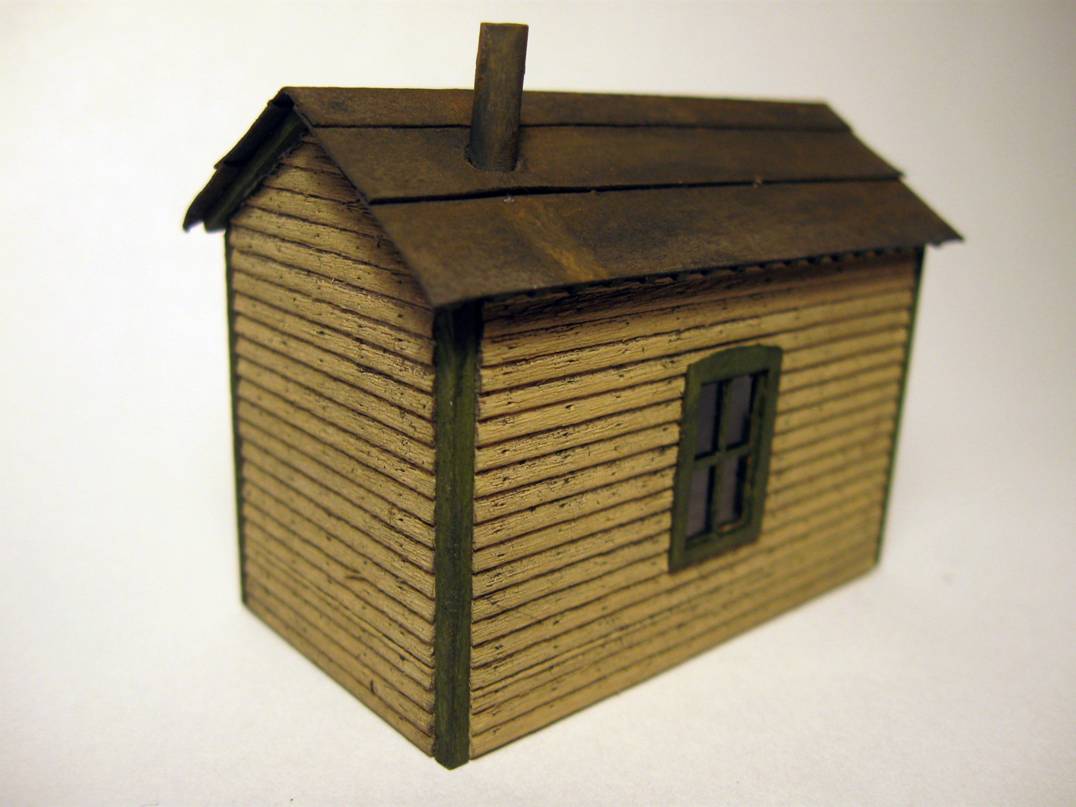
- Built the Campbell “Bunkhouse A” kit; used cedar shake shingles, styrene for walls, etc.
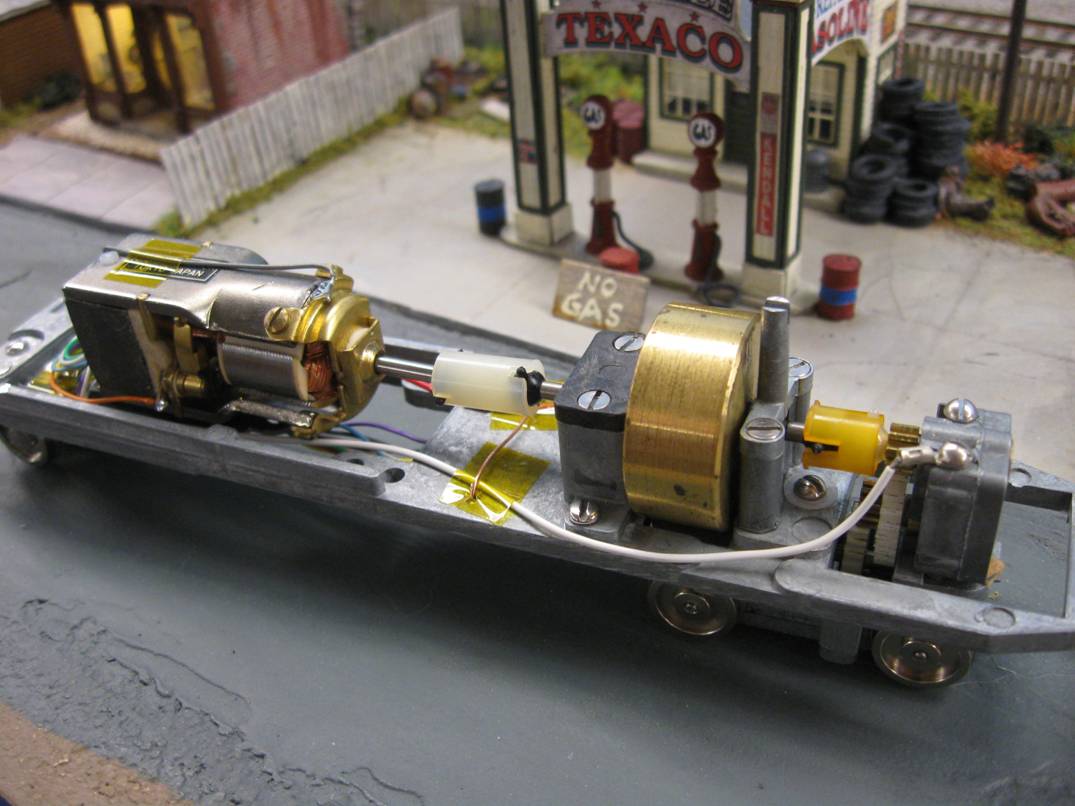
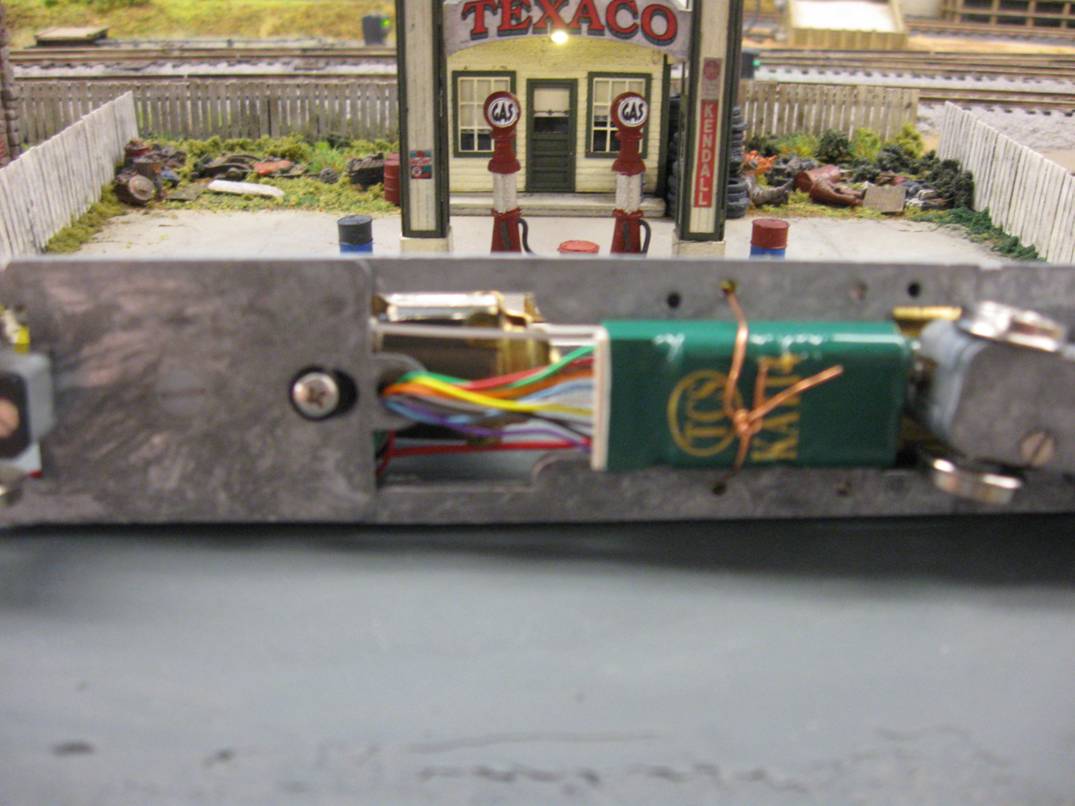
- Built the Bowser Aerotrain using the Hobbytown of Boston drive and Bowser car chassis
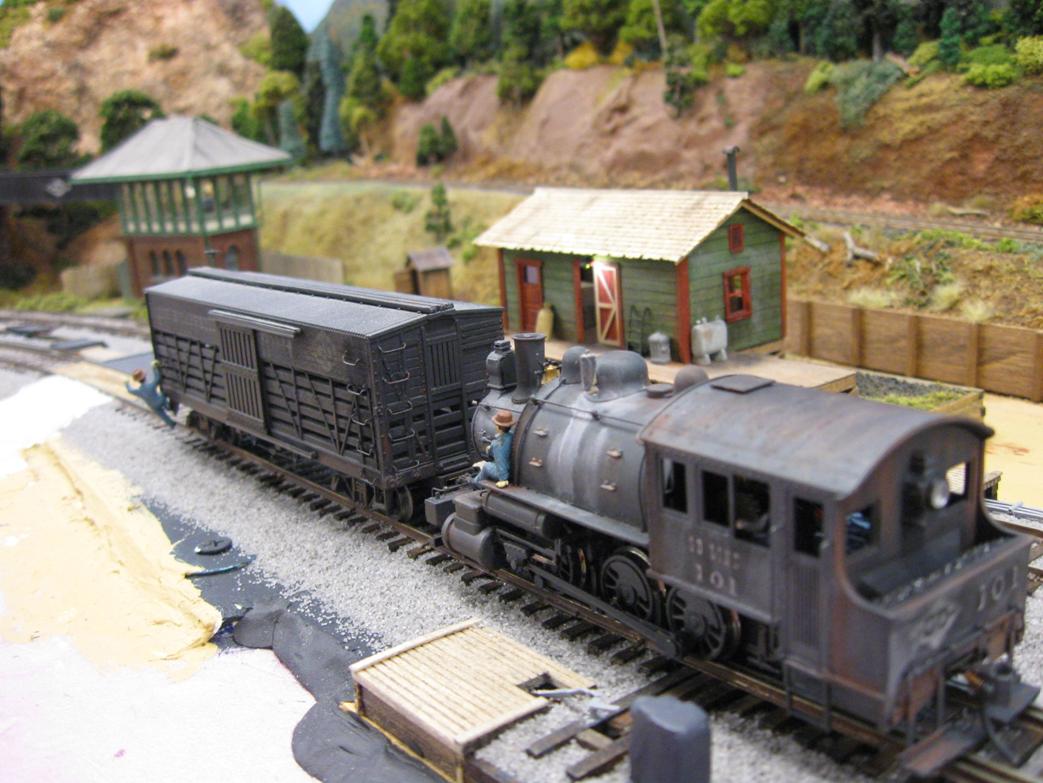
- rebuilt/renumbered/weathered MDC basket case G&D box car
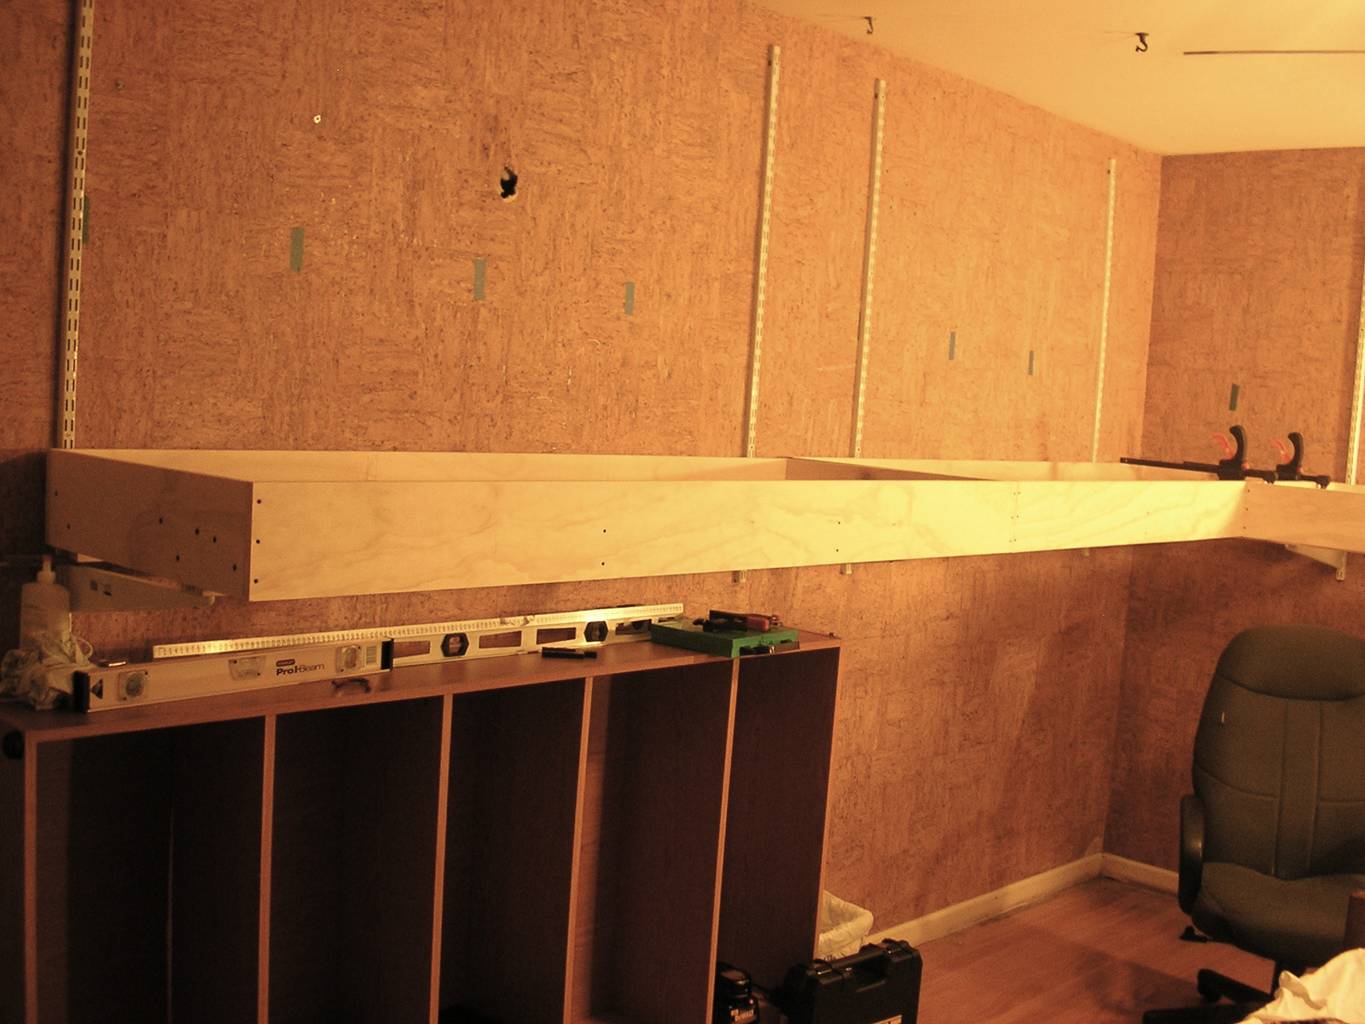
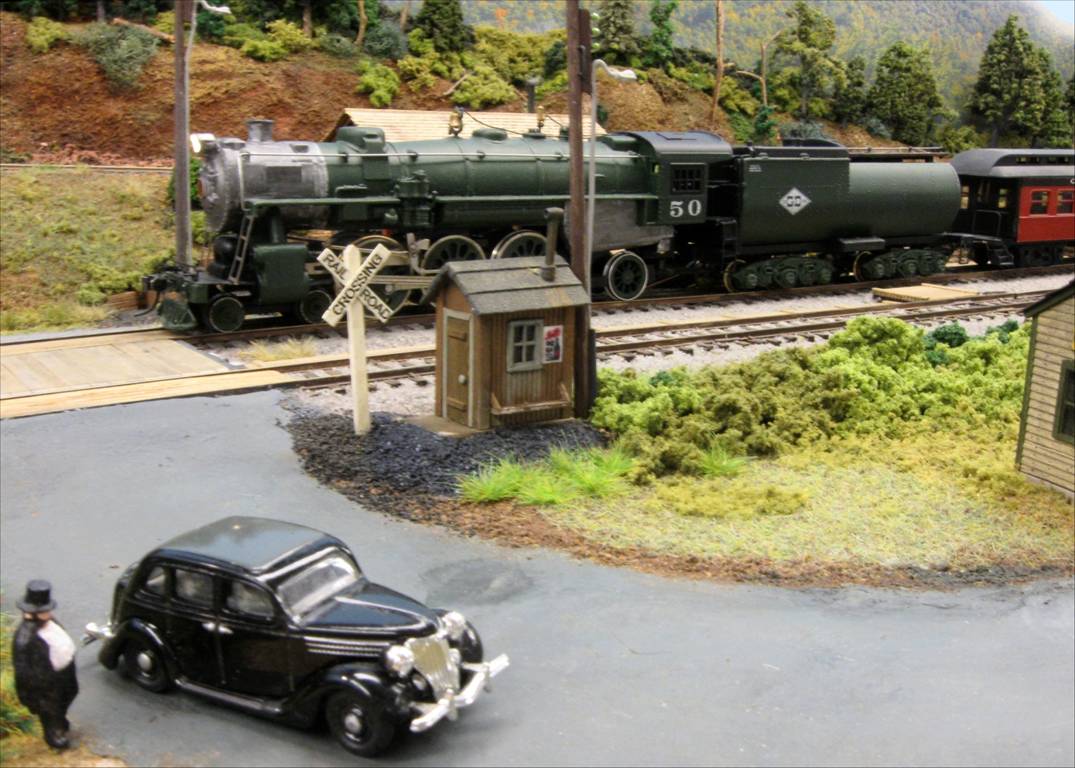
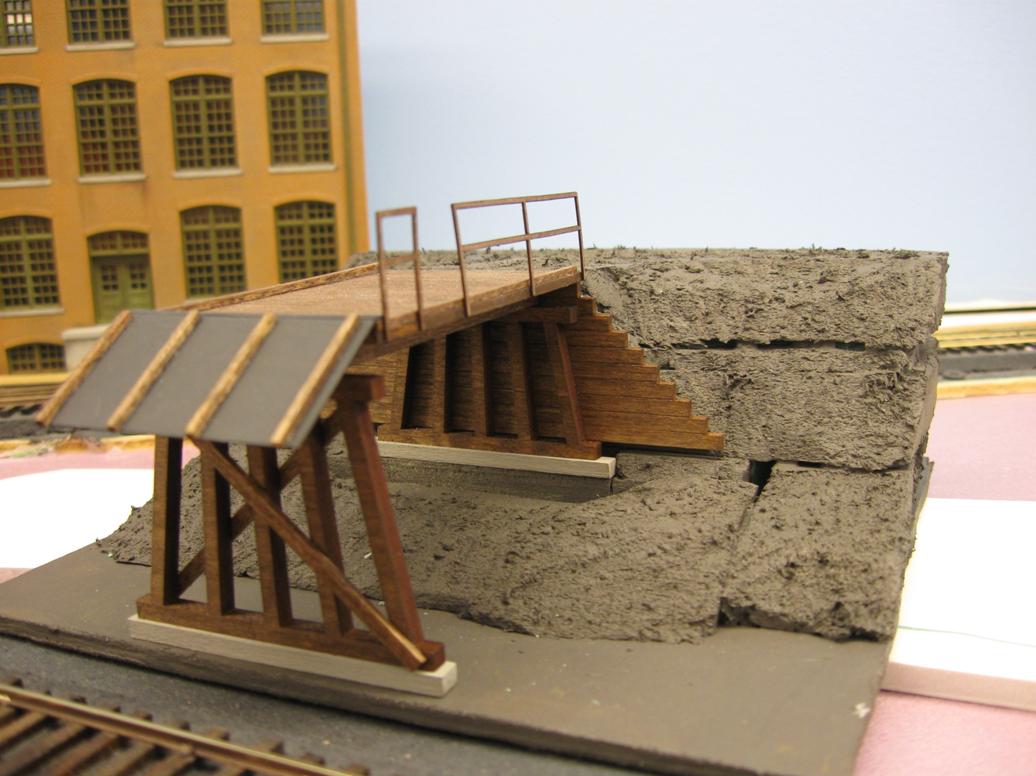
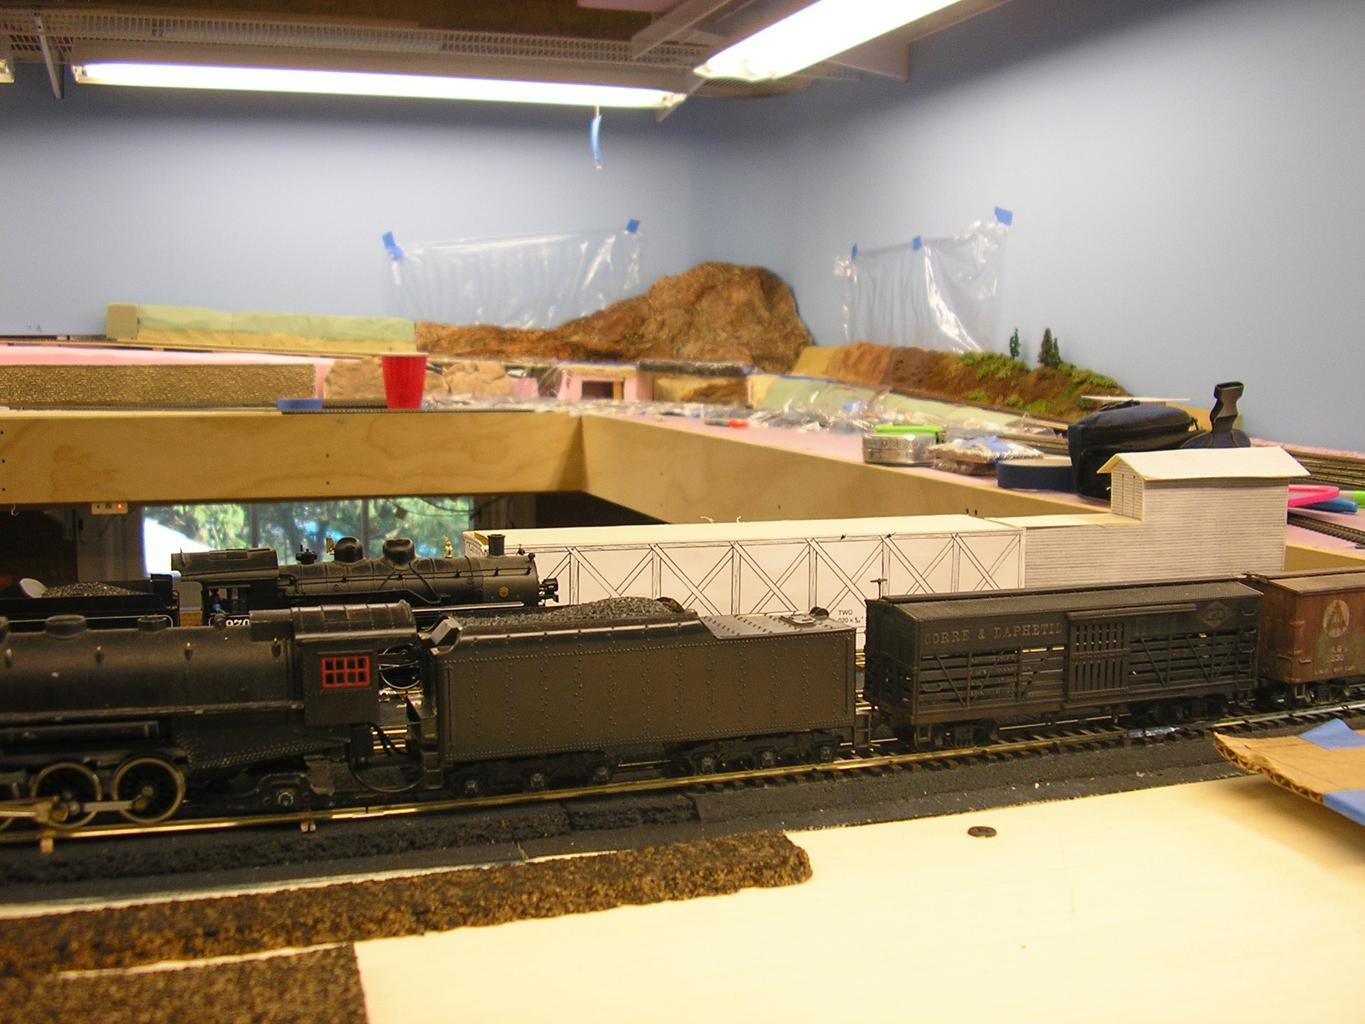
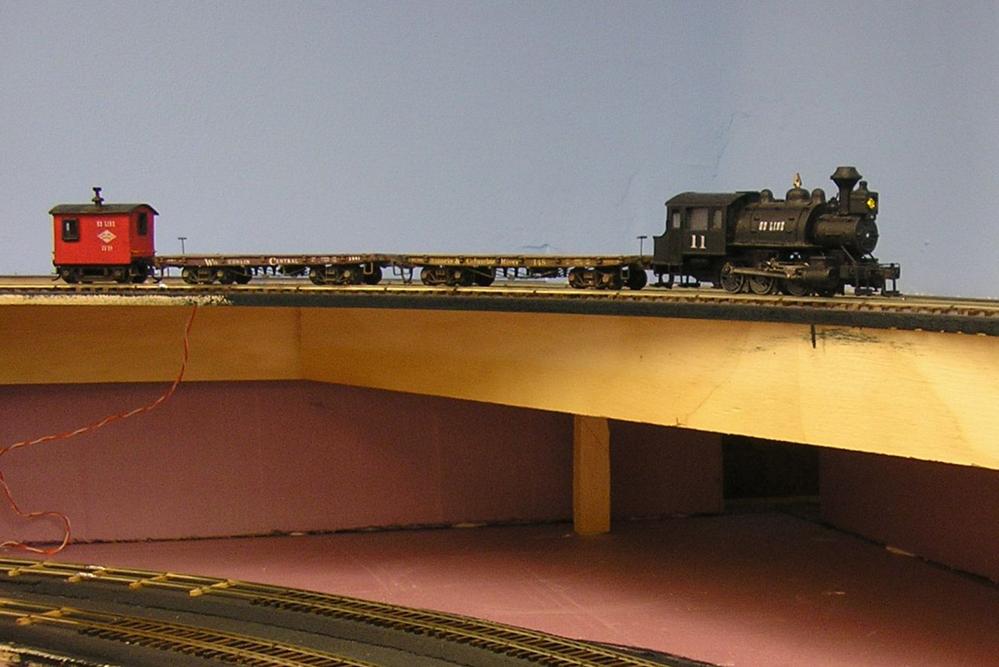
The scale house installed, with the truck and scratch-built scale:
The MDC shorty flat lettered for the G&D and weathered:
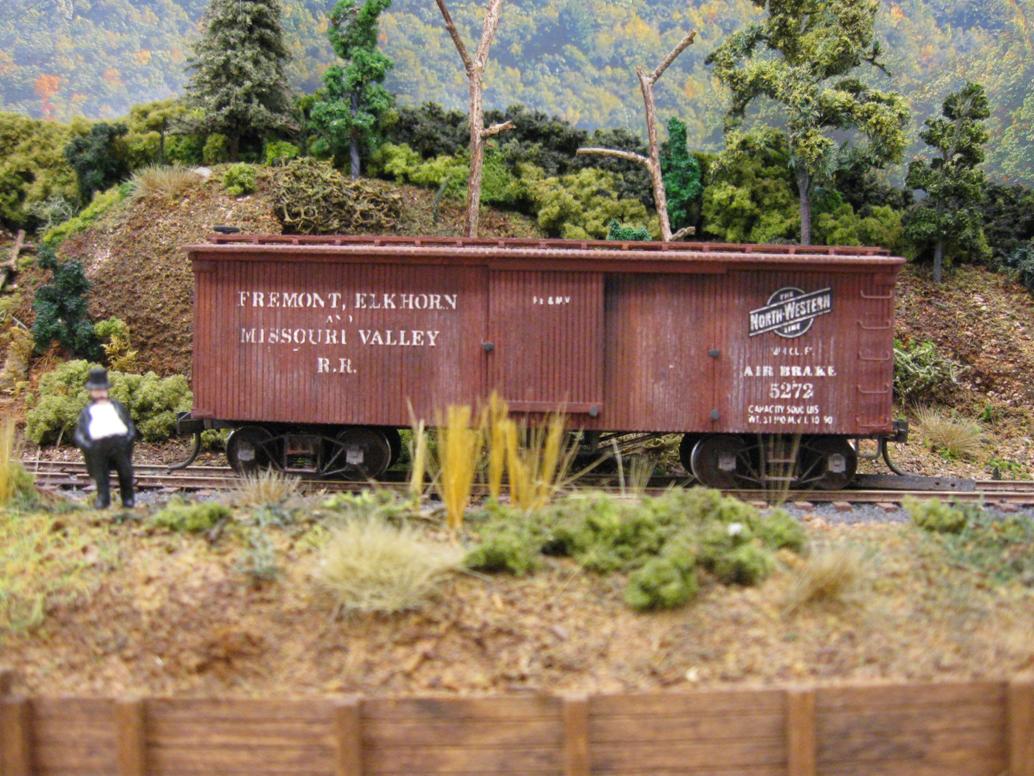
Steve’s gifted custom box car, weathered:
The re-worked DG&H reefer:
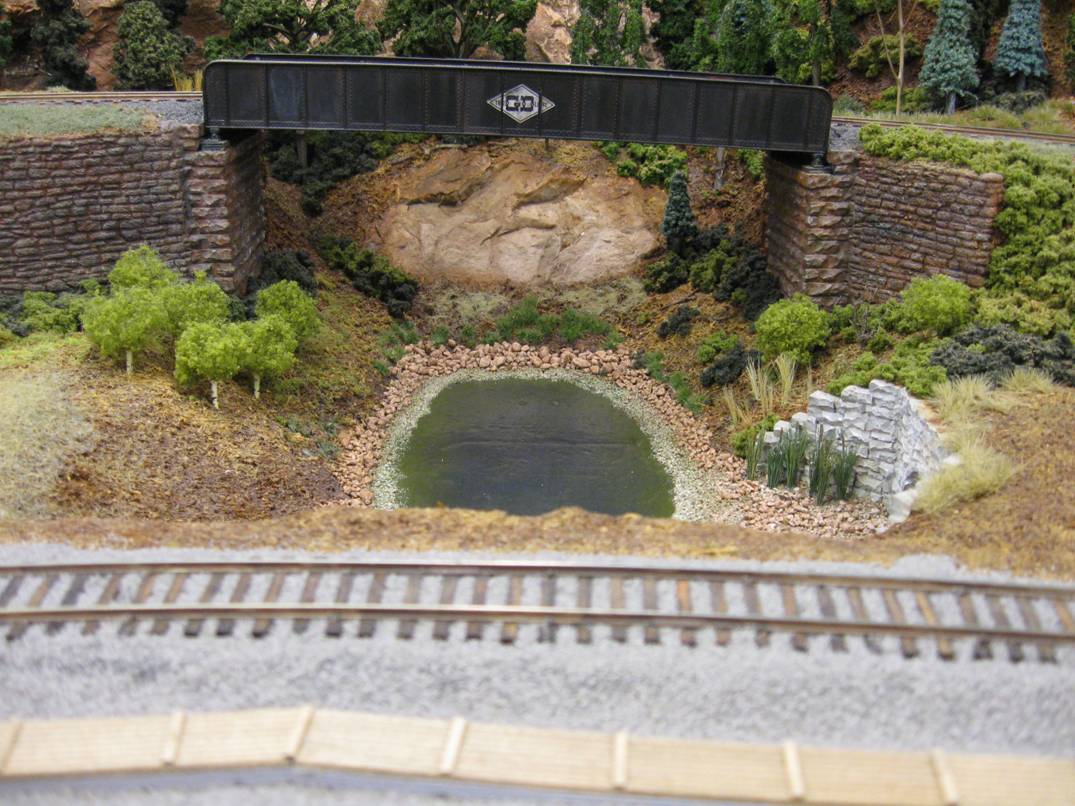
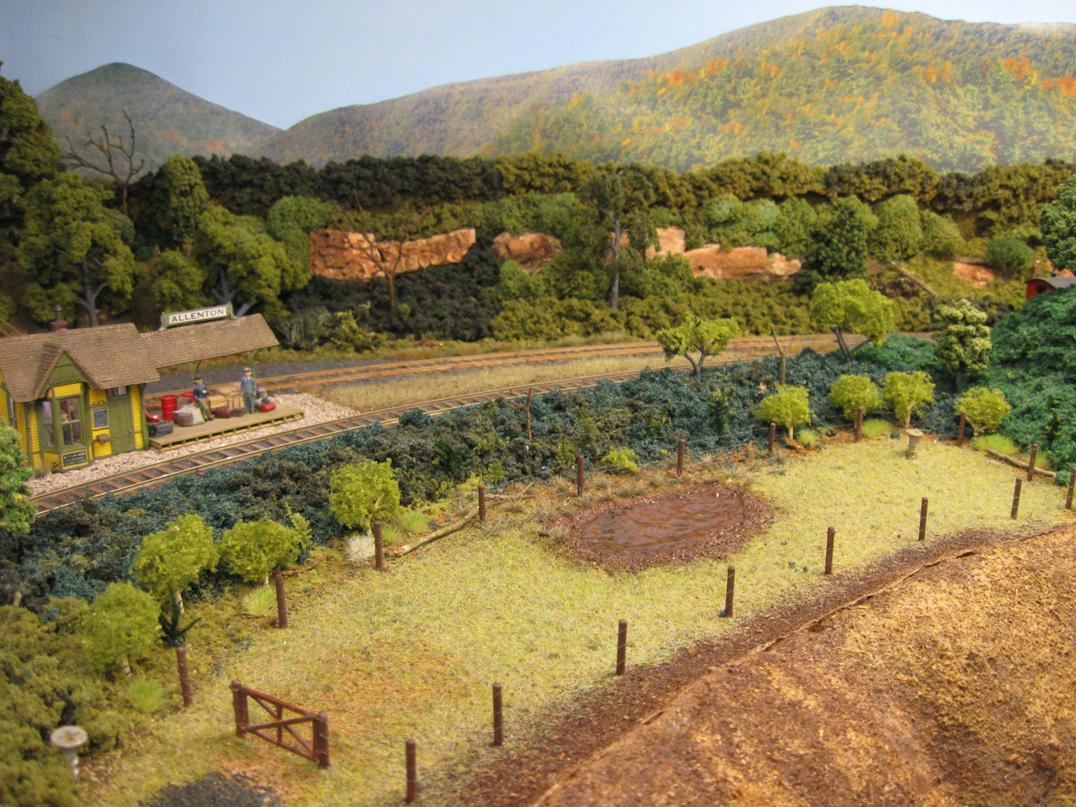
Adding some gloss acrylic to the pond (“Future”):
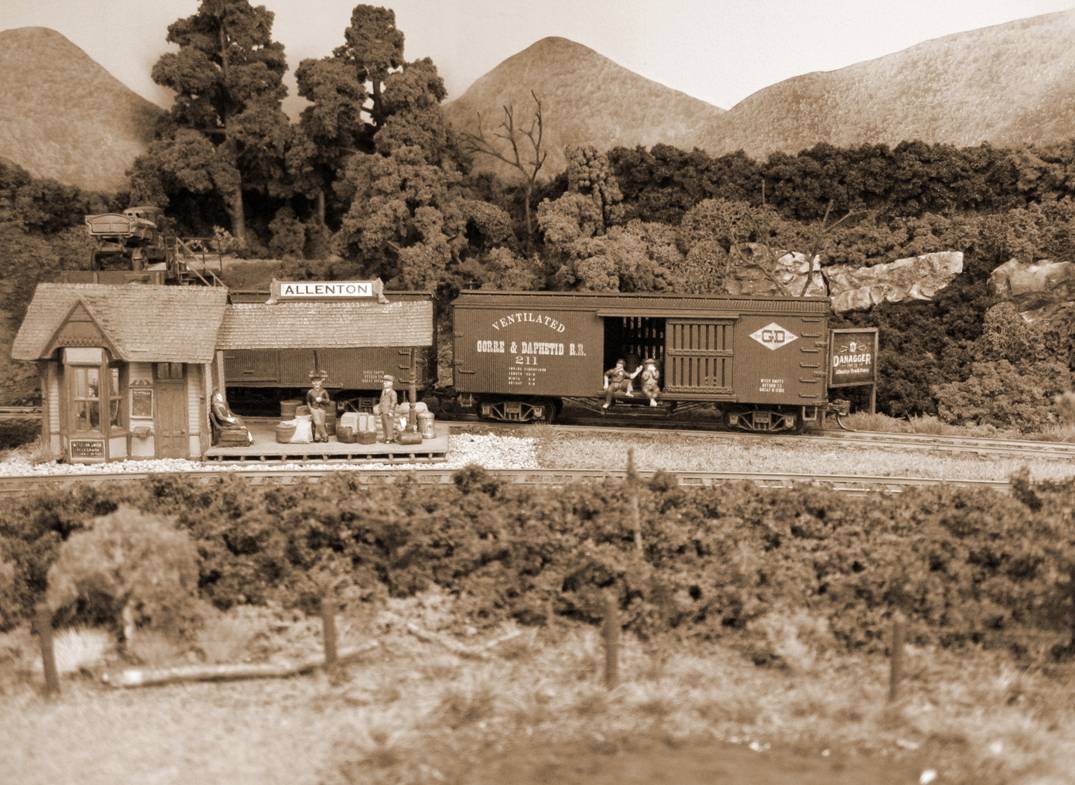
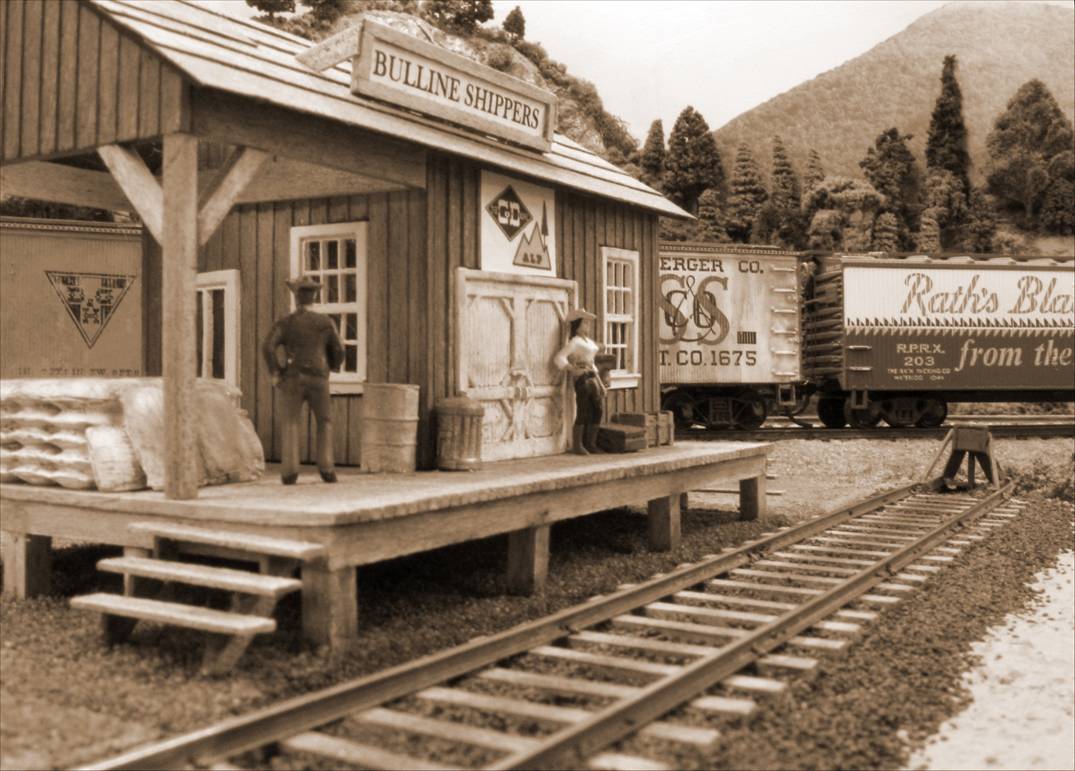
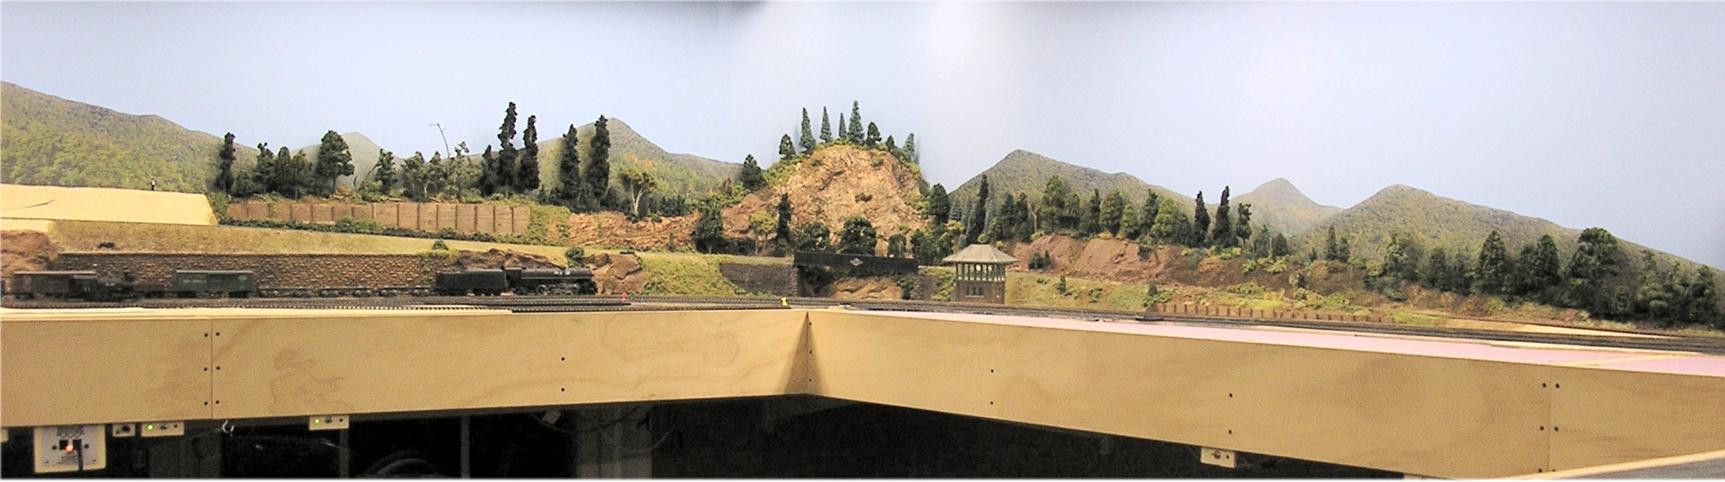
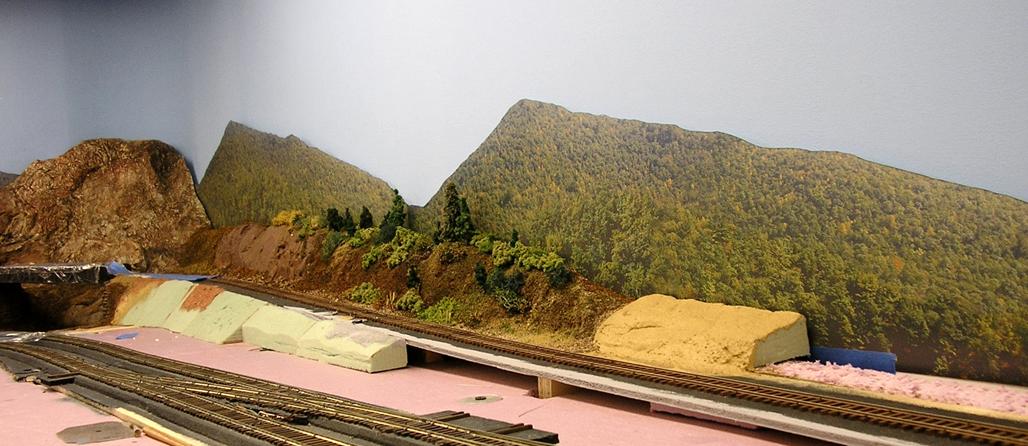
A sepia-tone image of Allenton:
Steve’s gifted Tyco gondola, re-detailed and weathered:

Built Campbell “Bunkhouse A”:
Built
the AeroTrain using the Hobbytown
of Boston drive
Memorial
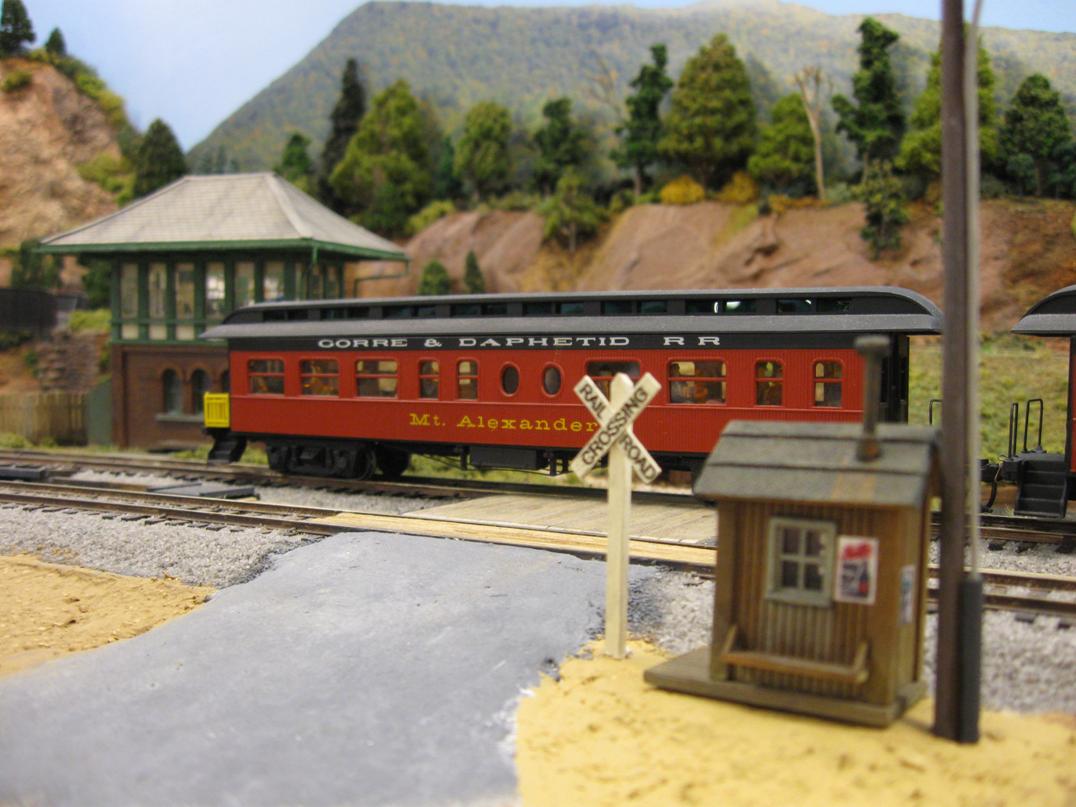
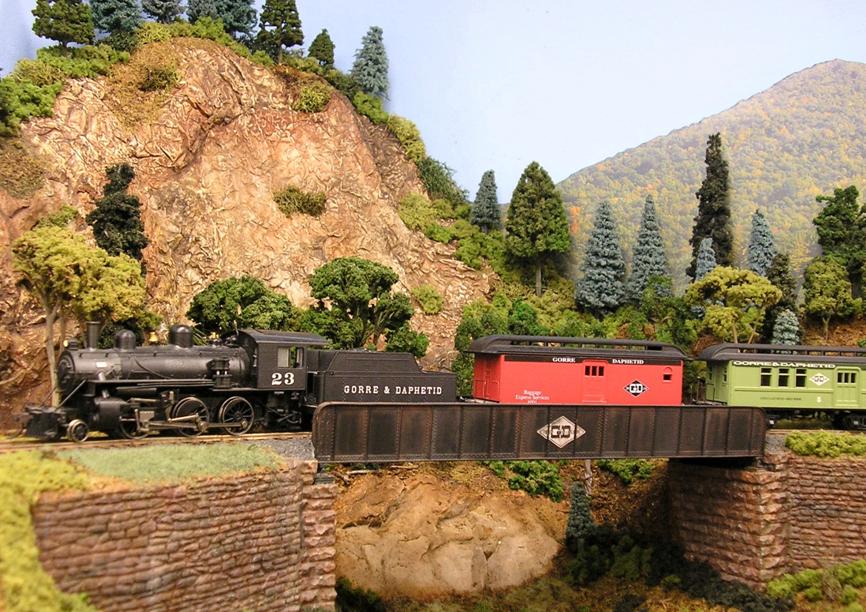
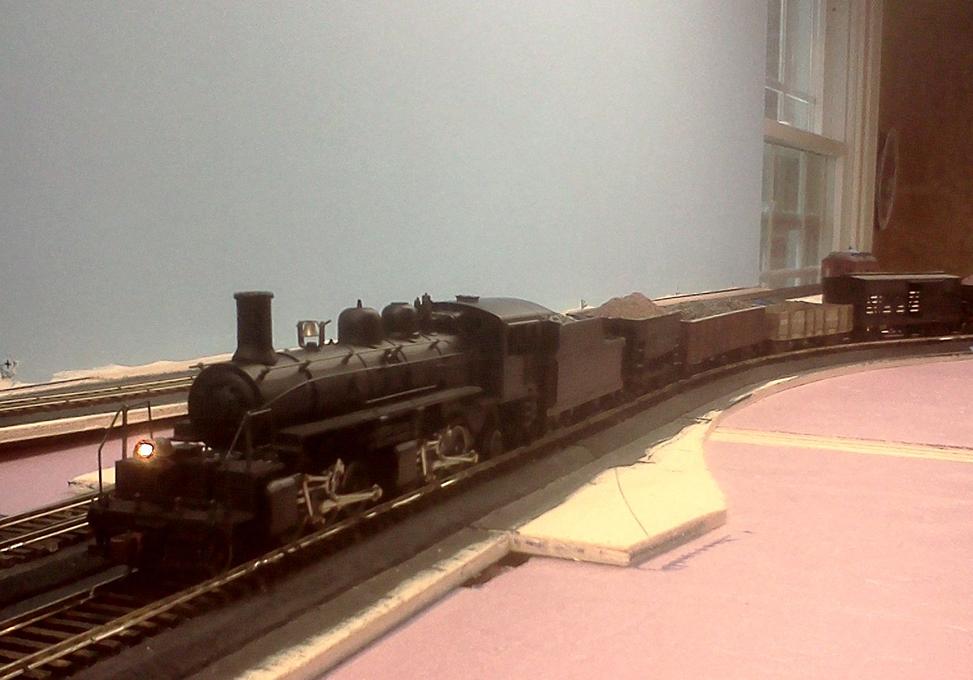
Day weekend – Steve’s Tribute #50 and a sepia-tone photo:
Steve
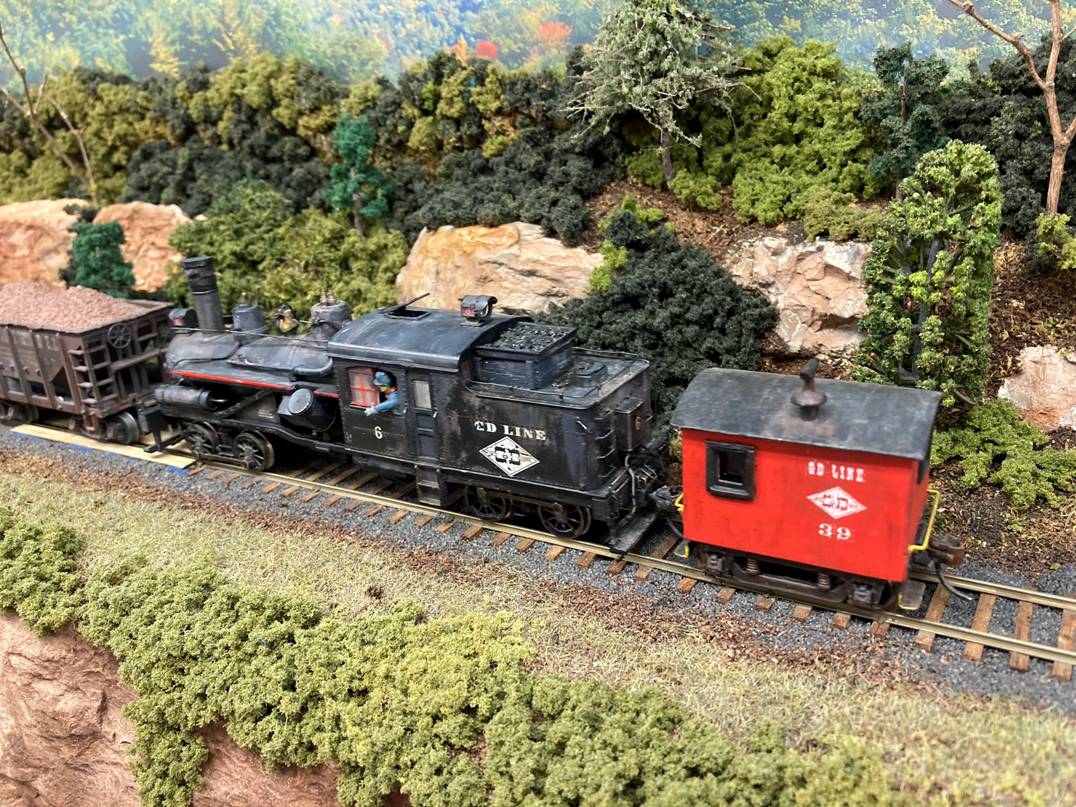
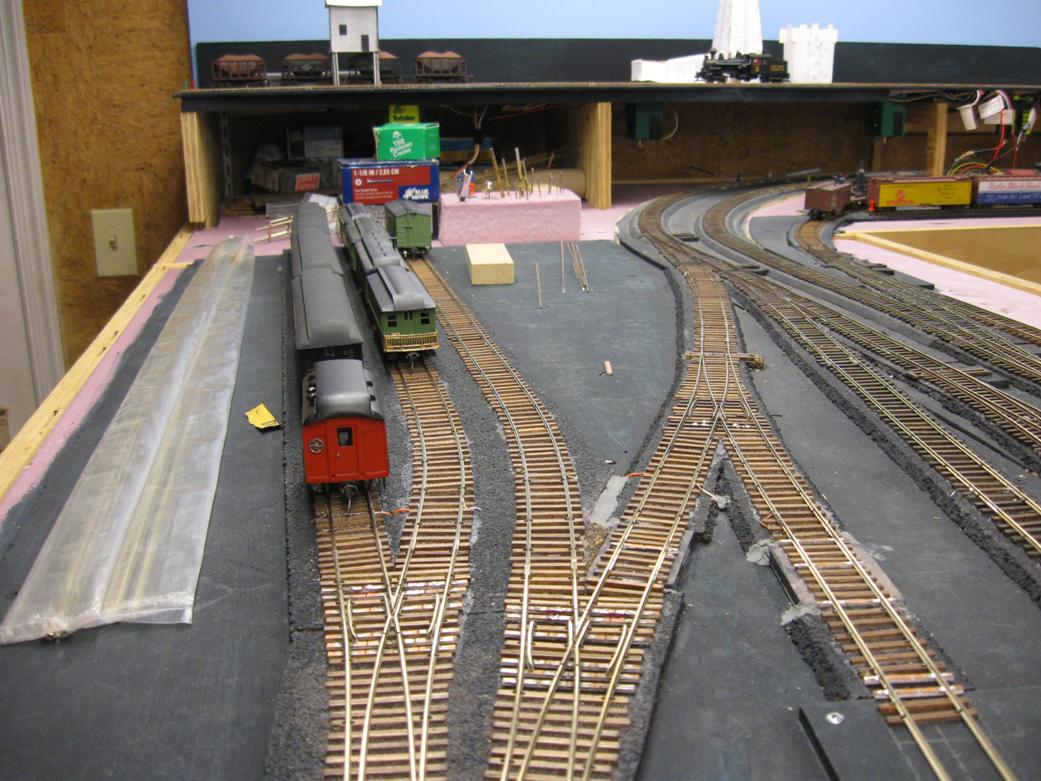
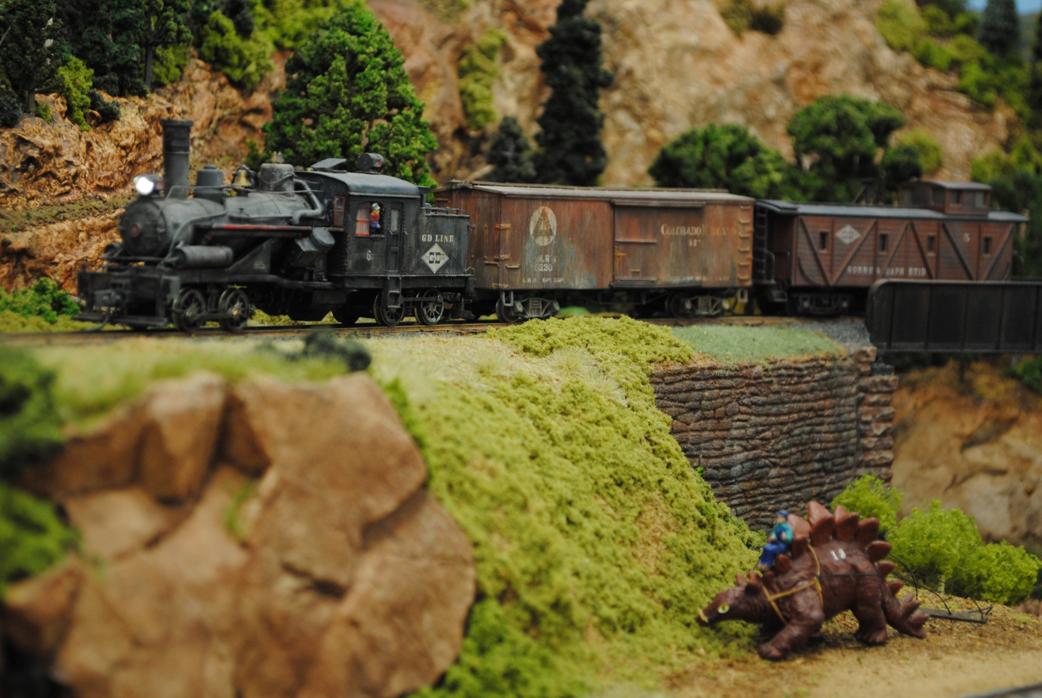
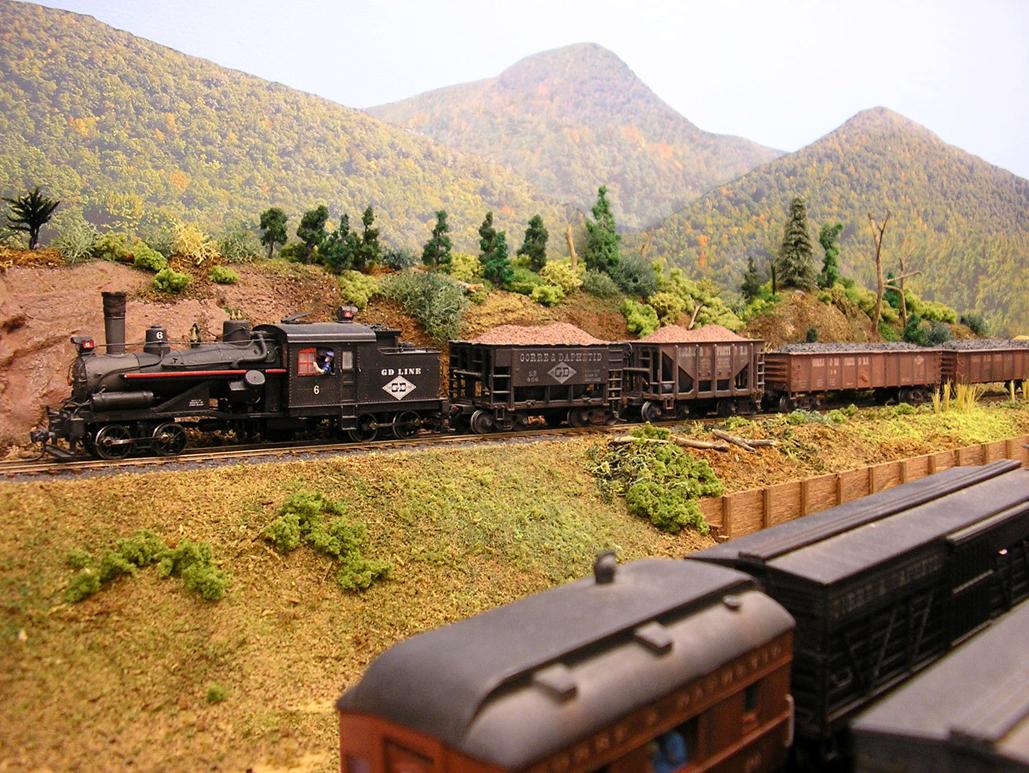
gave me G&D Heisler #6 for my birthday!!!
Rebuilt
“EBay basket case”MDC G&D box car

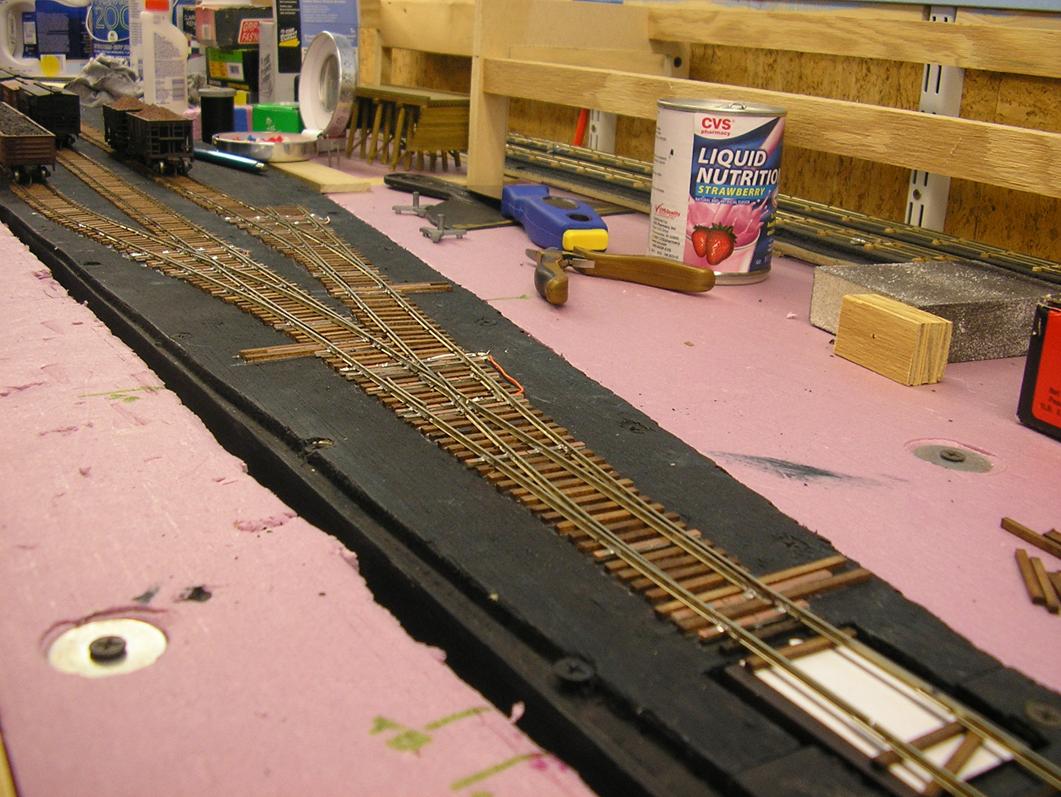
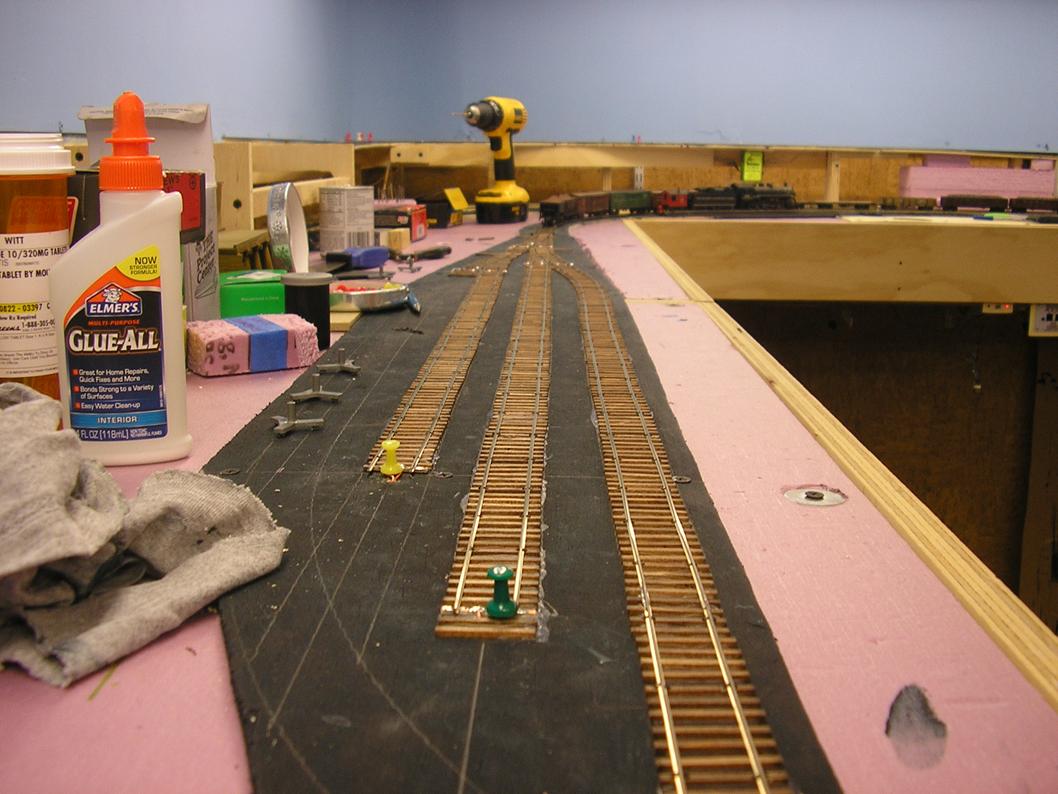
February 2020 through November 2020
It’s been ten months, but there has been progress. The pandemic hasn’t been the boon to progress one would expect:
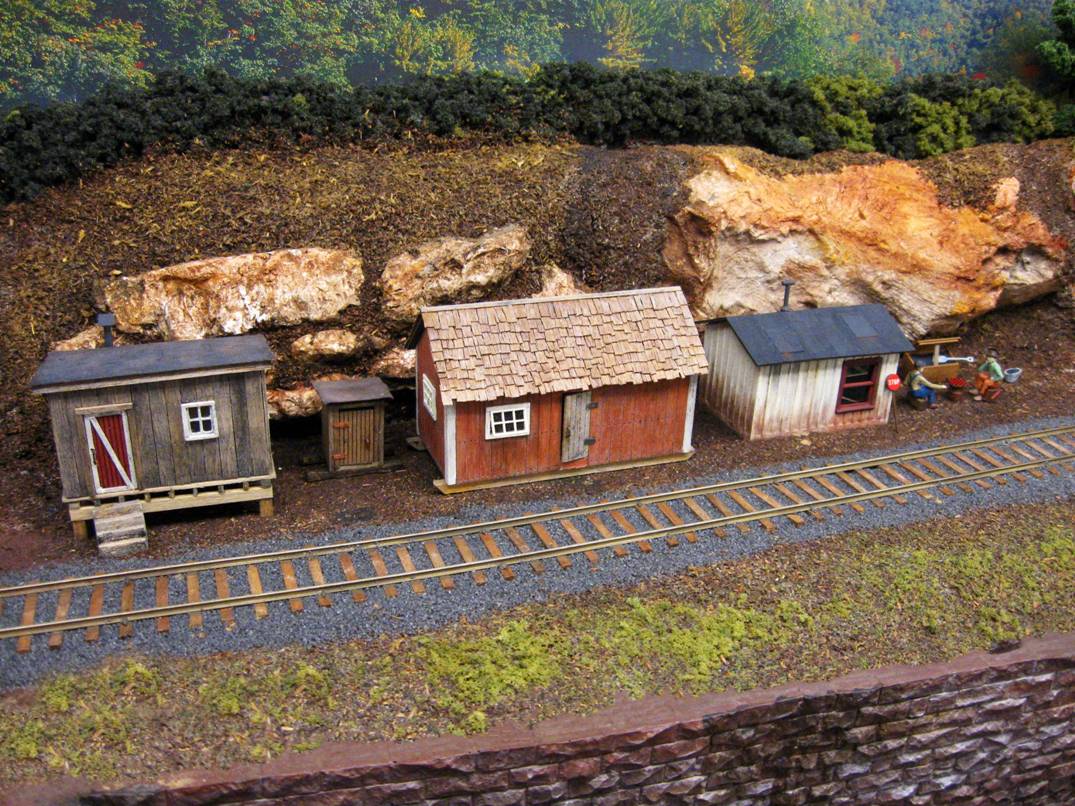
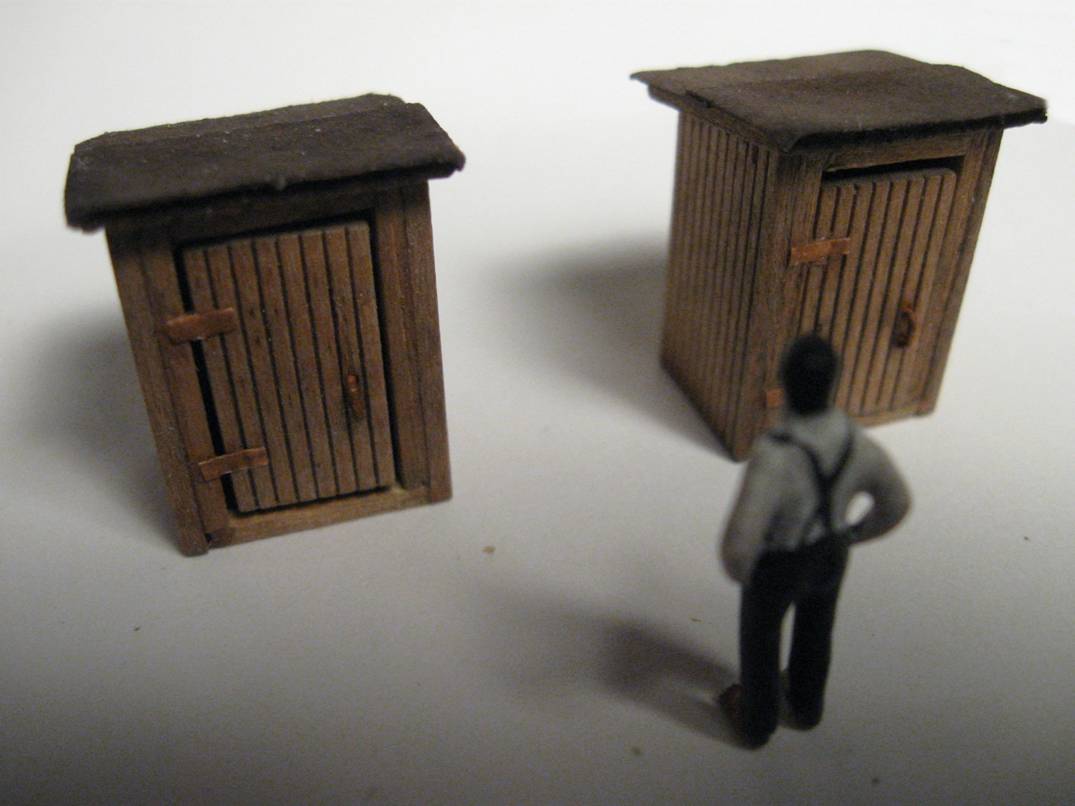
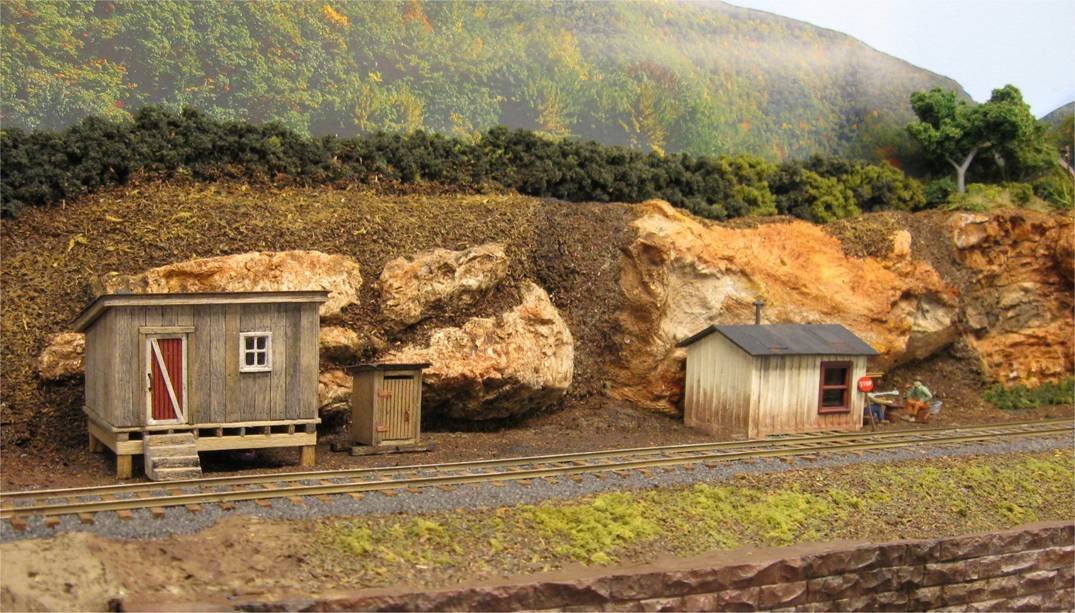
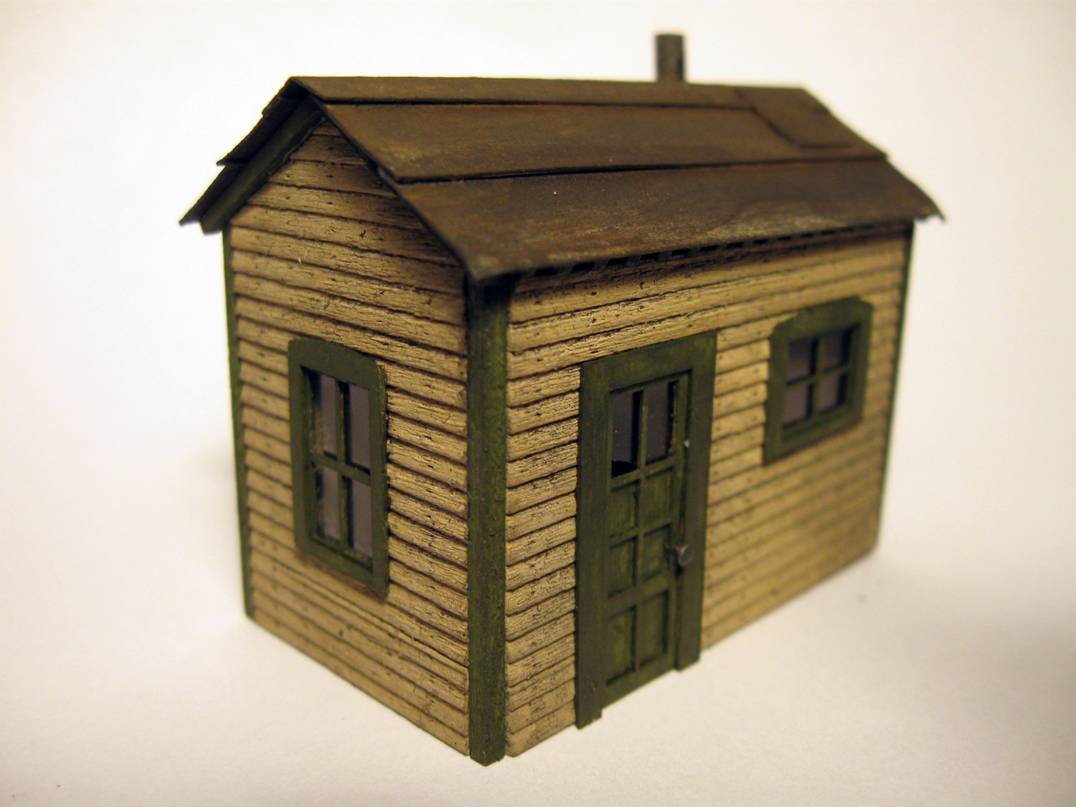
- scratch built a miner's shack and two outhouses for the east side branch line
- added foliage to barn board, ground cover to east side
- added an extension to the barn area, cut away some of the
removable section,
added a retaining wall in front of the barn site, trimmed the goop and placed the barn - added more ground goop to a couple of areas: the west side fascia and the south side, made a new batch
- spackled the west-side sidewalks and the west side street, added cracks to the street, painted them
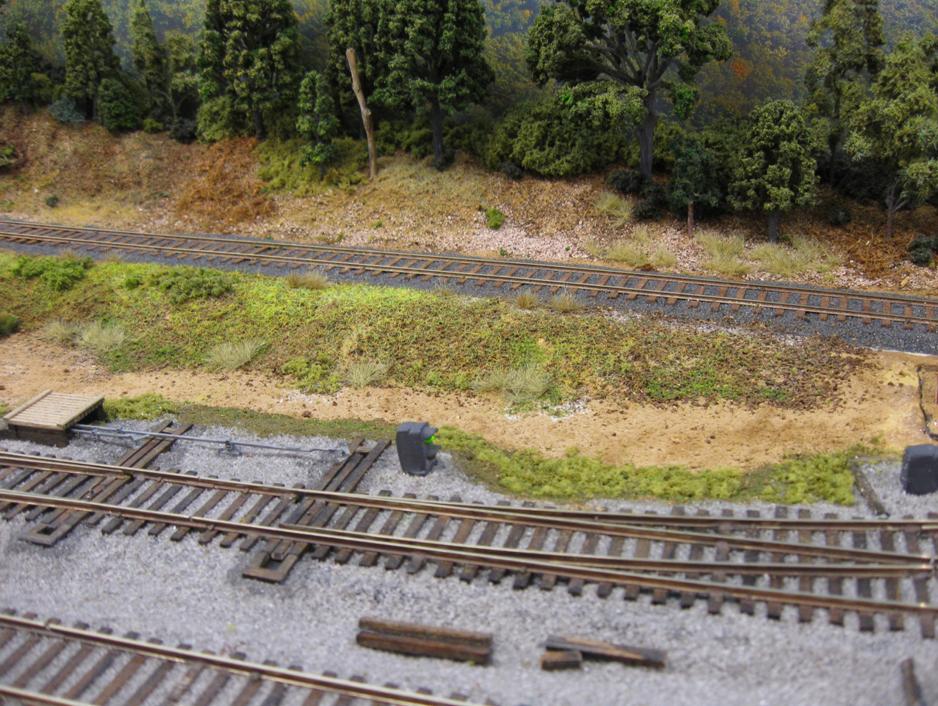
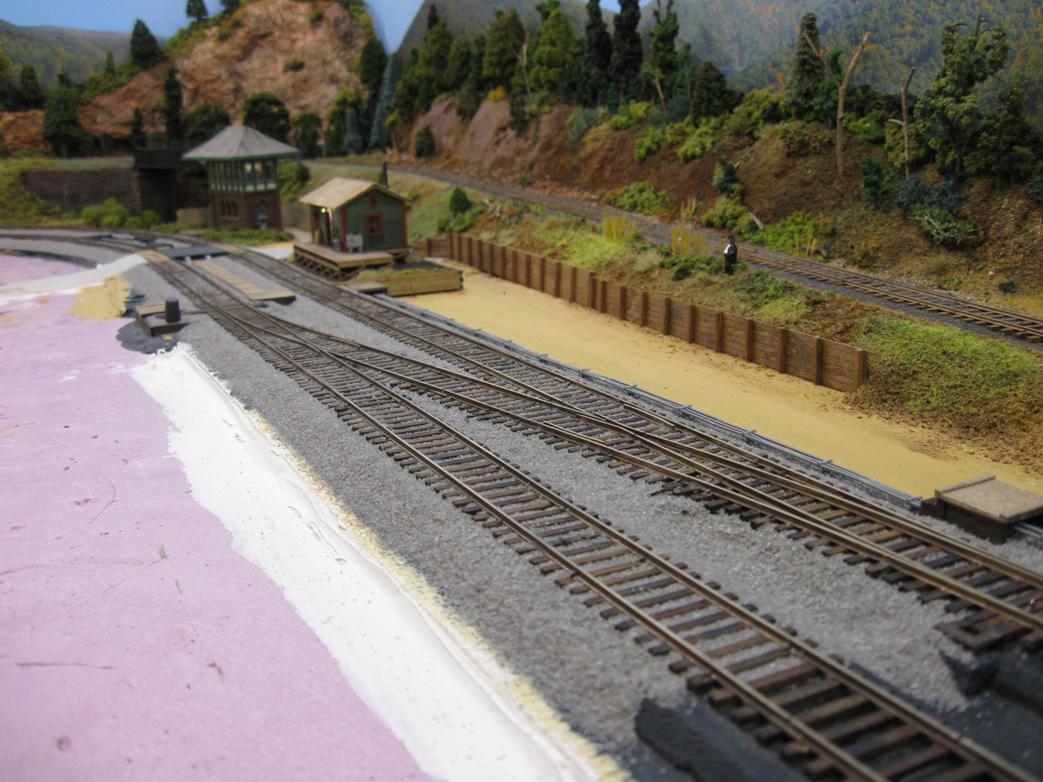
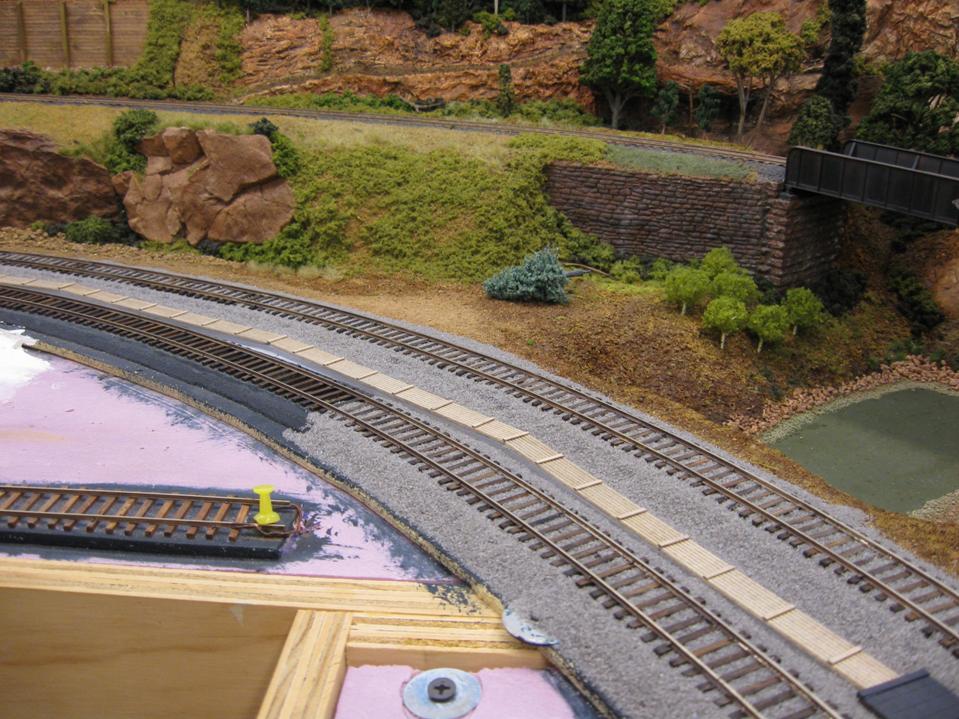
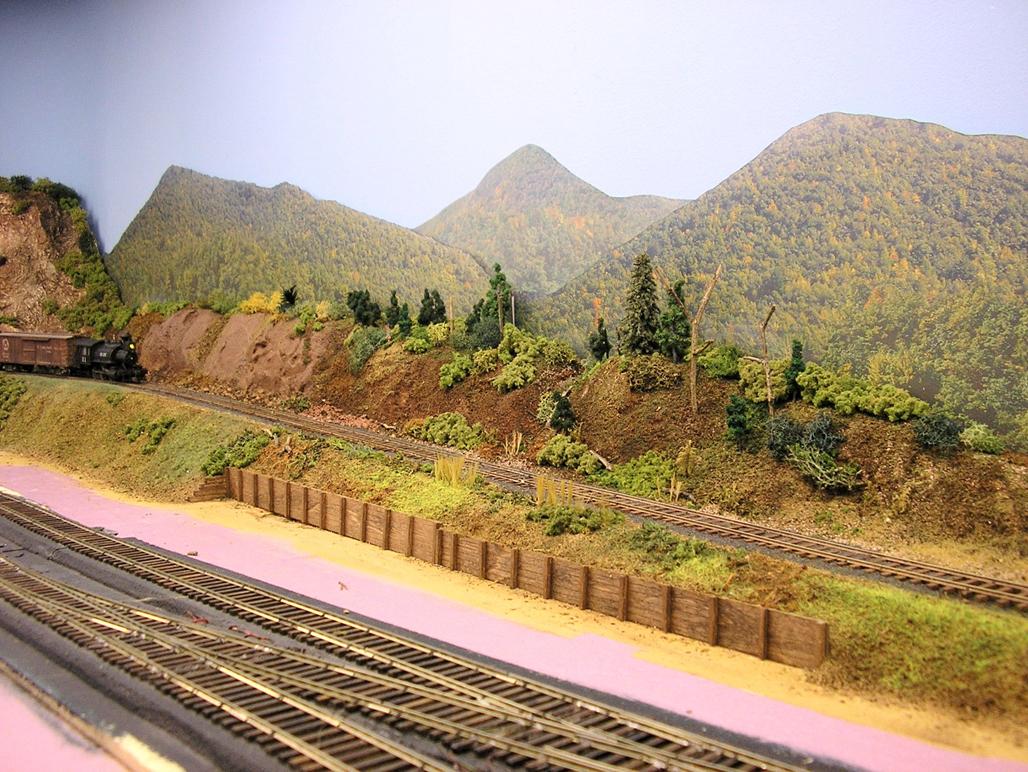
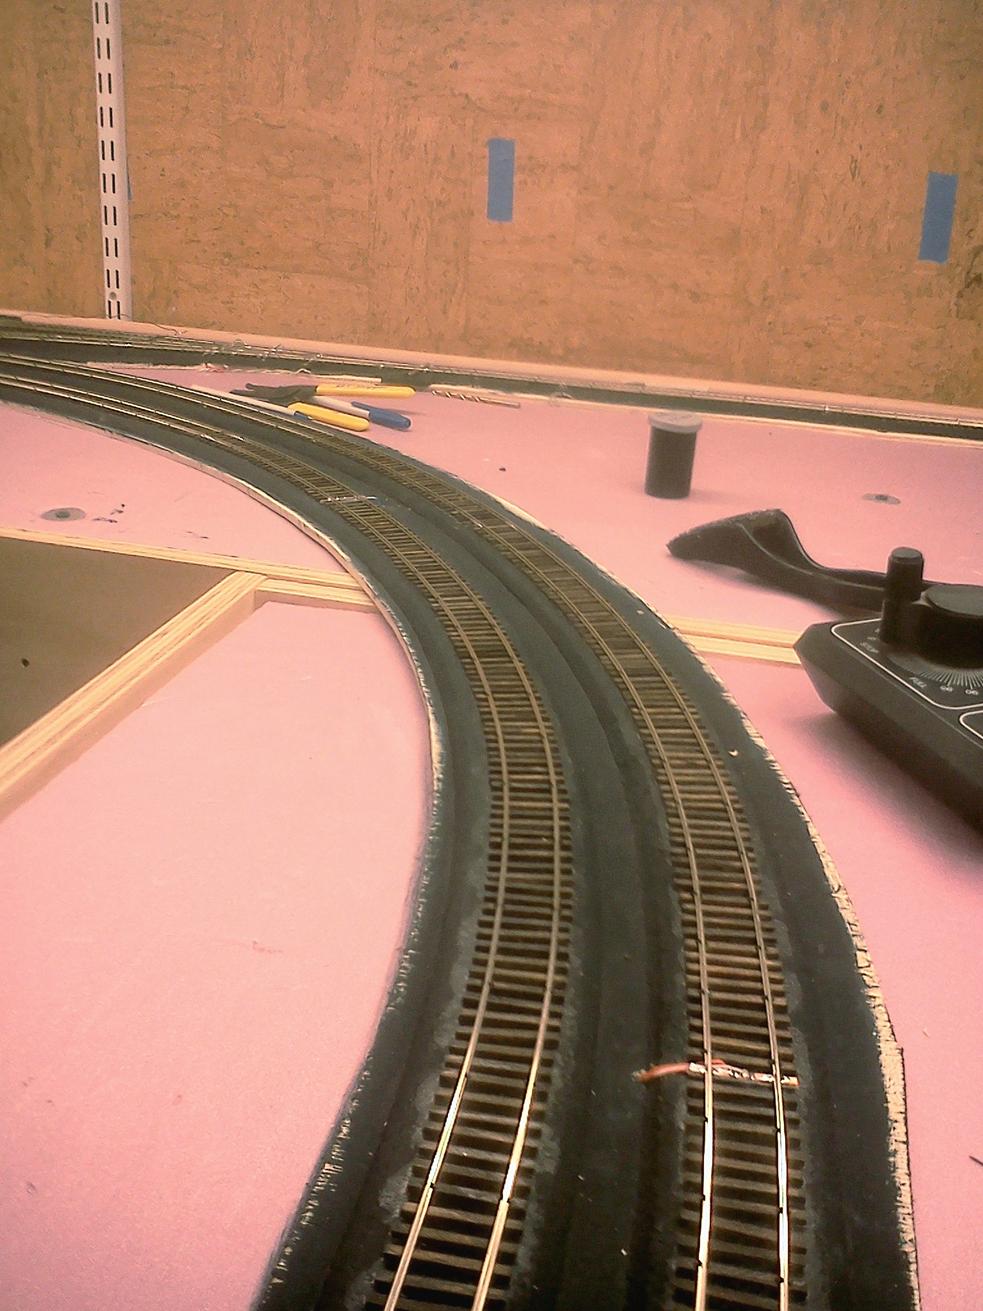
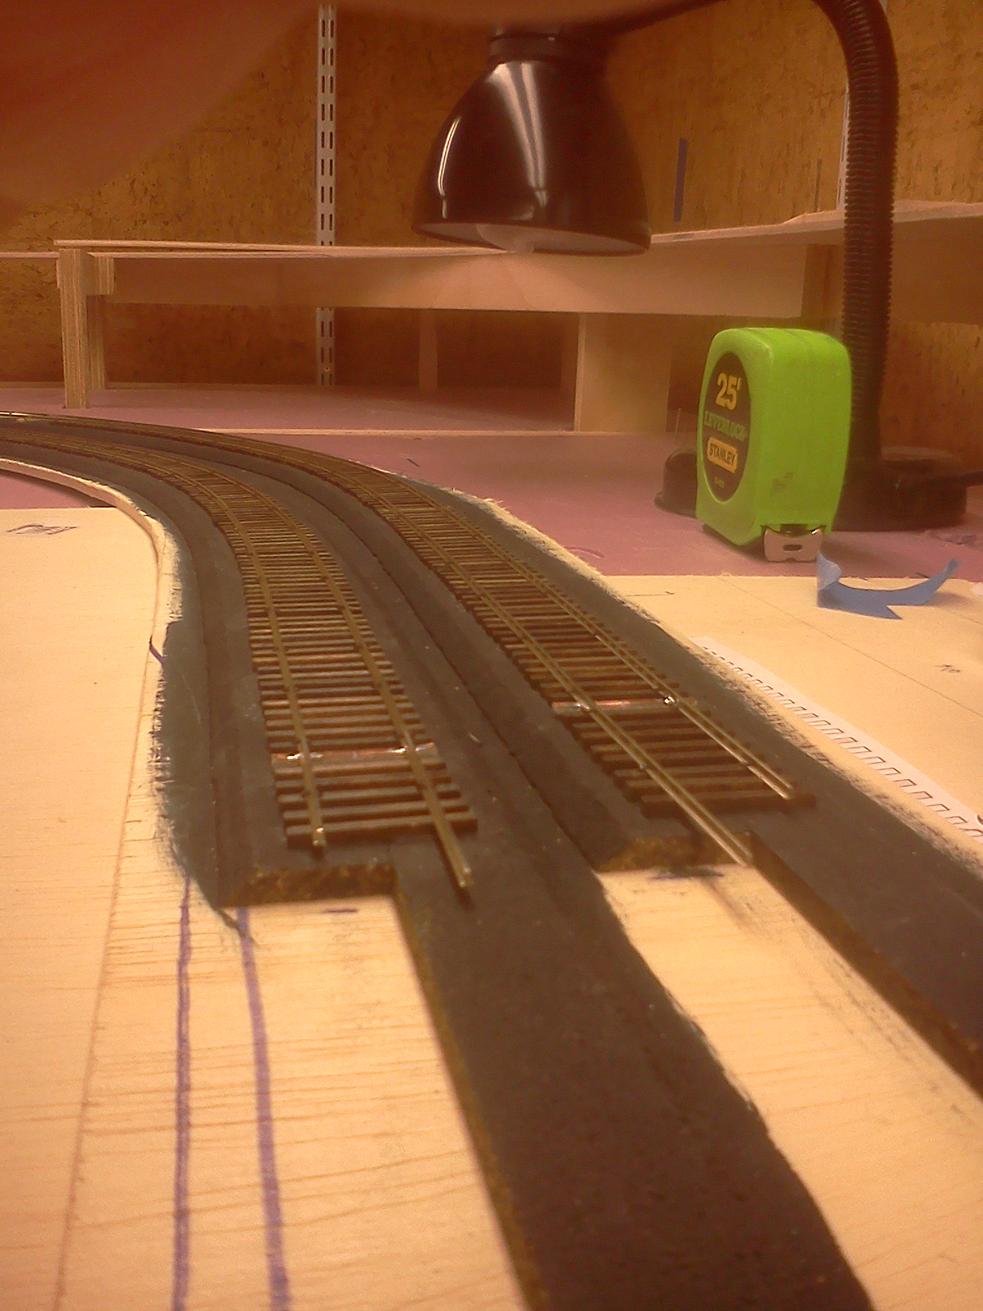
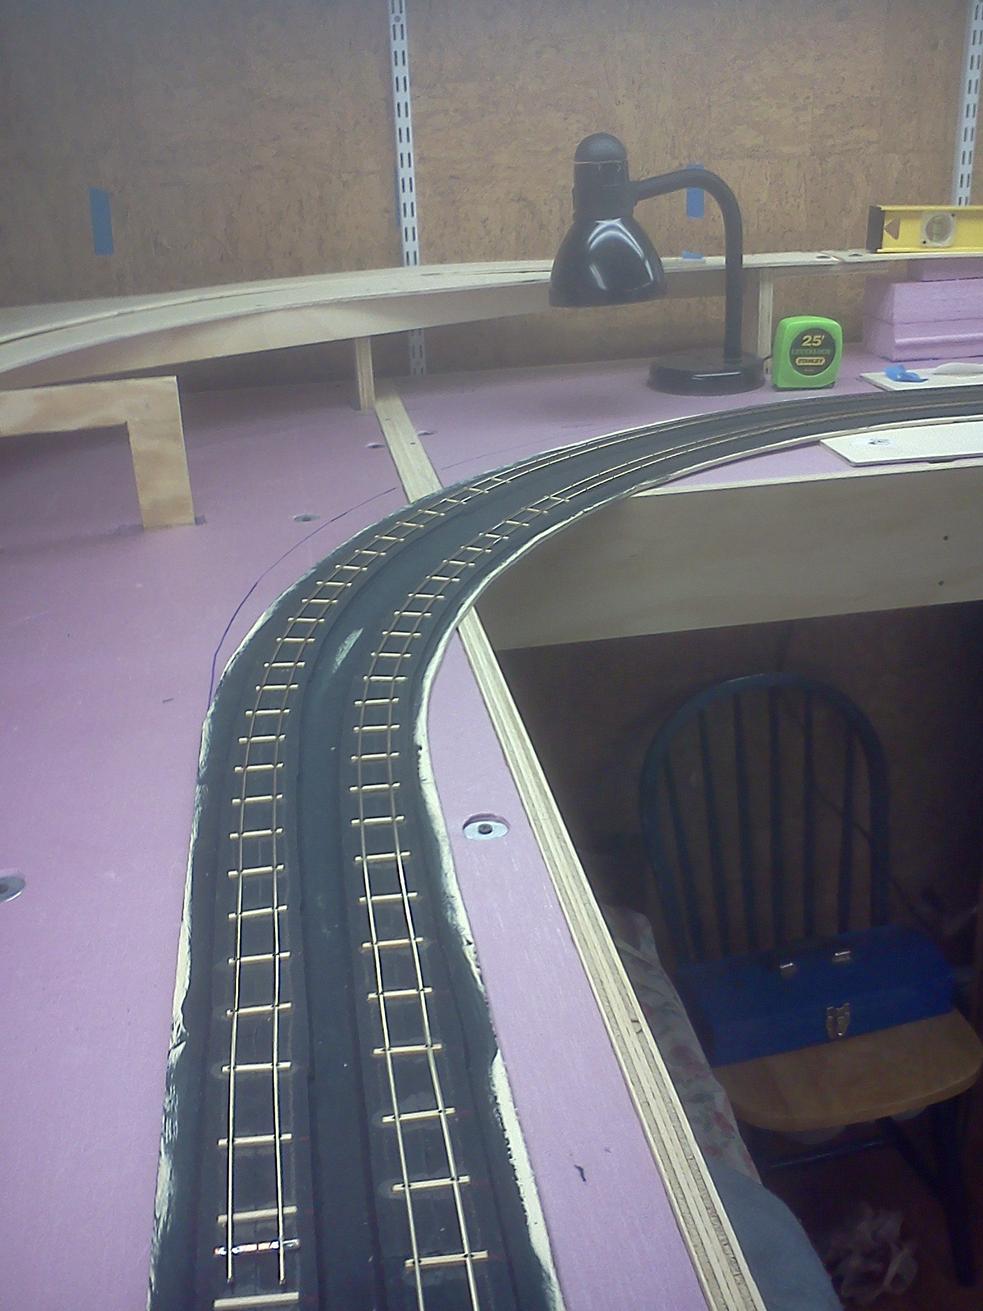
- ballasted the east-side branch to the bridge
- made a pole for the west side power crossing (outside of track), modified the other pole
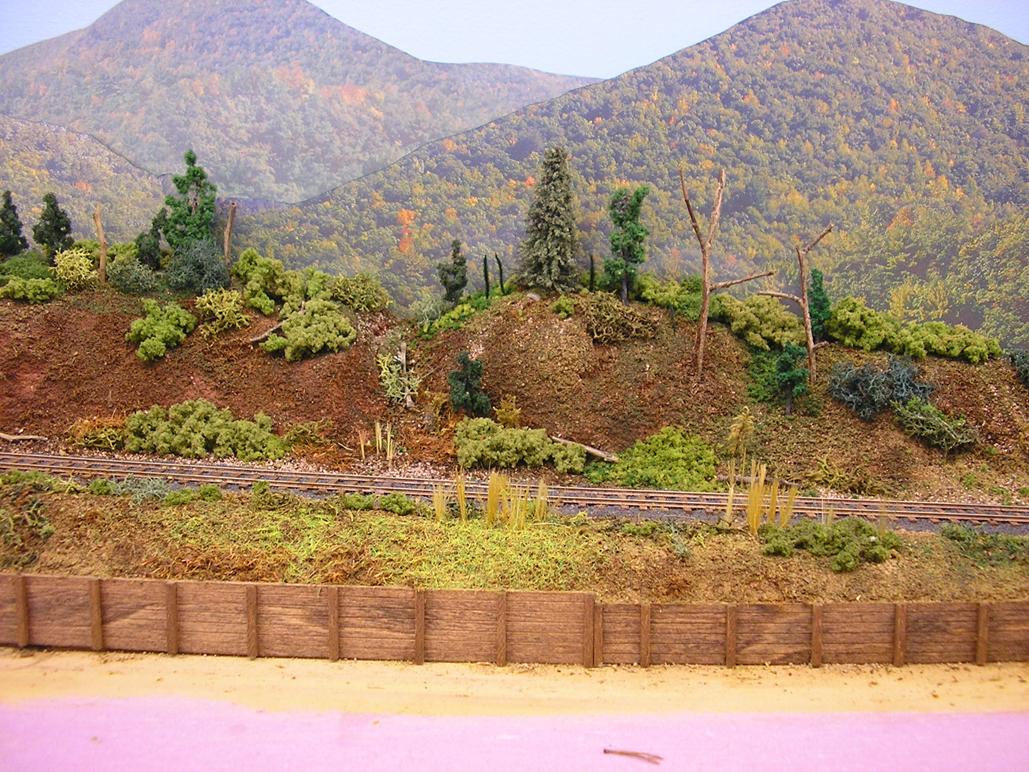
- added soil to the east side branch line area
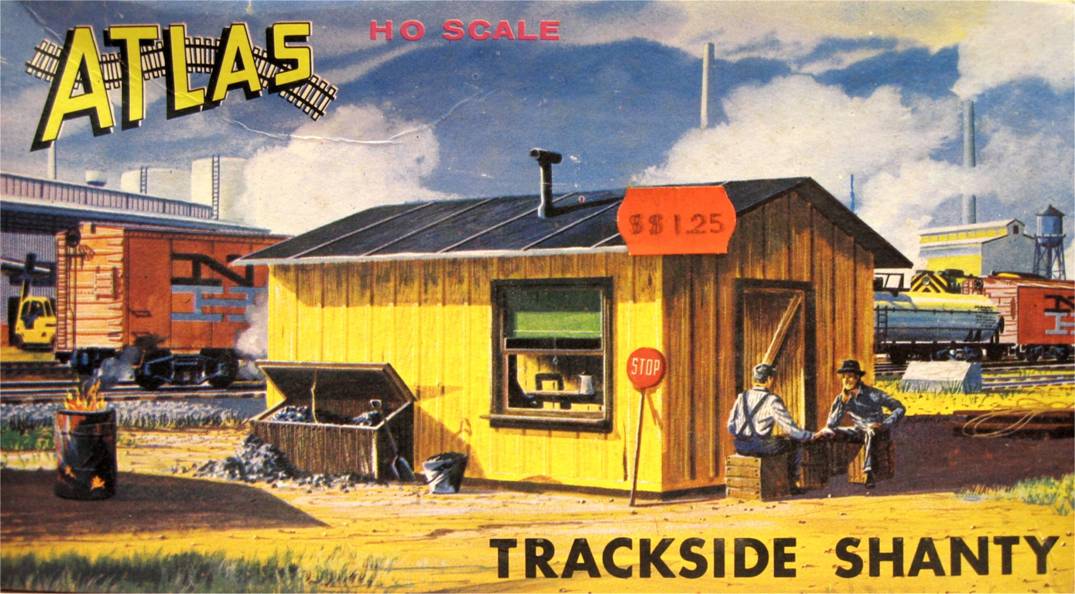
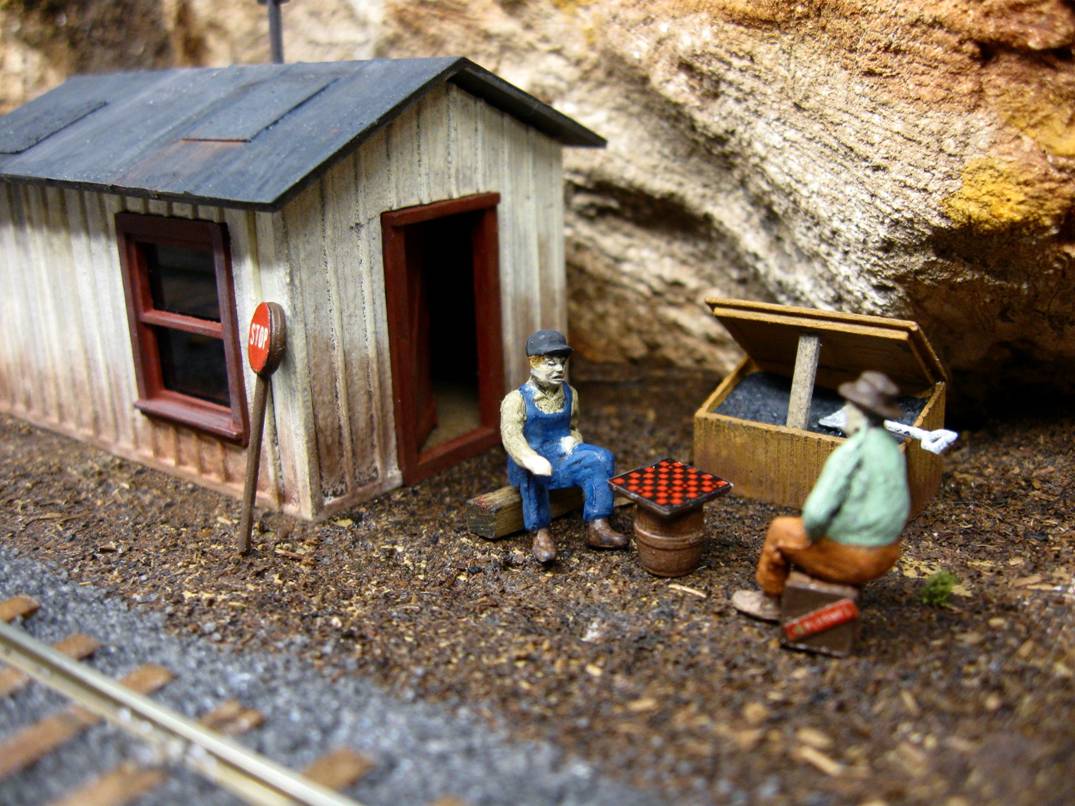
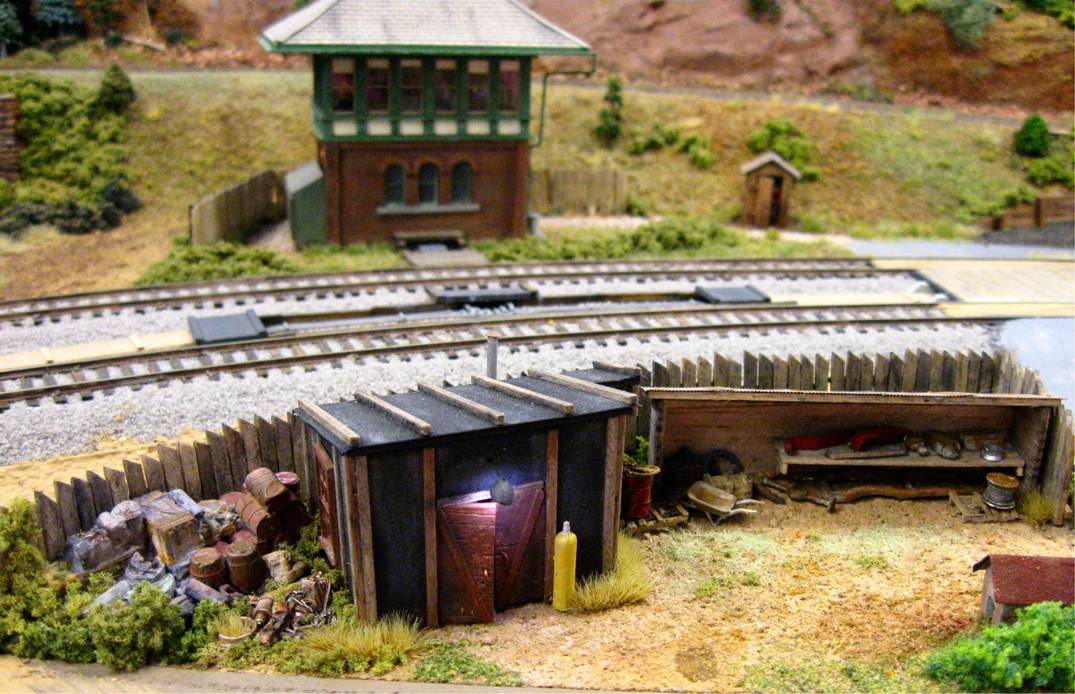
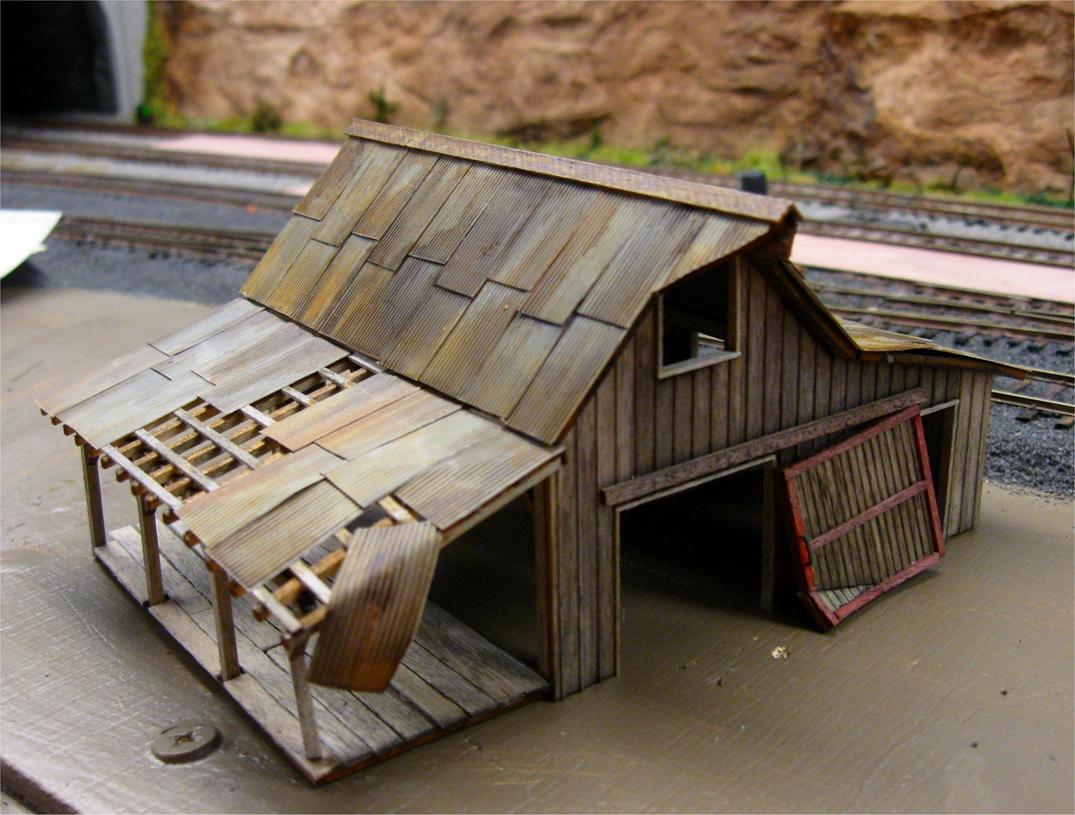
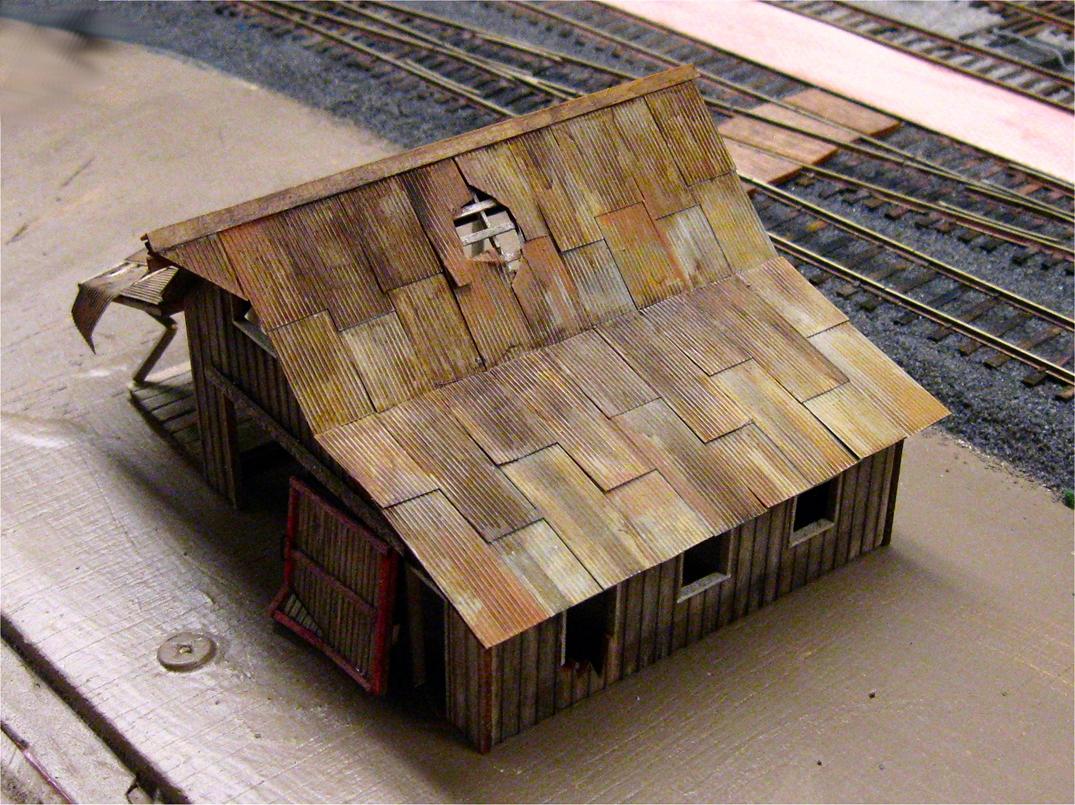
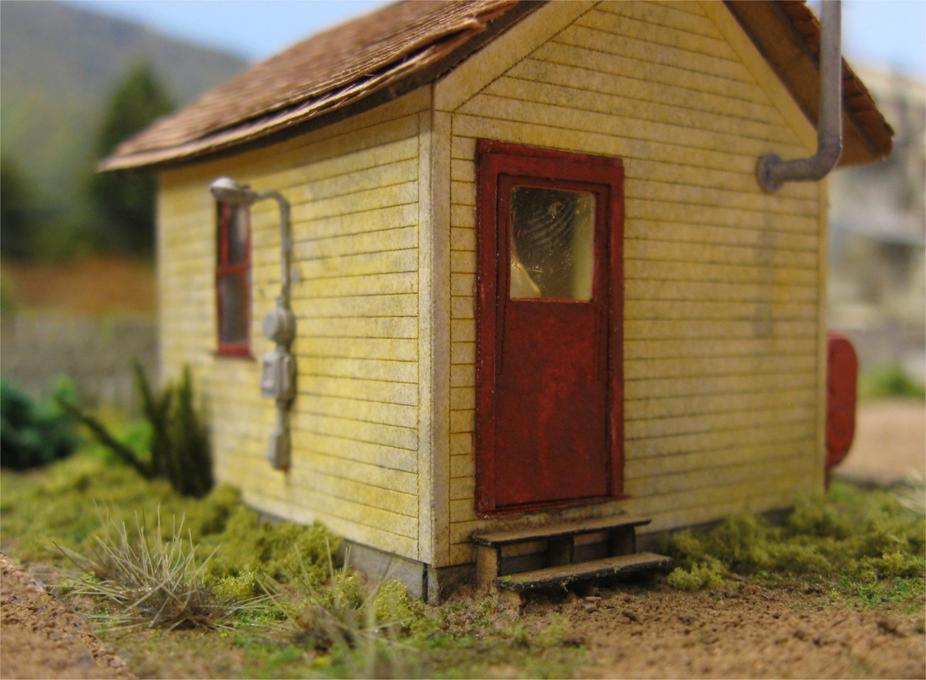
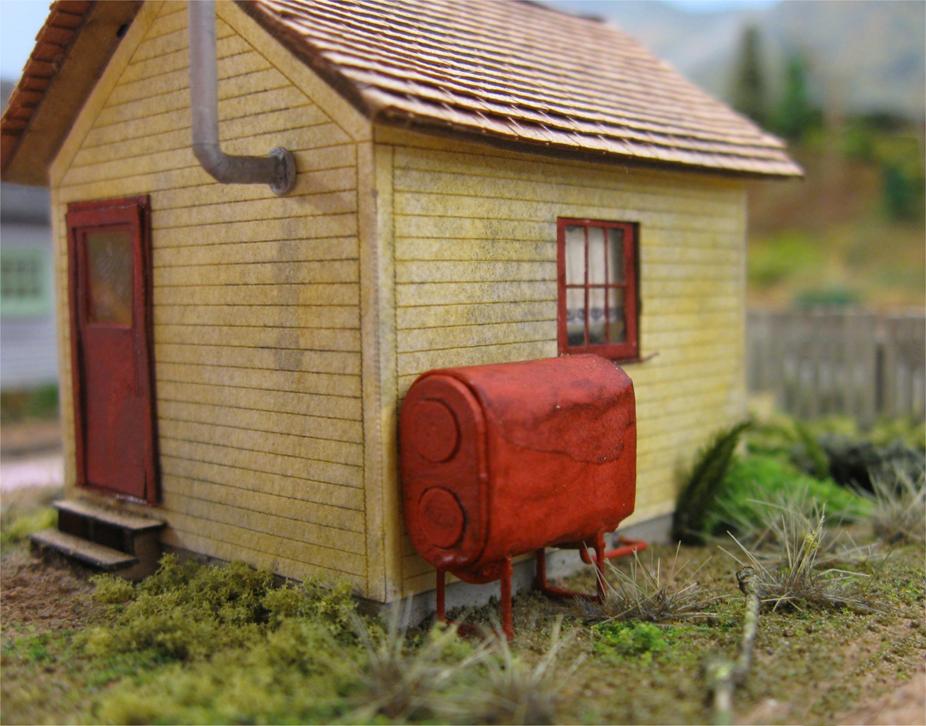
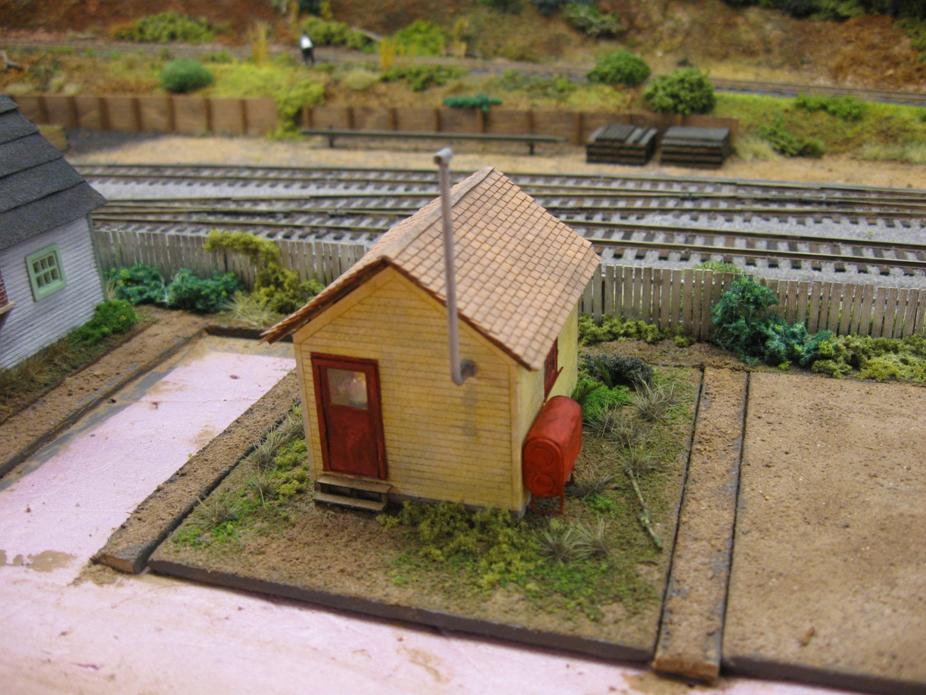
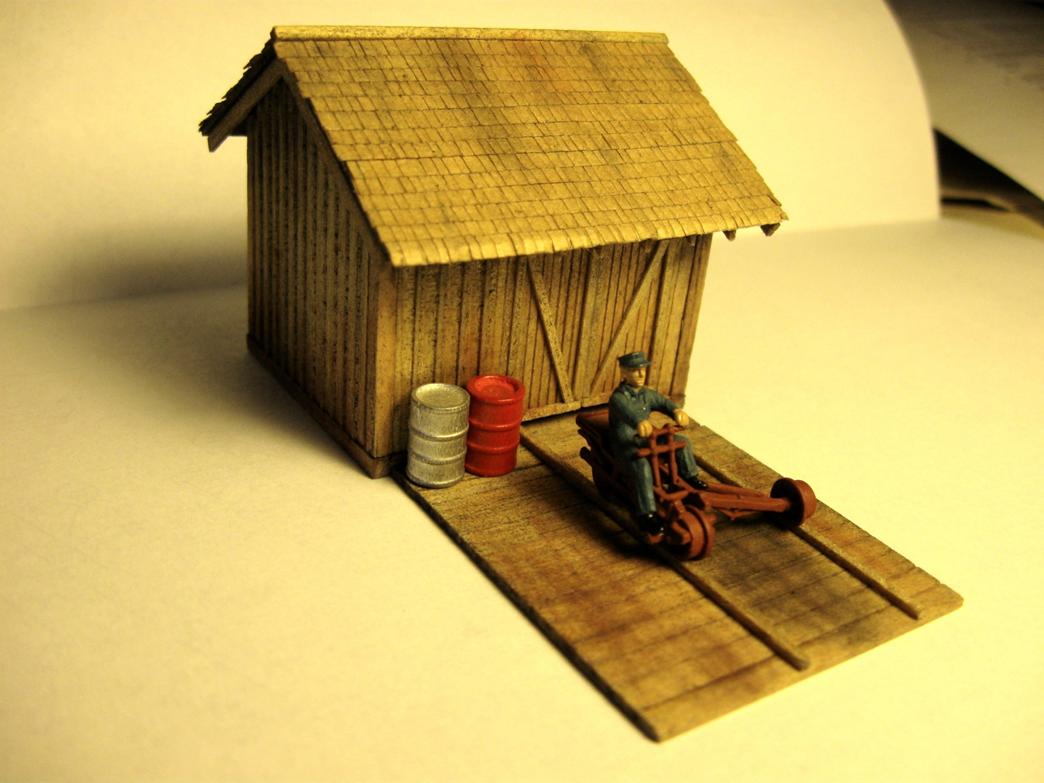
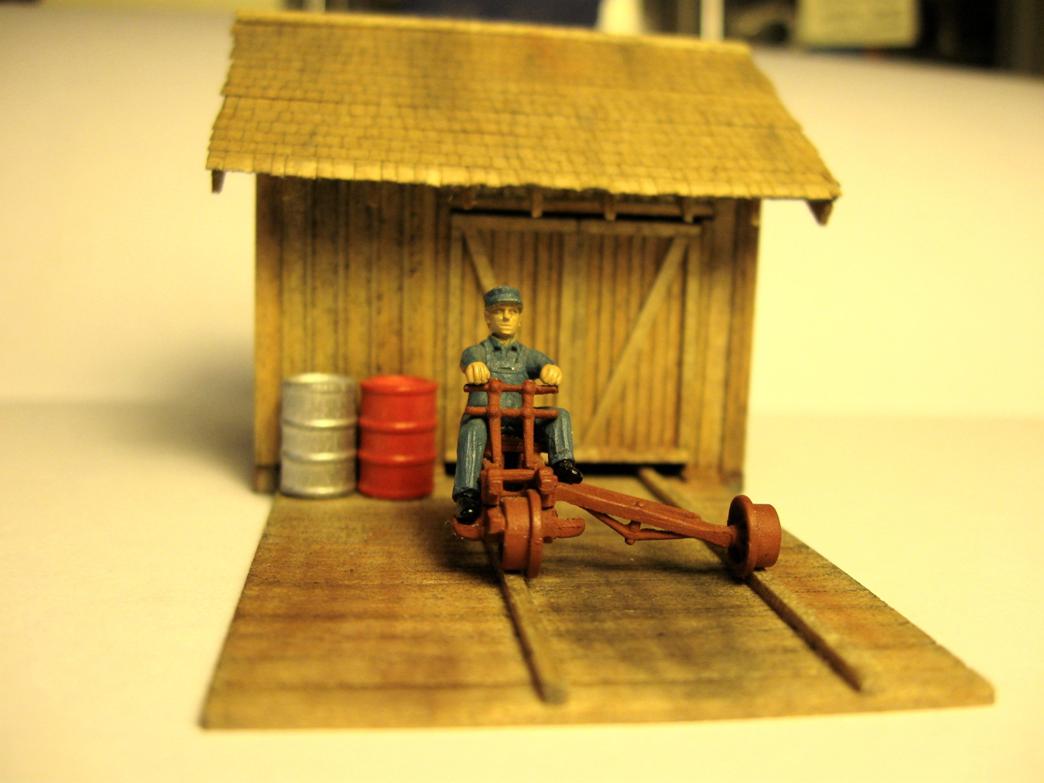
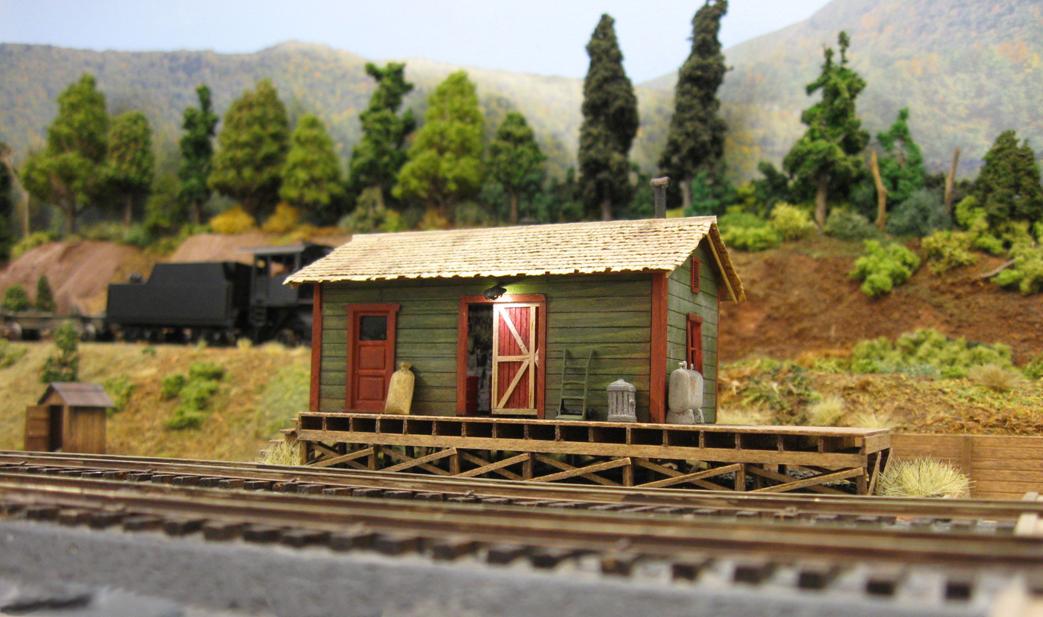
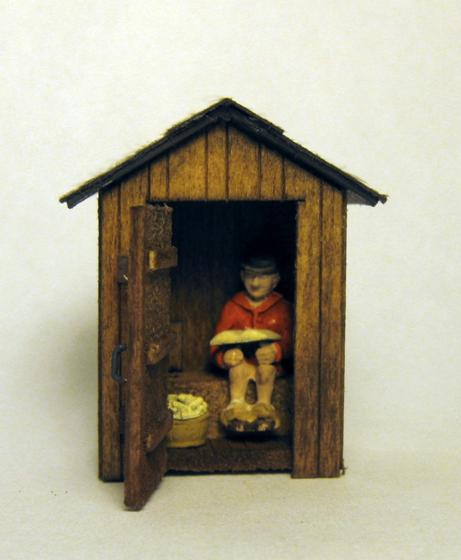
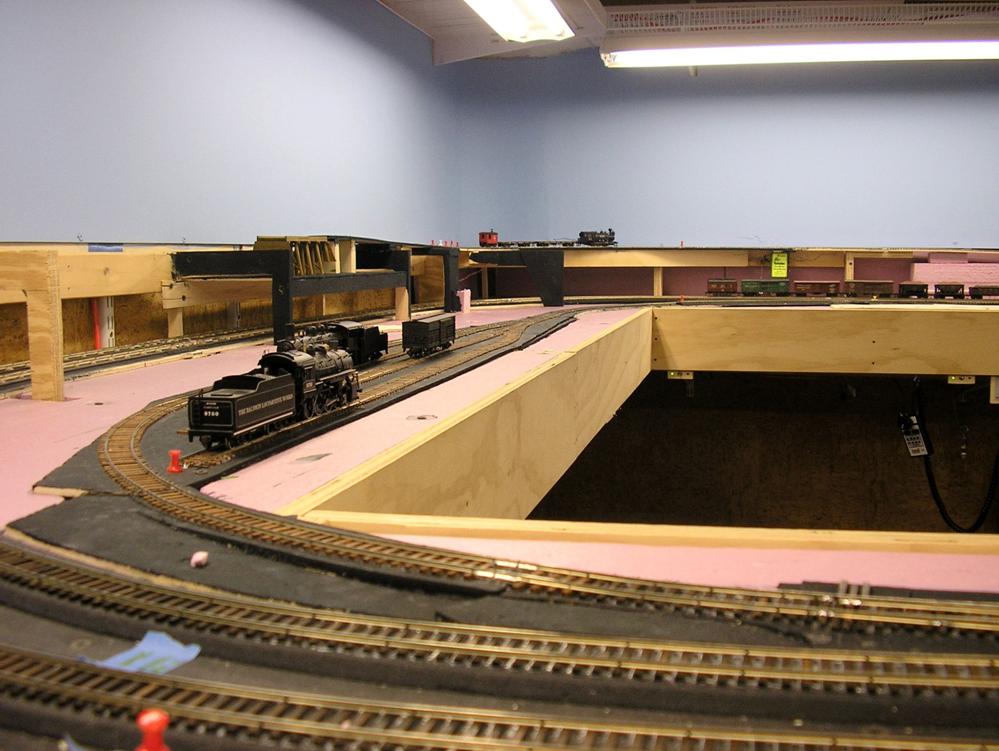
- built the Atlas Trackside Shed"
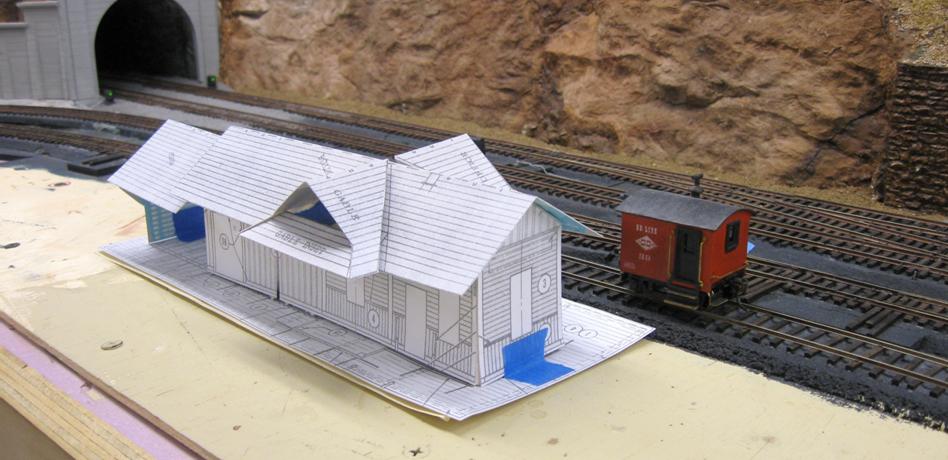
- built the Gloor Craft section house
- re-built Great Gulch and Yahoo Valley Northern boxcar
(trucks/couplers/brake wheel/weight/weathering) - added ground cover to the area near the crossing and junkyard
- added a welder to the junkyard (Steve gave me), built a welder, wired it
- added some sandeply to the area where the section house goes
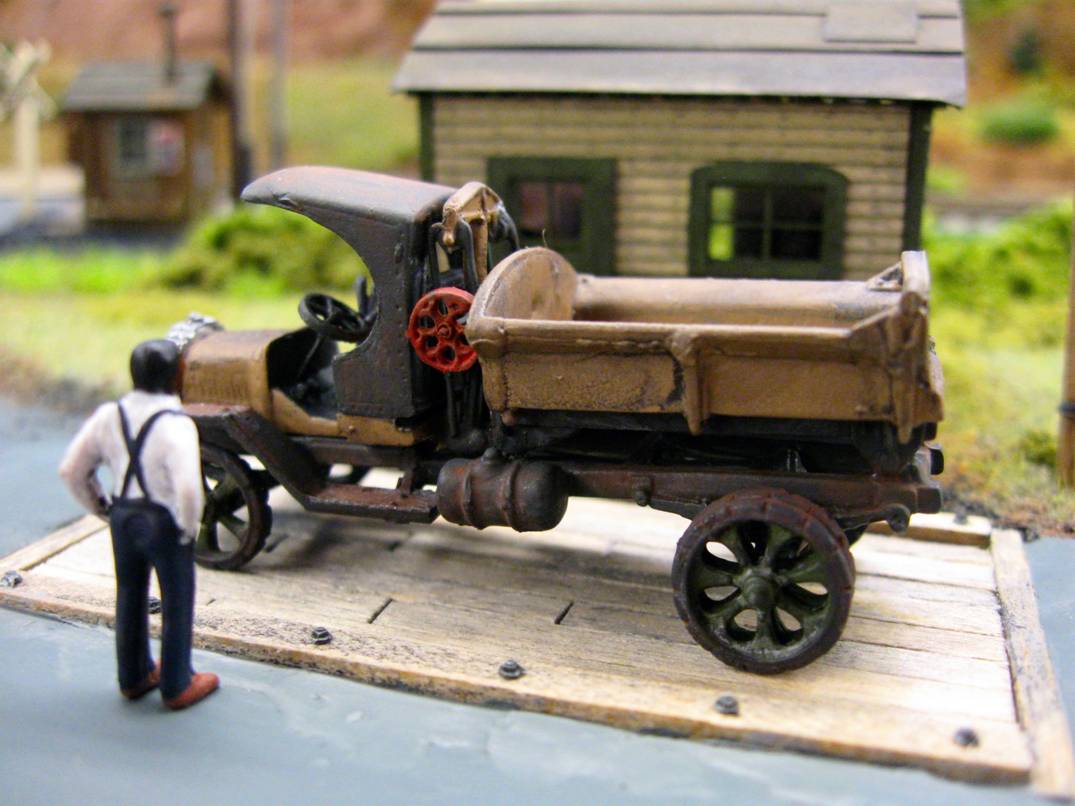
- built a Woodland Scenics dump truck
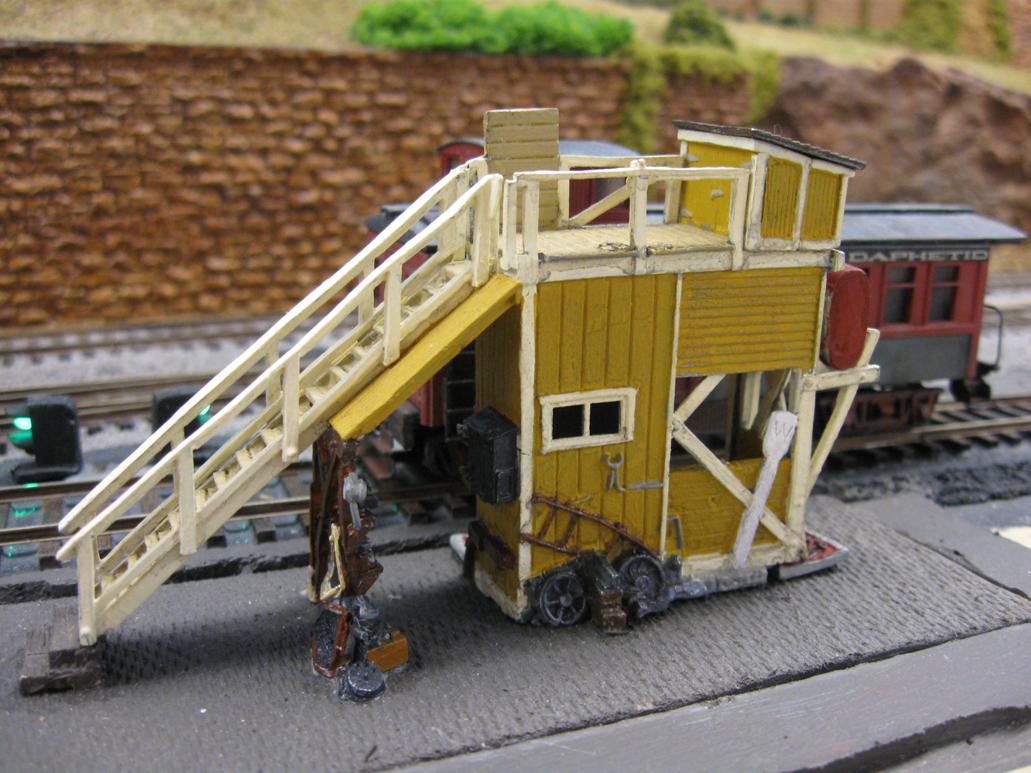
- built the RRkits scale house for the truck dump (not finished, but close)
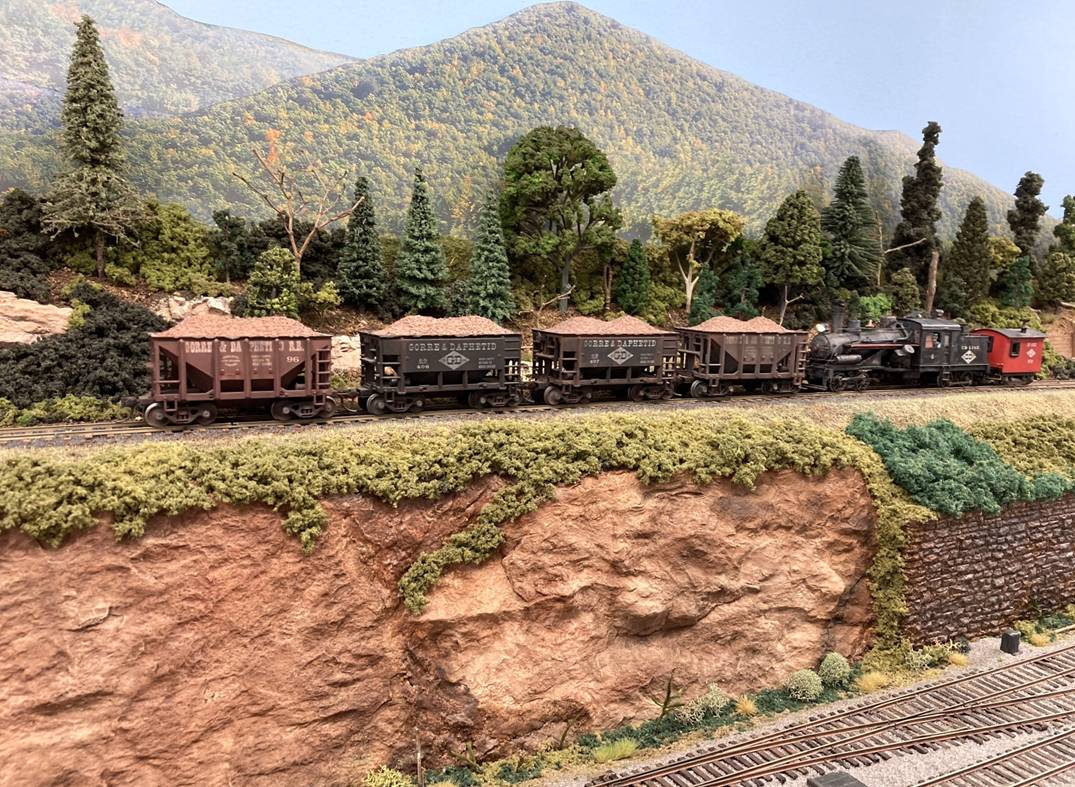
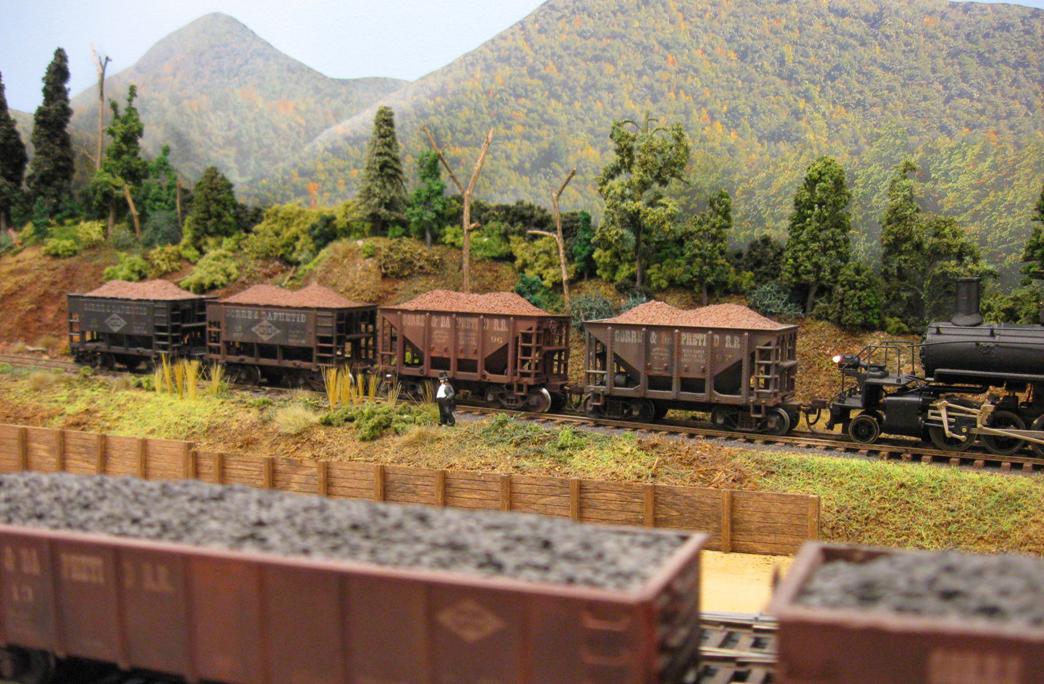
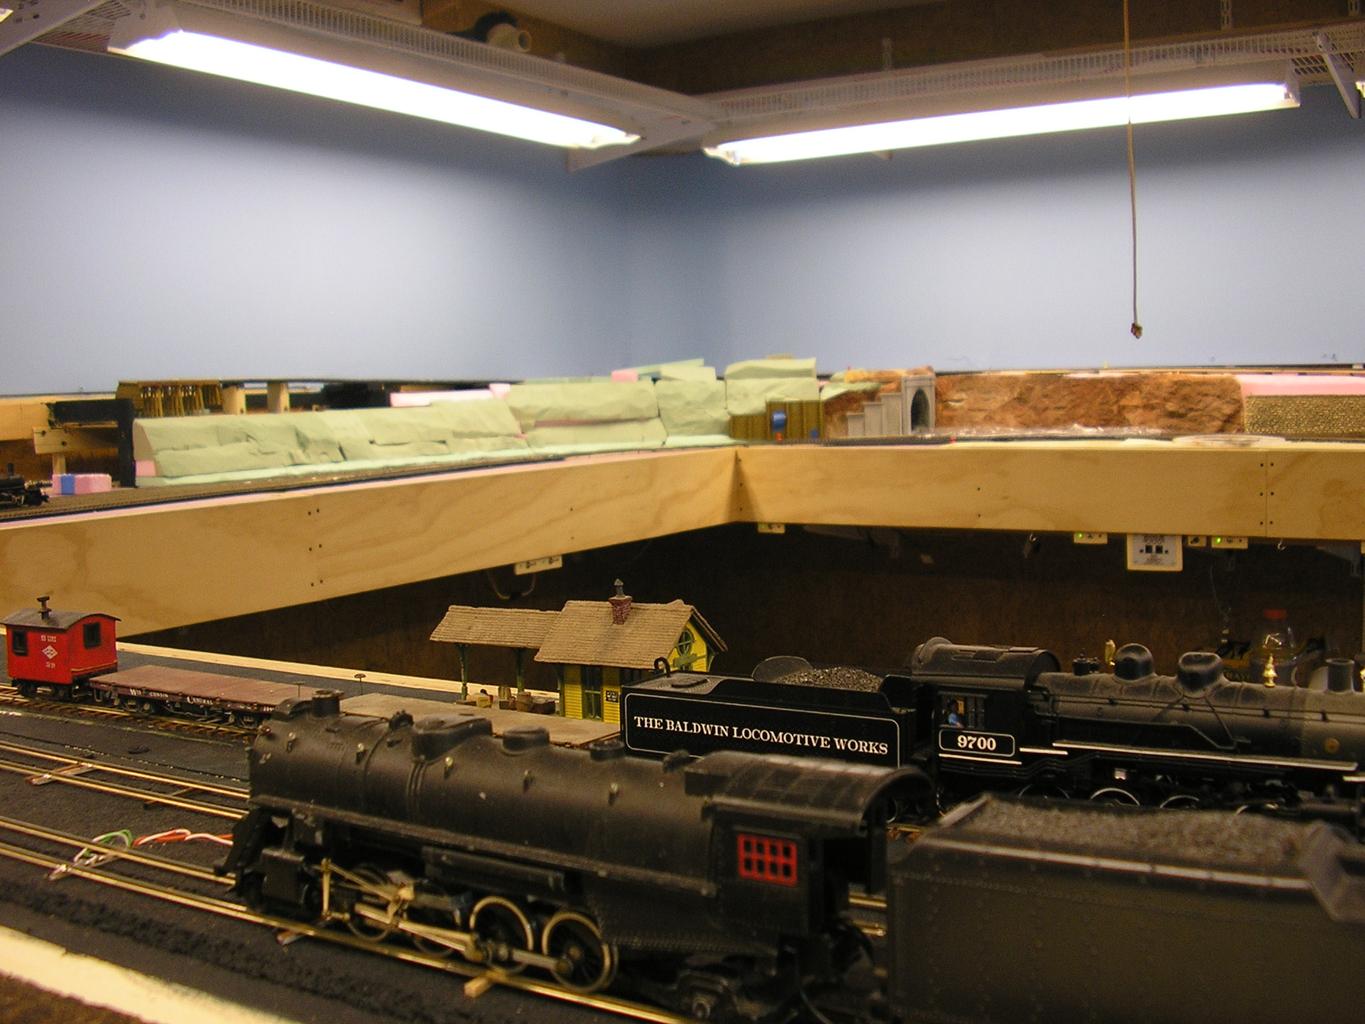
- weathered Steve's ore car"
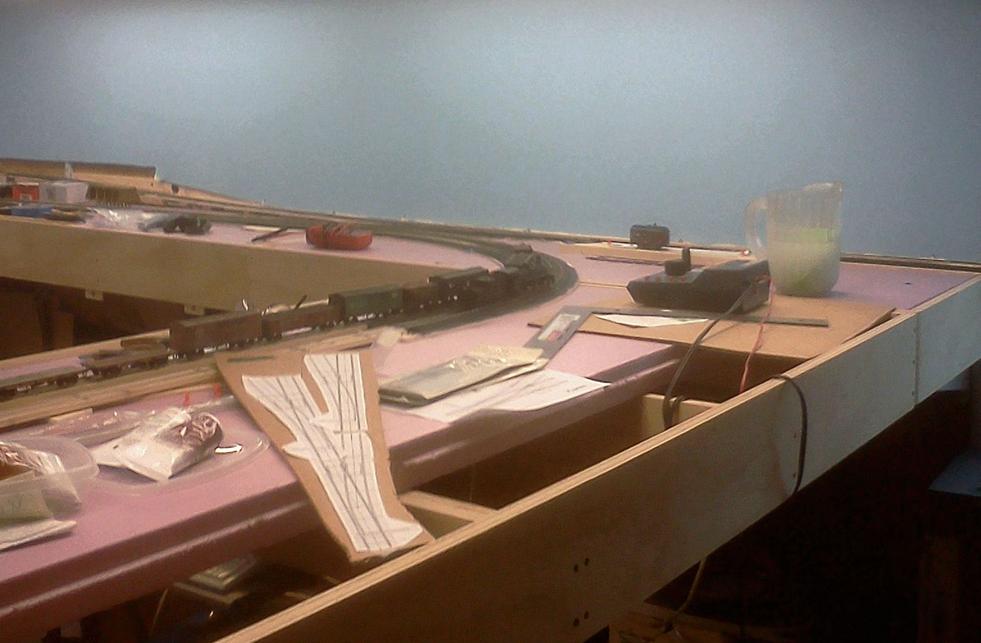
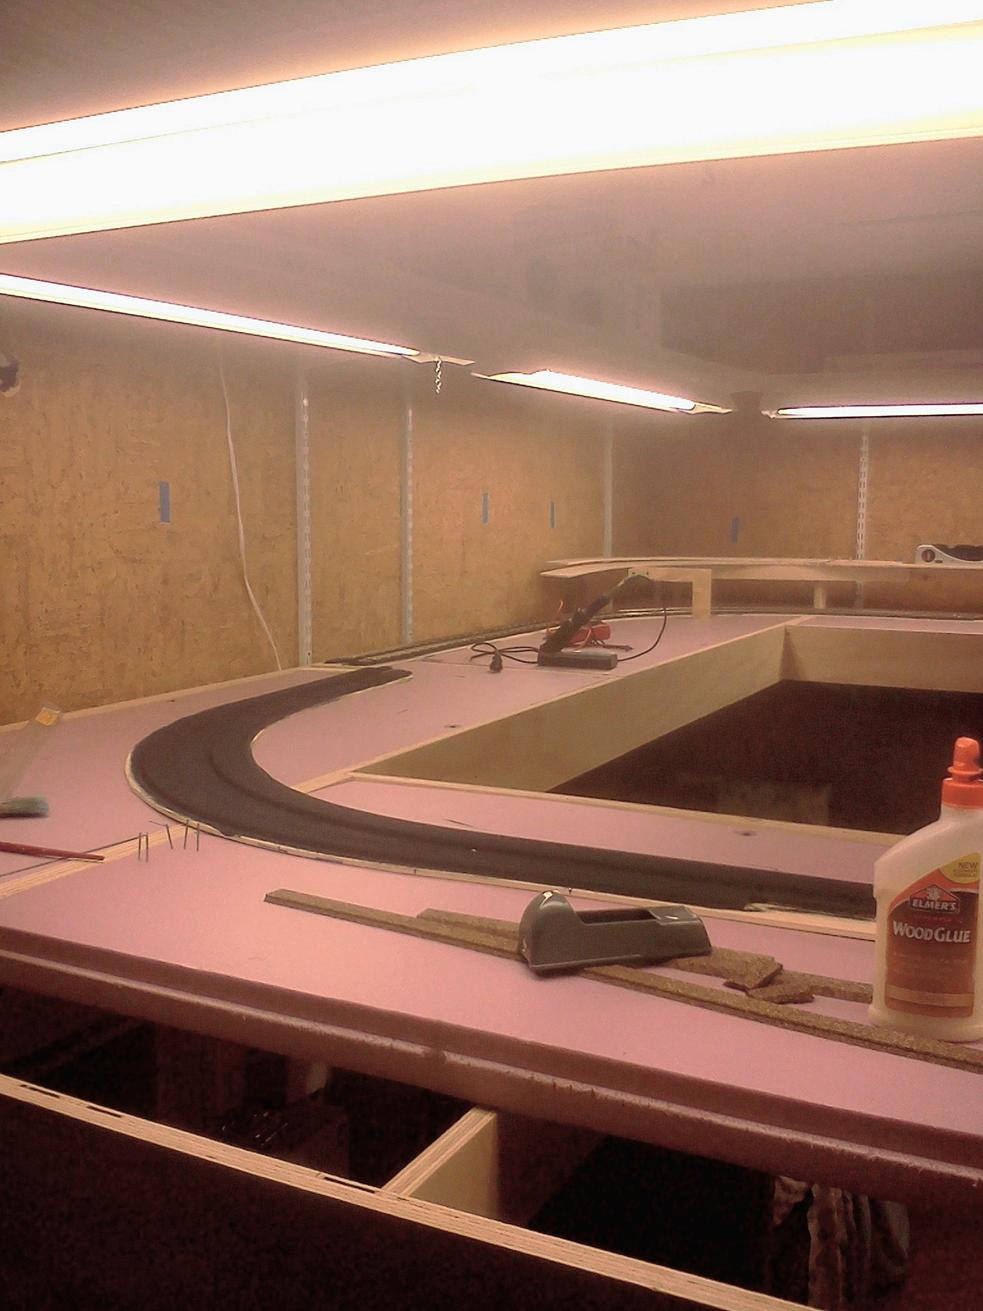
Now for some pictures, in chronological order.
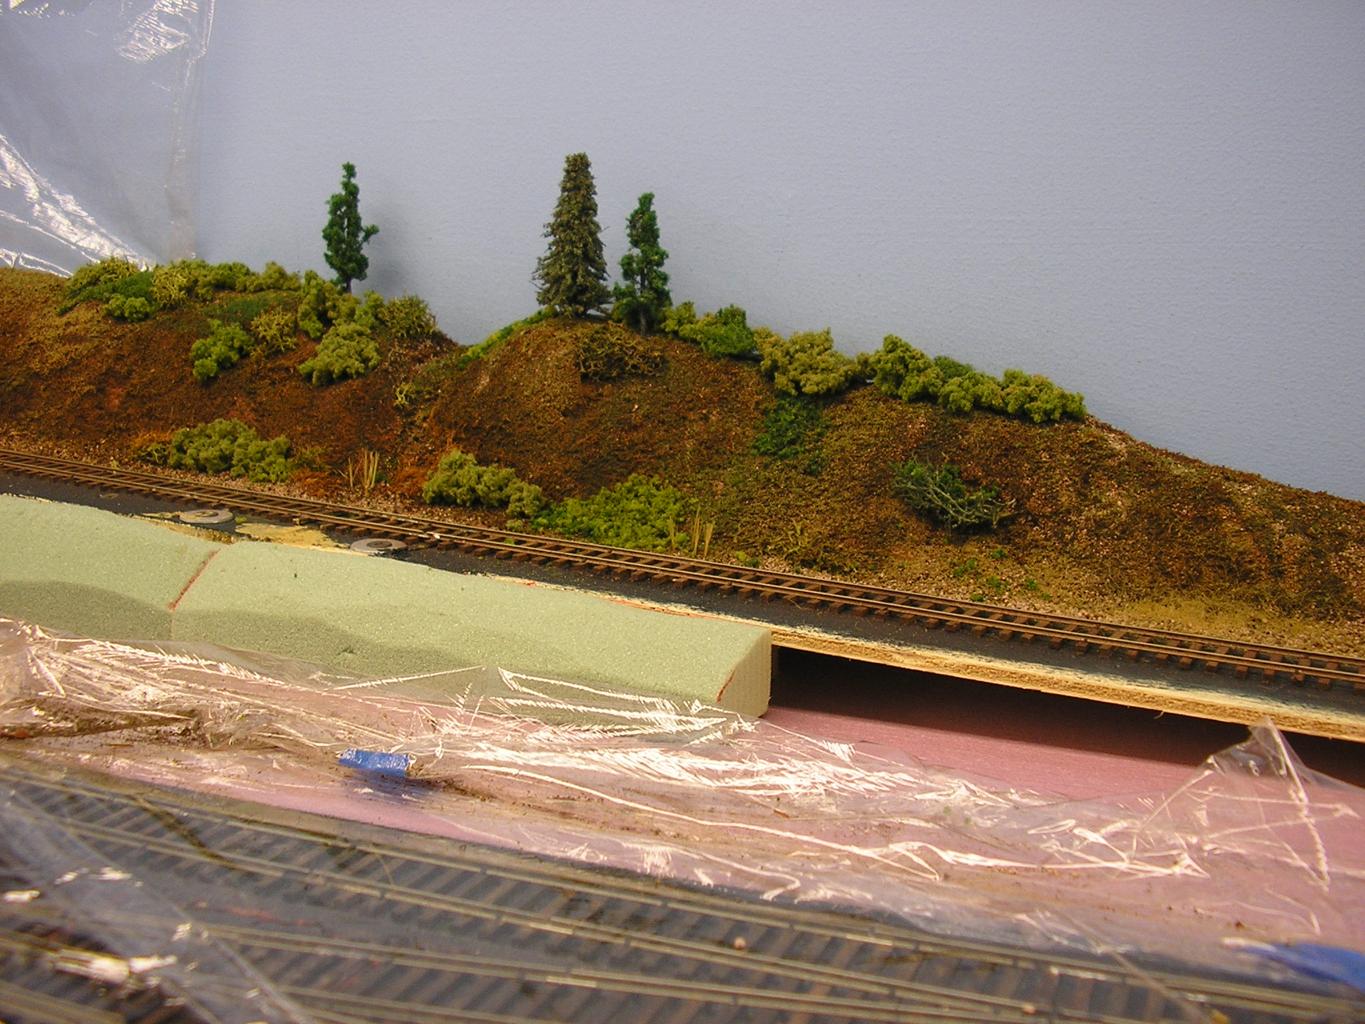
The scratch-built miner’s shack; scrap wood and coffee-stirrers over a styrene shell:
The scratch-built outhouses:
The updated barn installation:
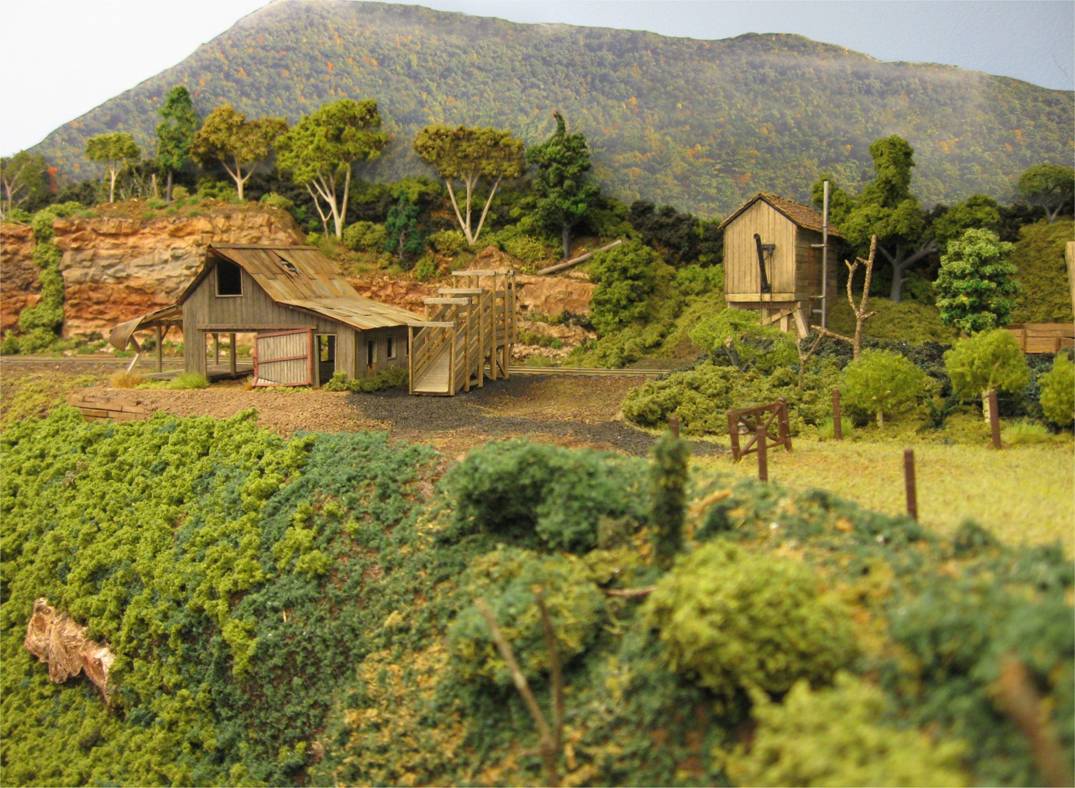
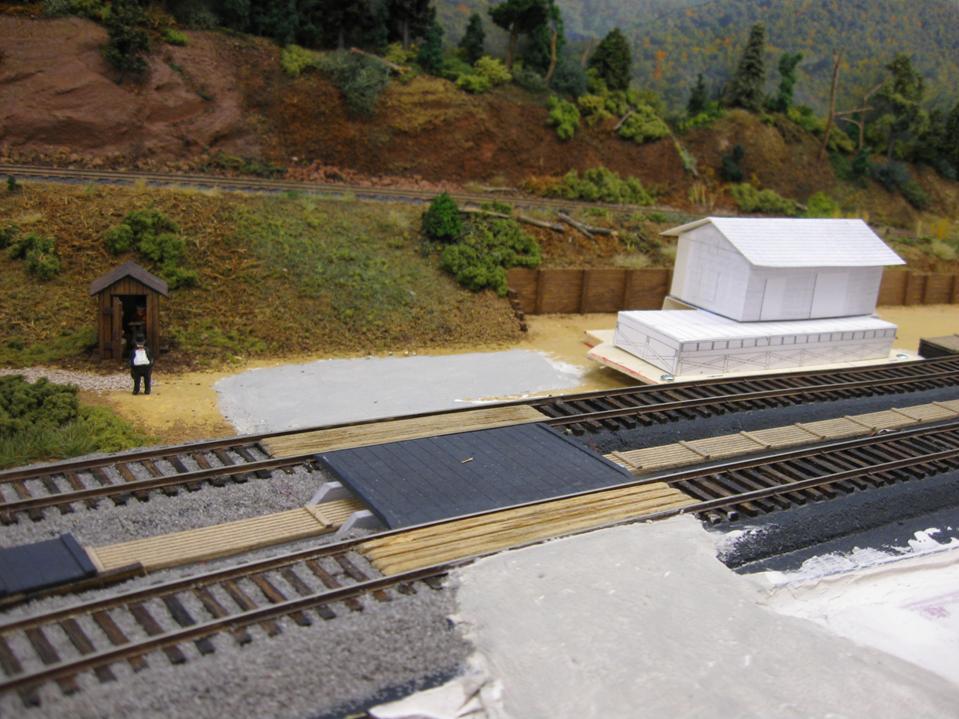
The Atlas Trackside Shanty (courtesy of Tom Adams):
The
updated east-side branch line “miner’s camp” area:
The
Gloor Craft section house, shown separated from the base/foundation,
which will be affixed to the layout.
Built
to be in “new” condition; I used some left-over “peel and stick” three-tab
shingles from another kit:
 :
:
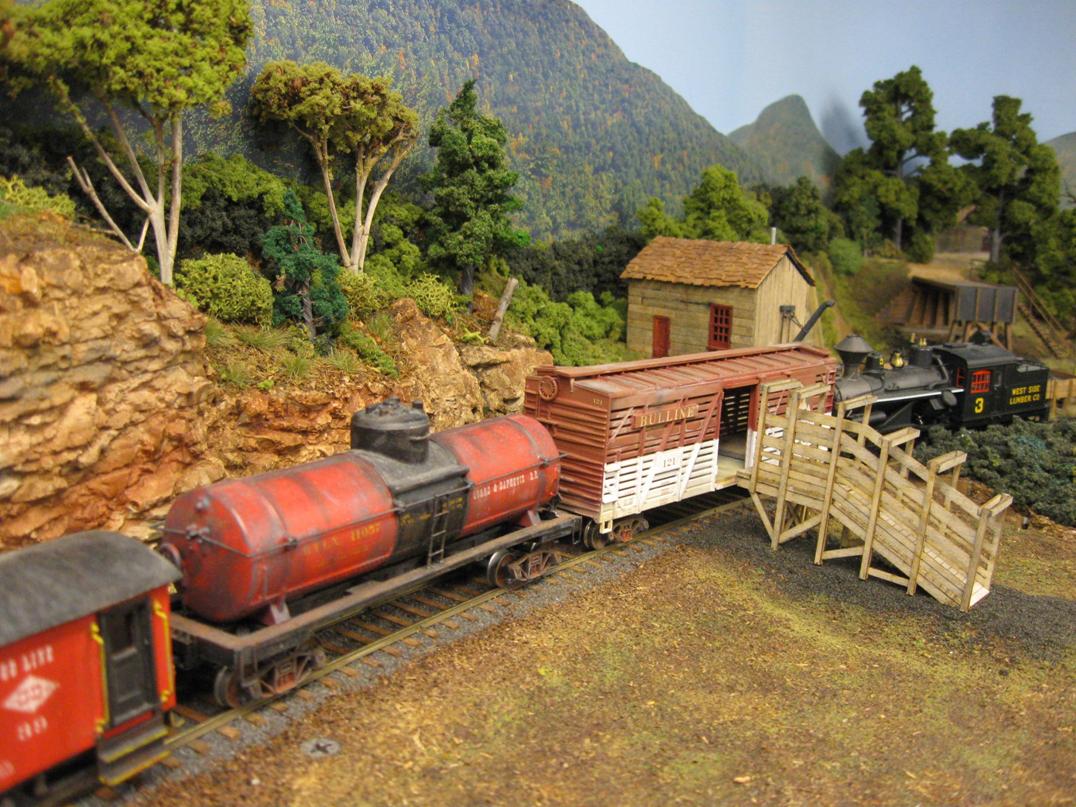
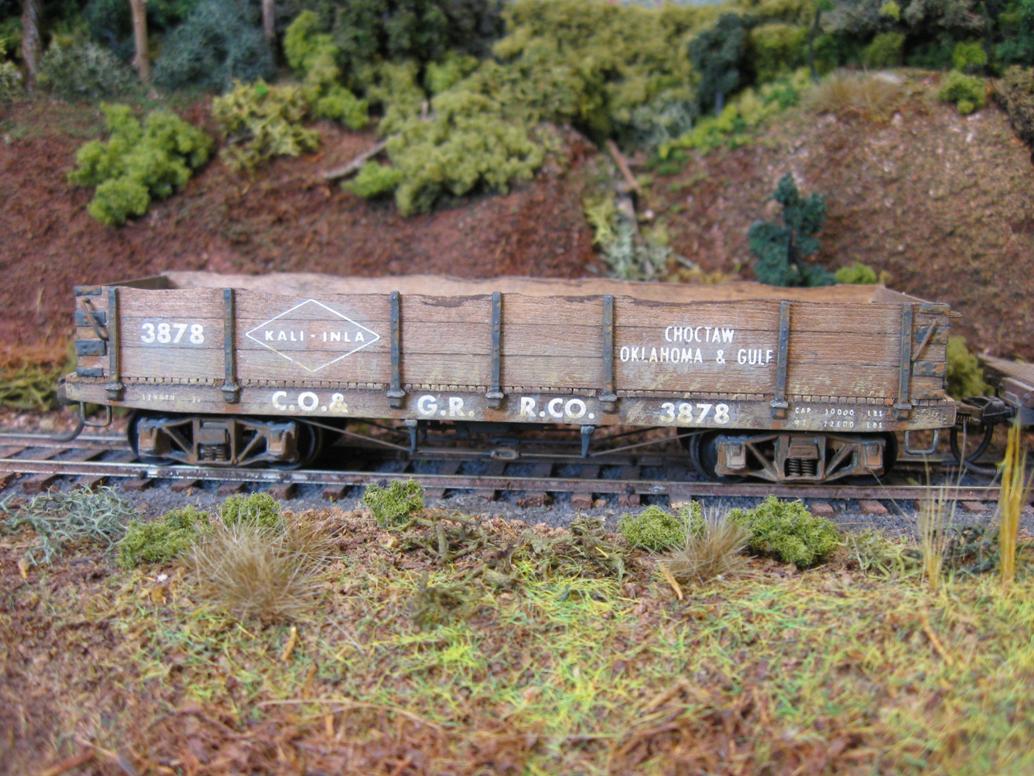
The re-built Great Gulch and Yahoo Valley Northern boxcar:
The west-side street and sidewalks:
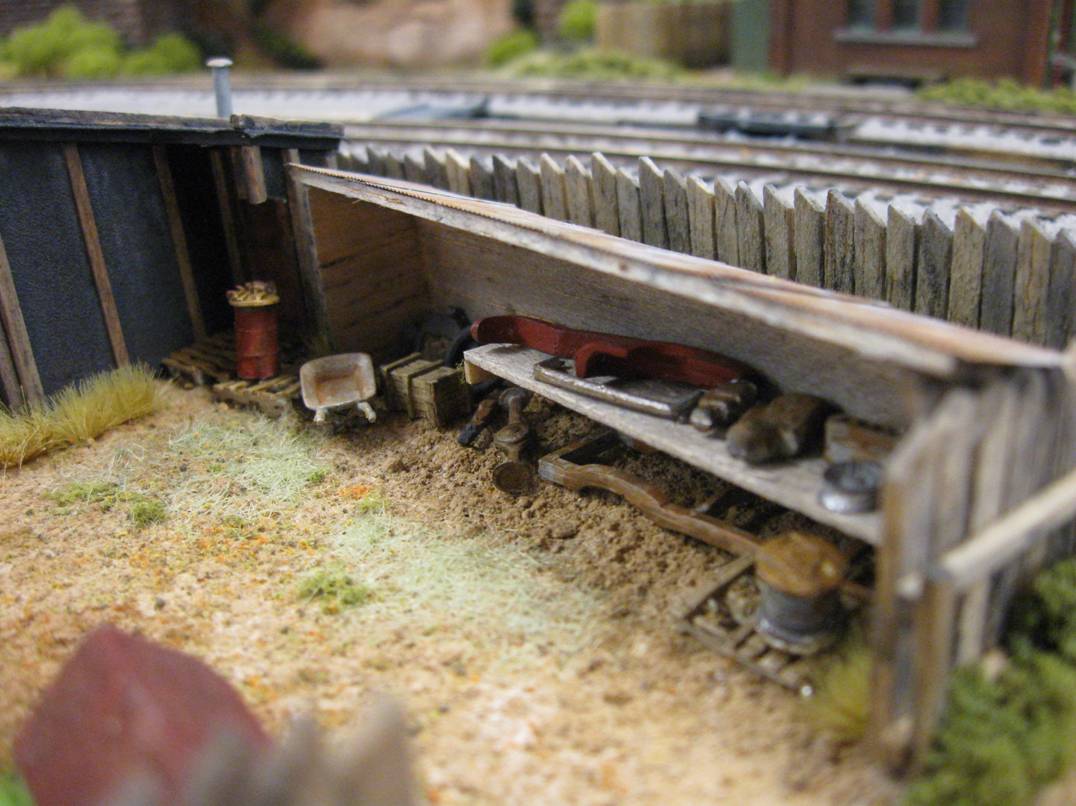
The welder in the junkyard:
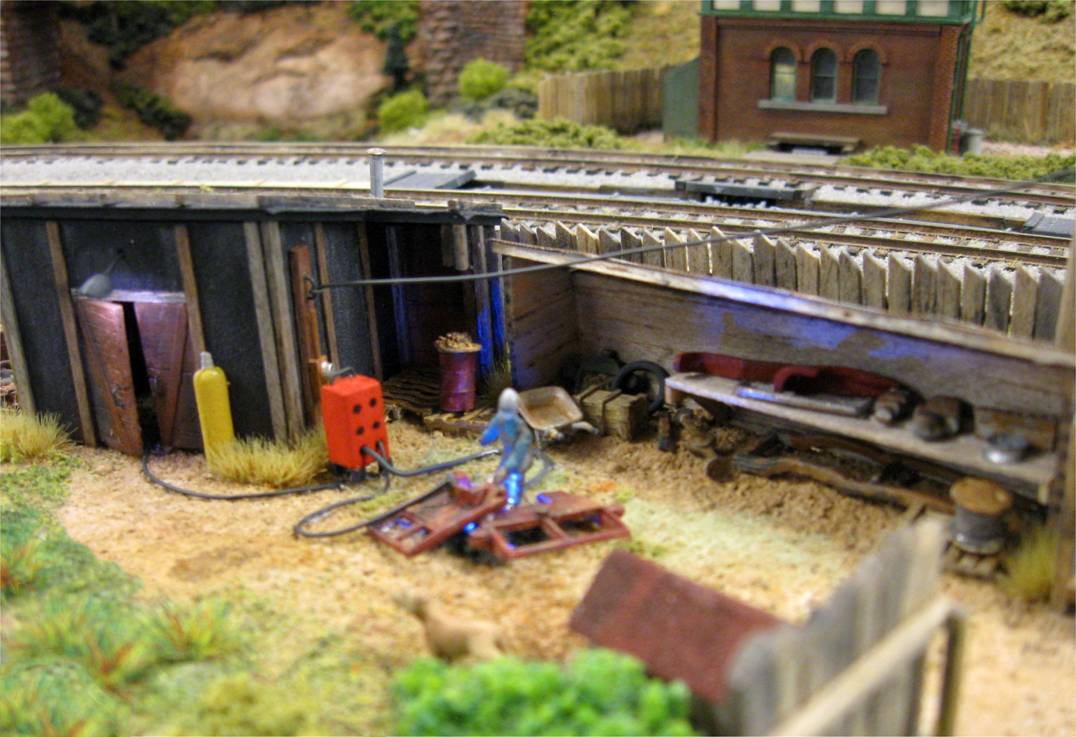
The Woodland Scenics dump truck and added signage for the Allenton truck dump:
Steve’s
weathered ore car and some of his other rolling stock visiting TT:
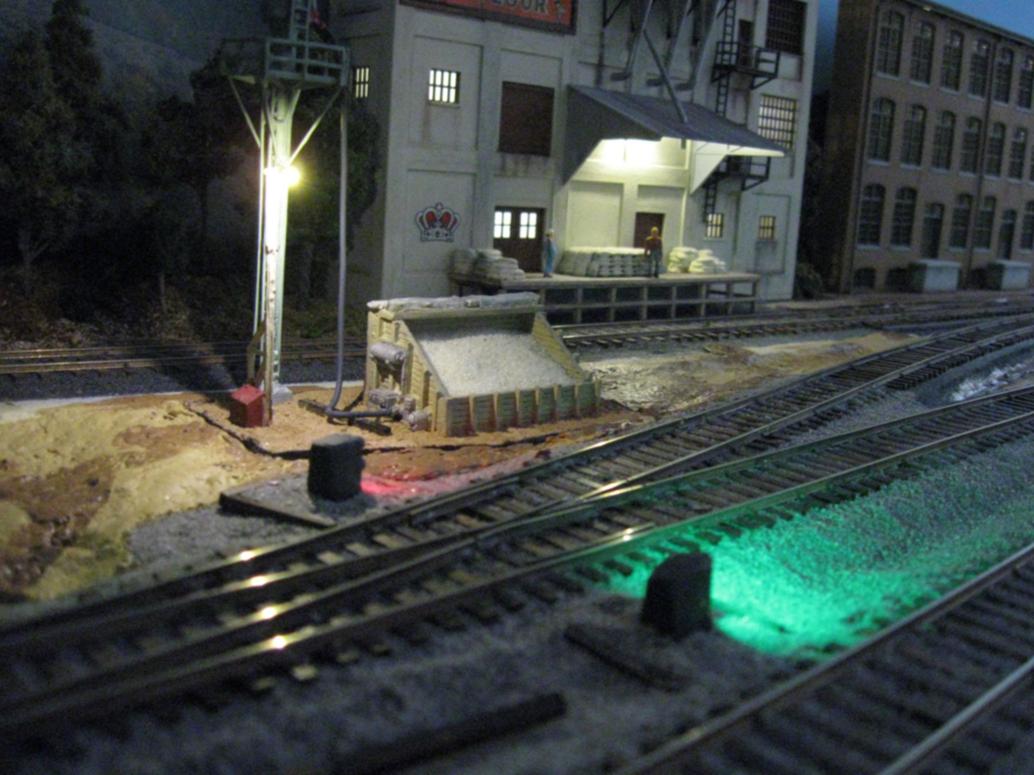
The truck dump scale house, almost done:
July 2019 through January 2020
It’s been a bit slow over the last six months, but there has been progress:
- Finished and add lighting to the kit, then detailed and installed the junkyard module in the inside SW corner
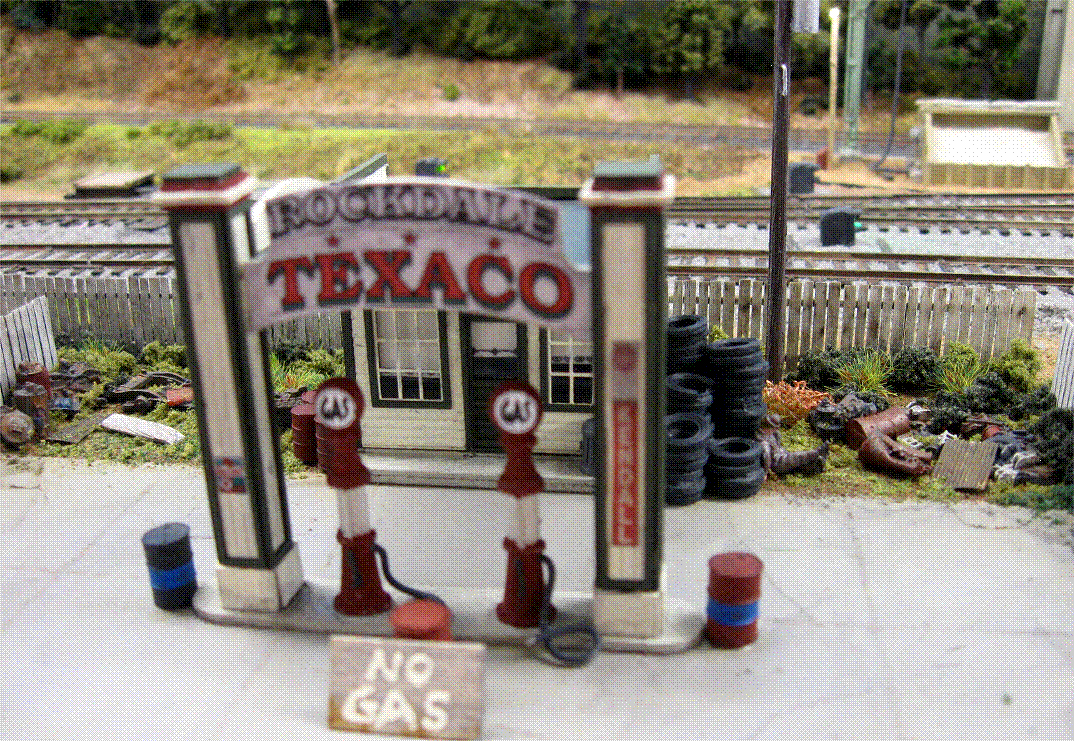
- Built the Bar Mills Shady Grove Gas Station kit, built a base,
detailed, and installed it.
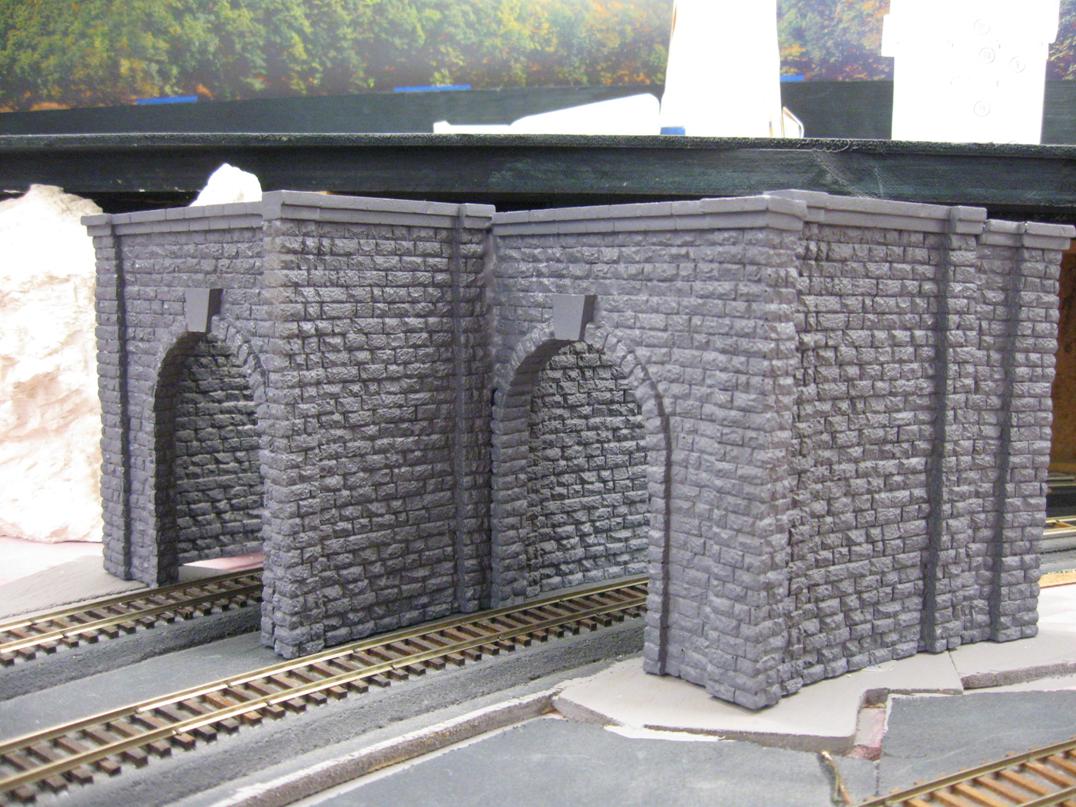
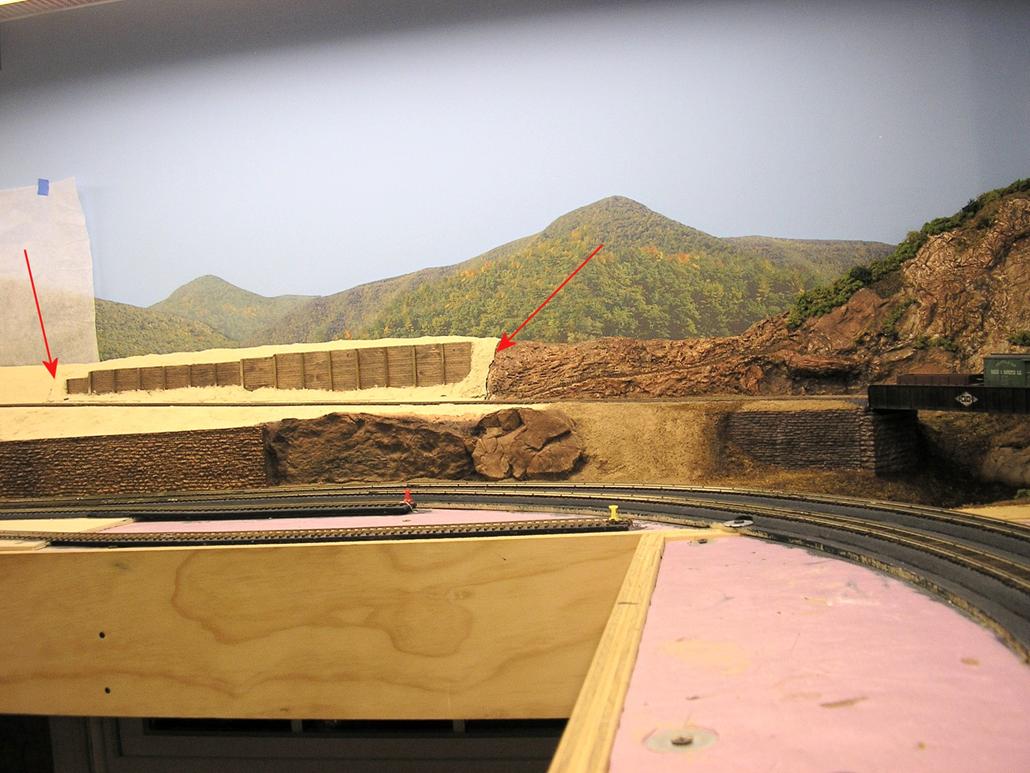
It is named “Rockdale Texaco”, after Dagny Taggart’s home town. - Assembled the NE tunnel portals; cut to fit, glued together, primed, set in place temporarily
- Lots of work on the east side:
- Made a new batch of ground goop
- Cut/fit backers with ground foam on them
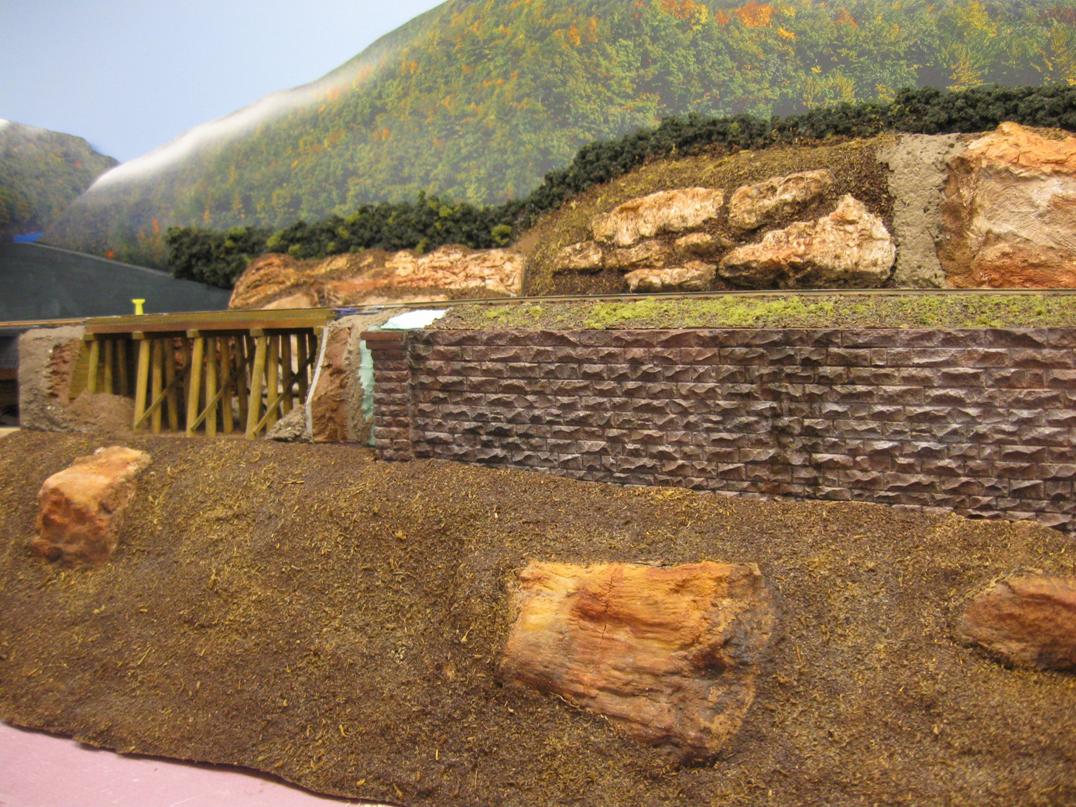
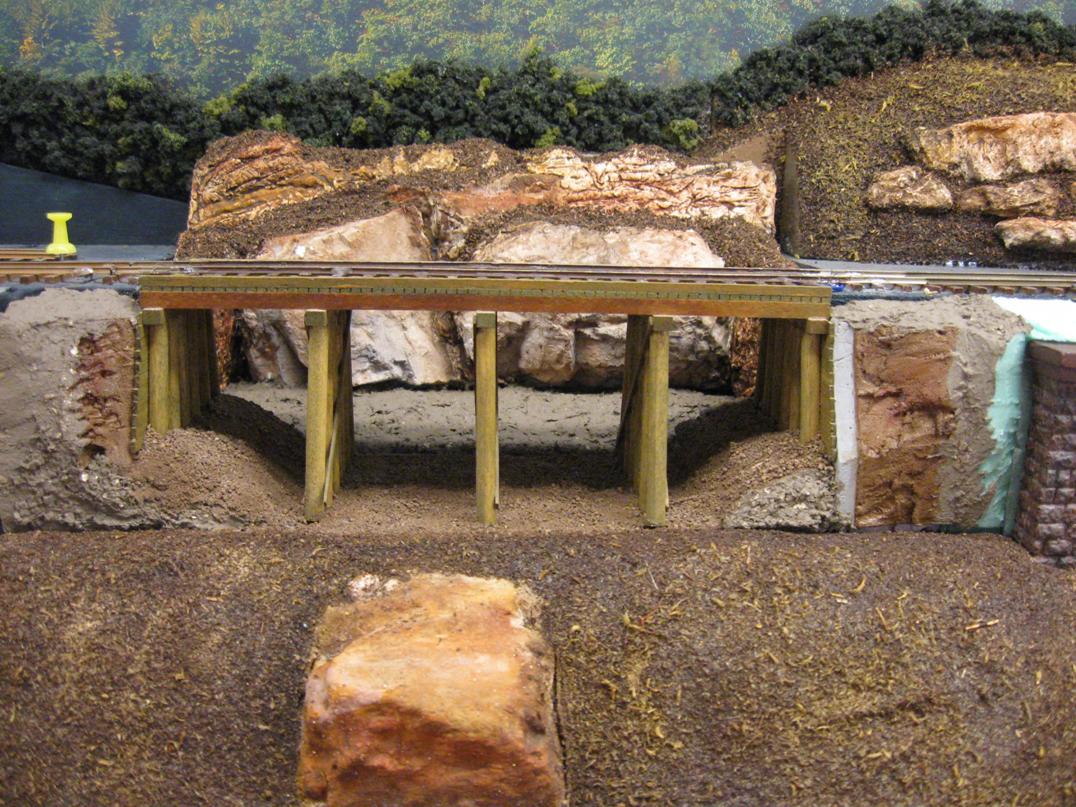
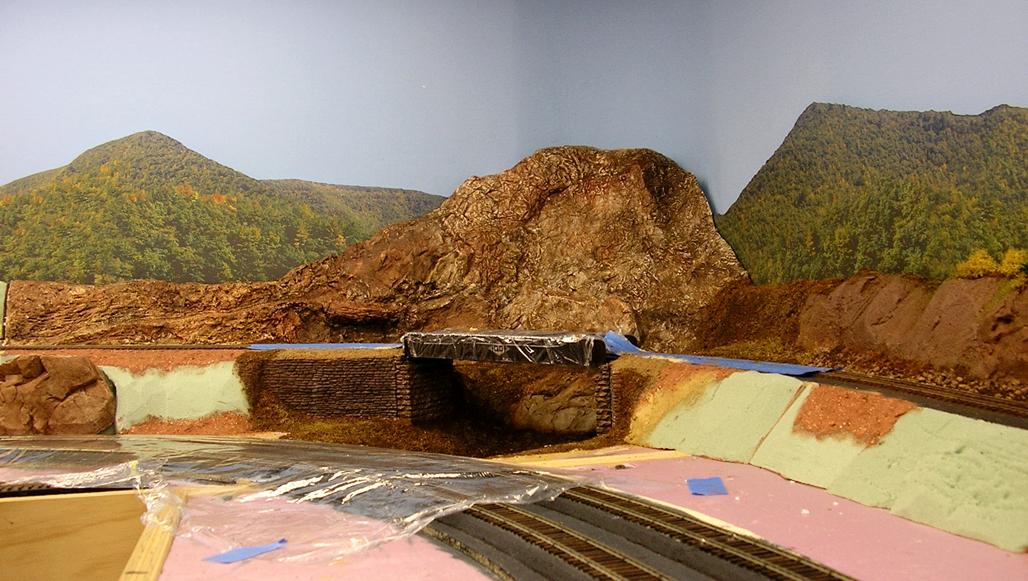
- Built the bridge gully with rock castings, foam, and ground goop
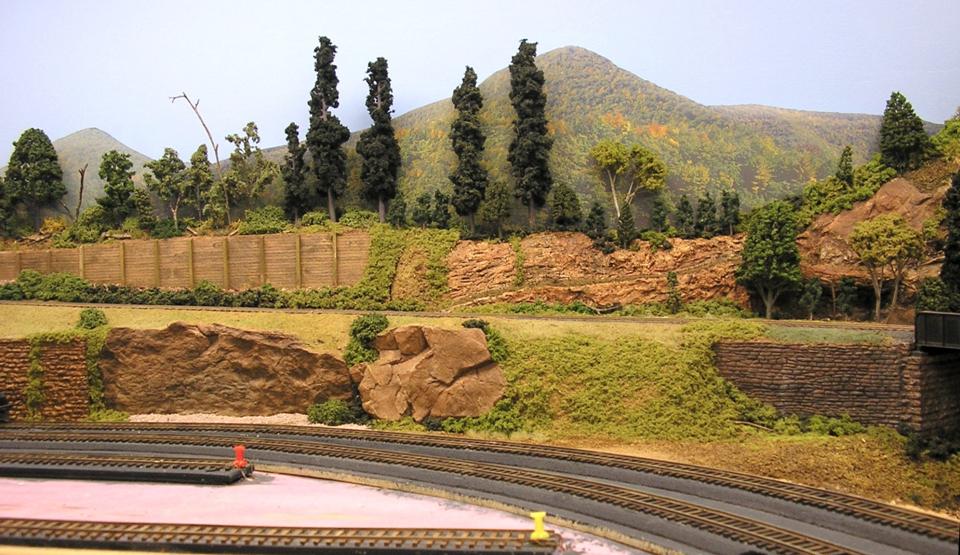
- Added rock castings and foliage to the lower SE corner hills
- Epoxied the bridge track to the bridge
- Painted more east side rails
- Built the Built-Rite models Texas Barn kit to go near the cattle loading ramp
- Cut a base for it, worked it into the scenery with ground goop
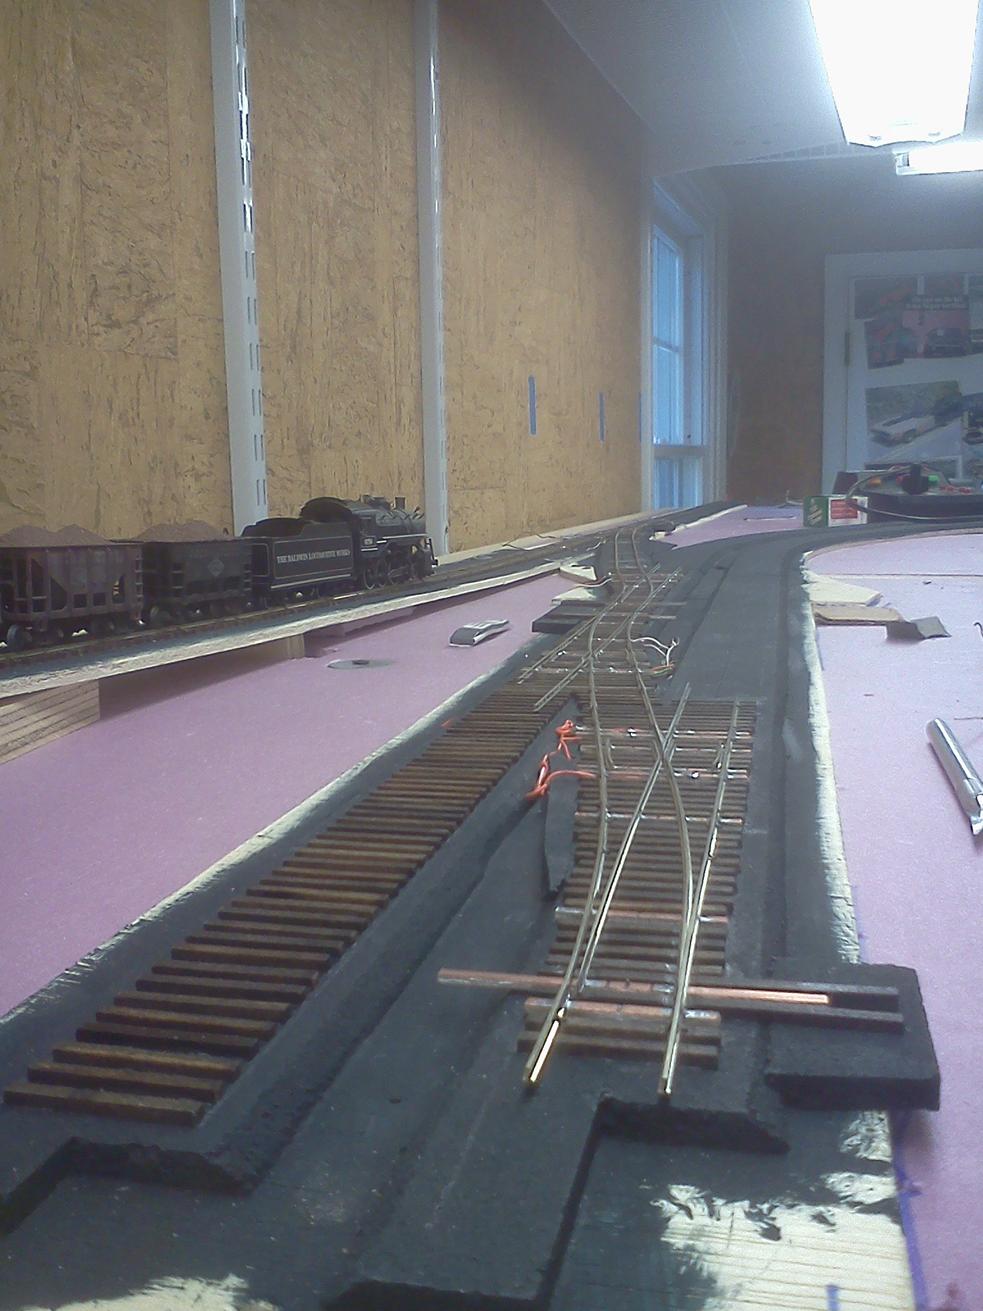
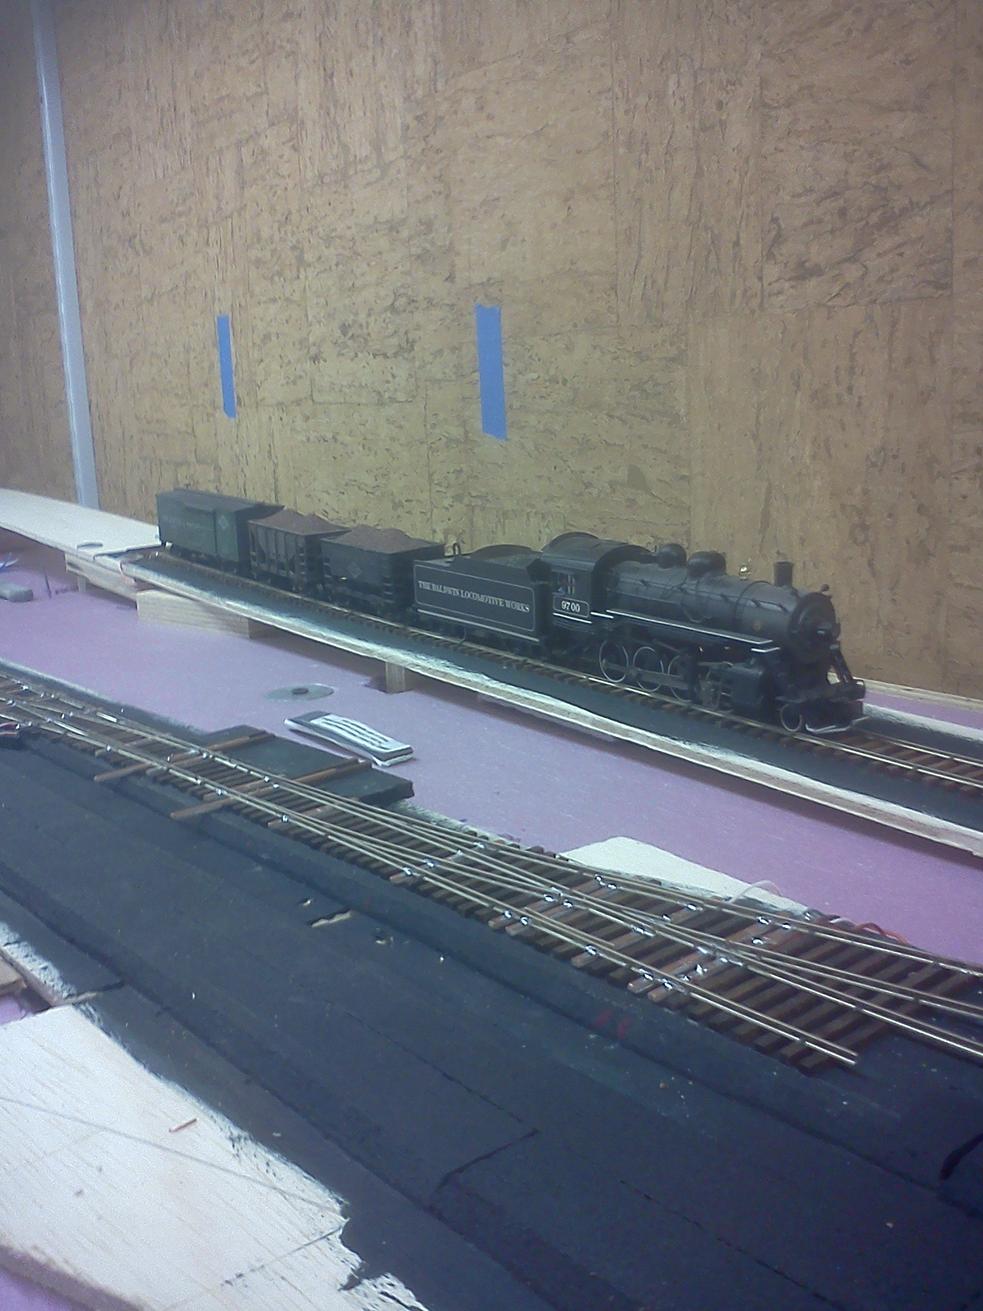
Now for some pictures, in chronological order.
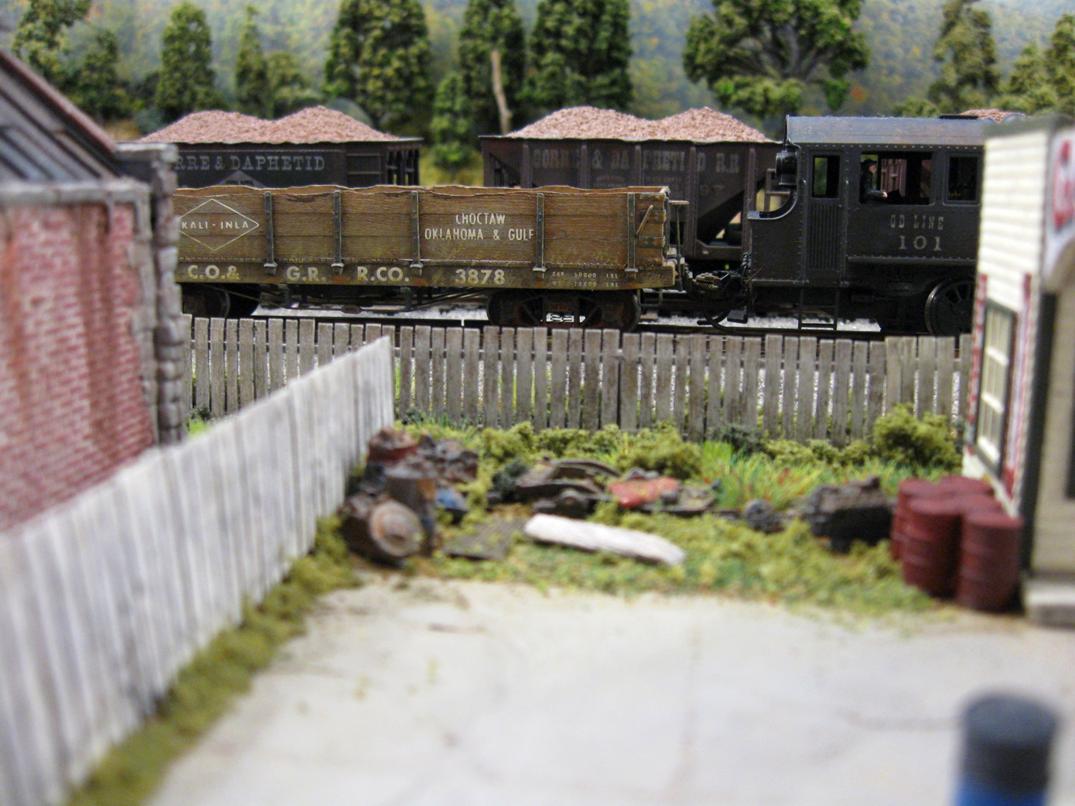
The completed (almost, needs signage) junkyard:
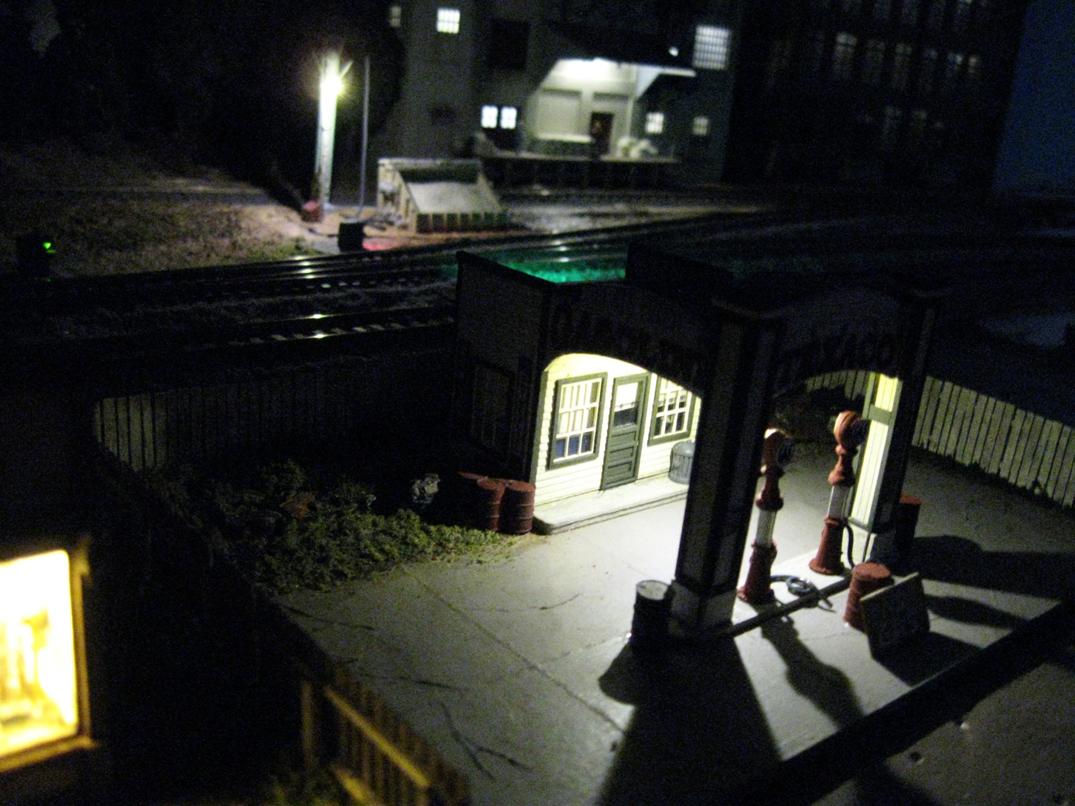
The
Gas Station:
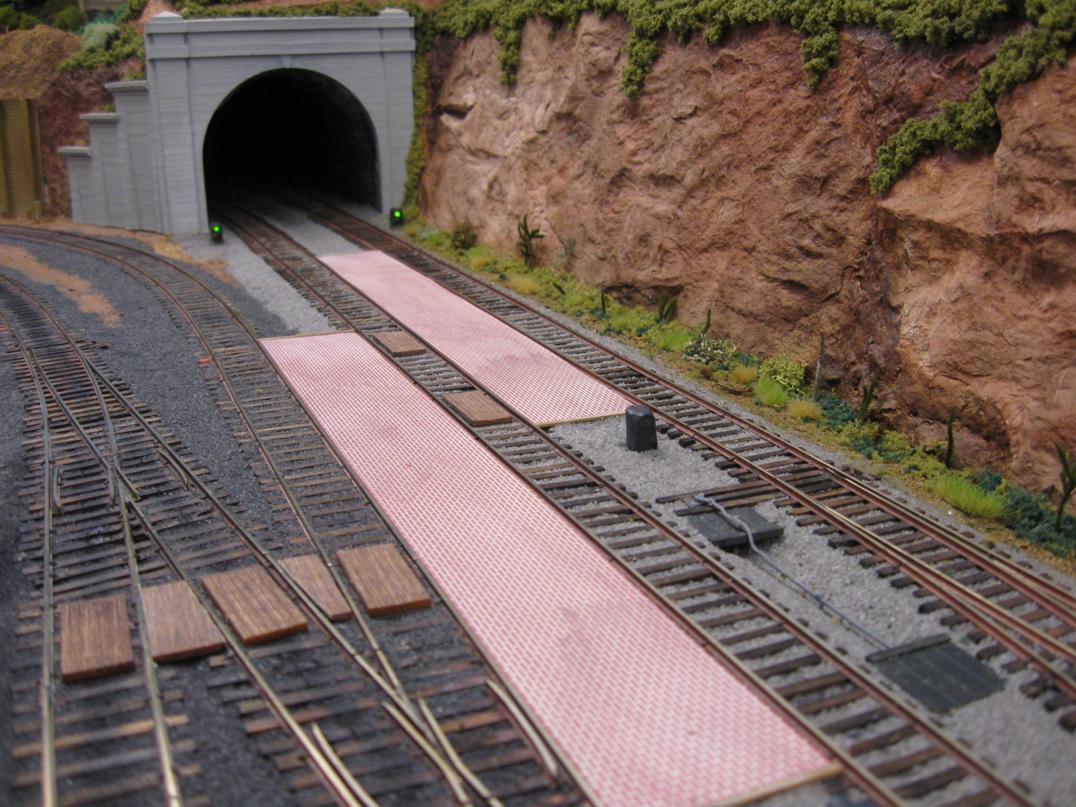
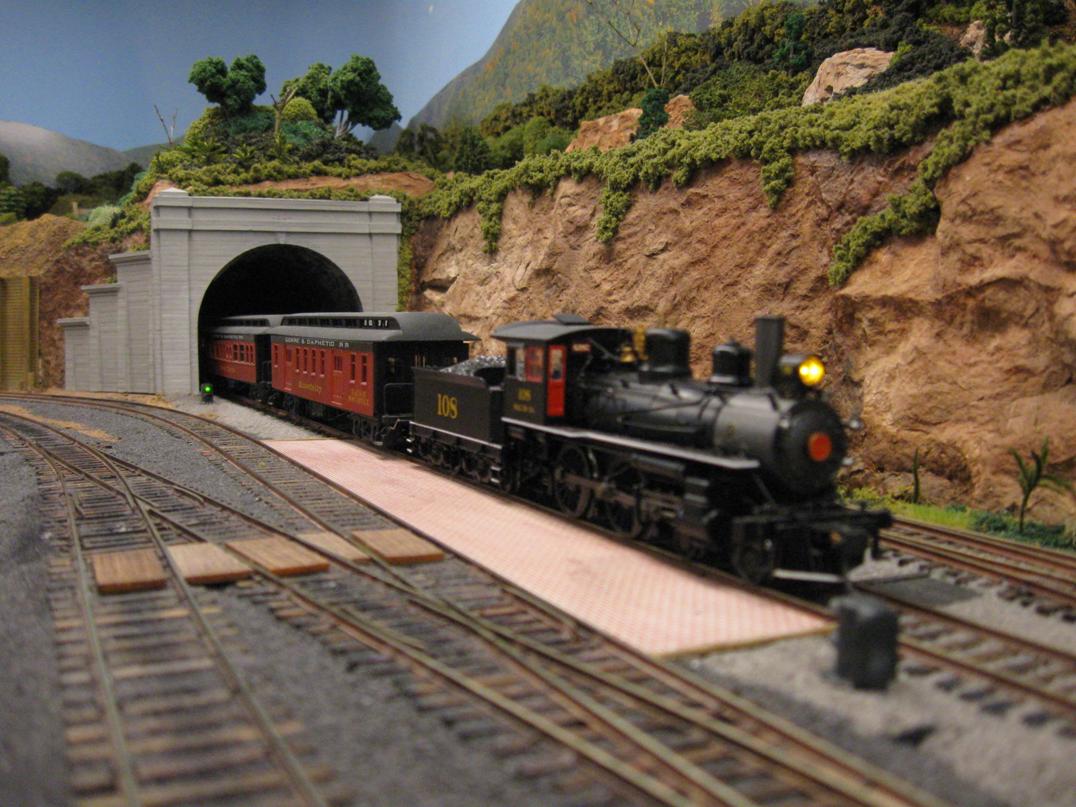
The NE tunnel portals:
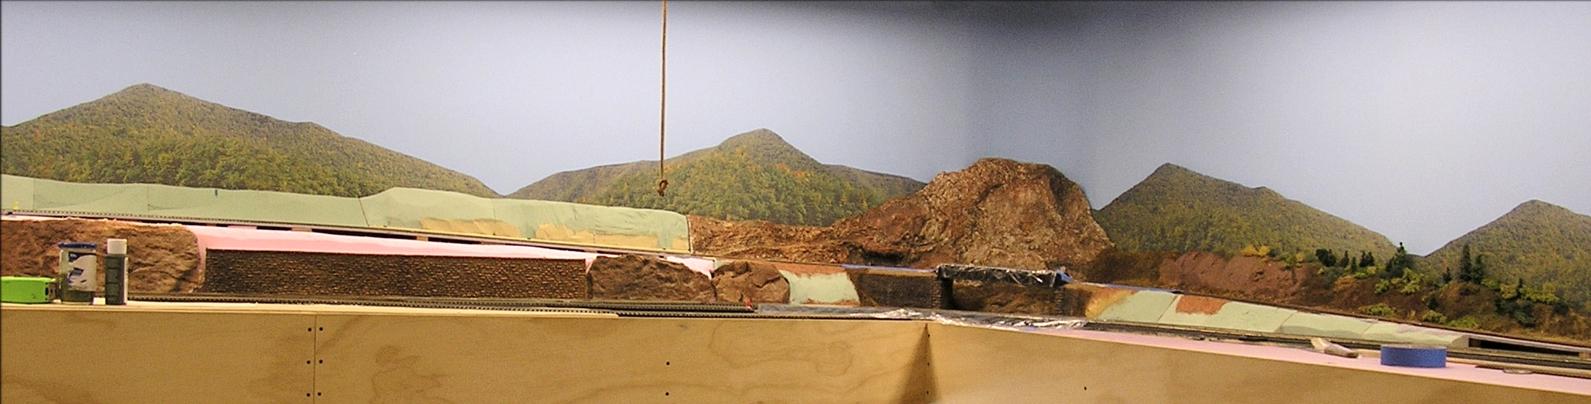
East-side
Scenery work:
The “Texas Barn”:
October 2018 through June 2019
Progress:
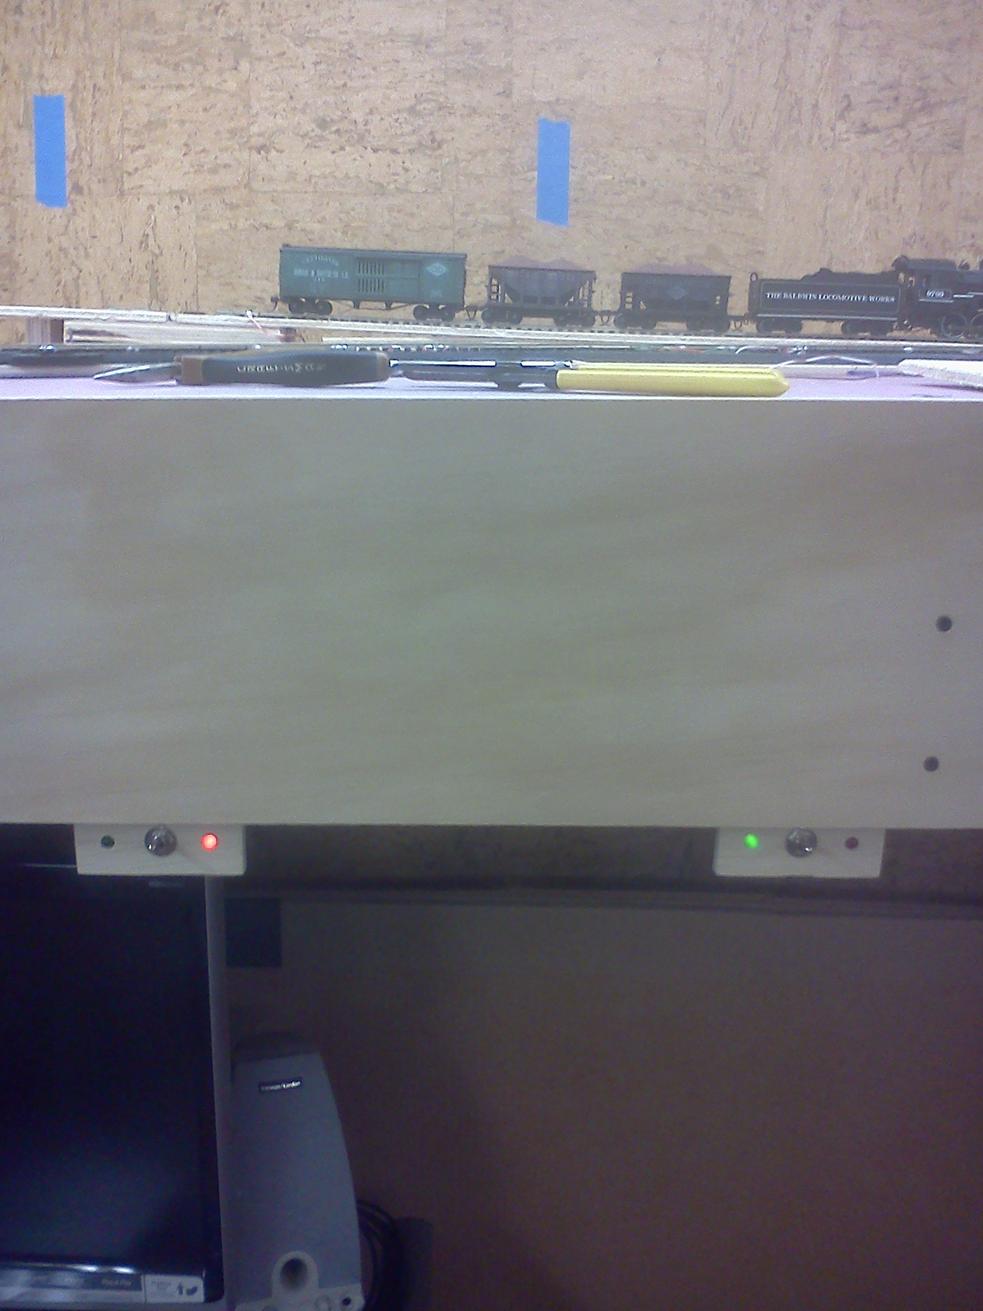
- “Wrong side of the tracks”: upgraded buildings with electric service, chimney caps, ground cover, etc
- Added Mrs. Spumoni
- Replaced two 3-aspect dwarfs which had gone bad due to reverse over-voltage, added reverse polarity protection diodes
- Scenicked the SE corner “tunnel cover” hatch and environs
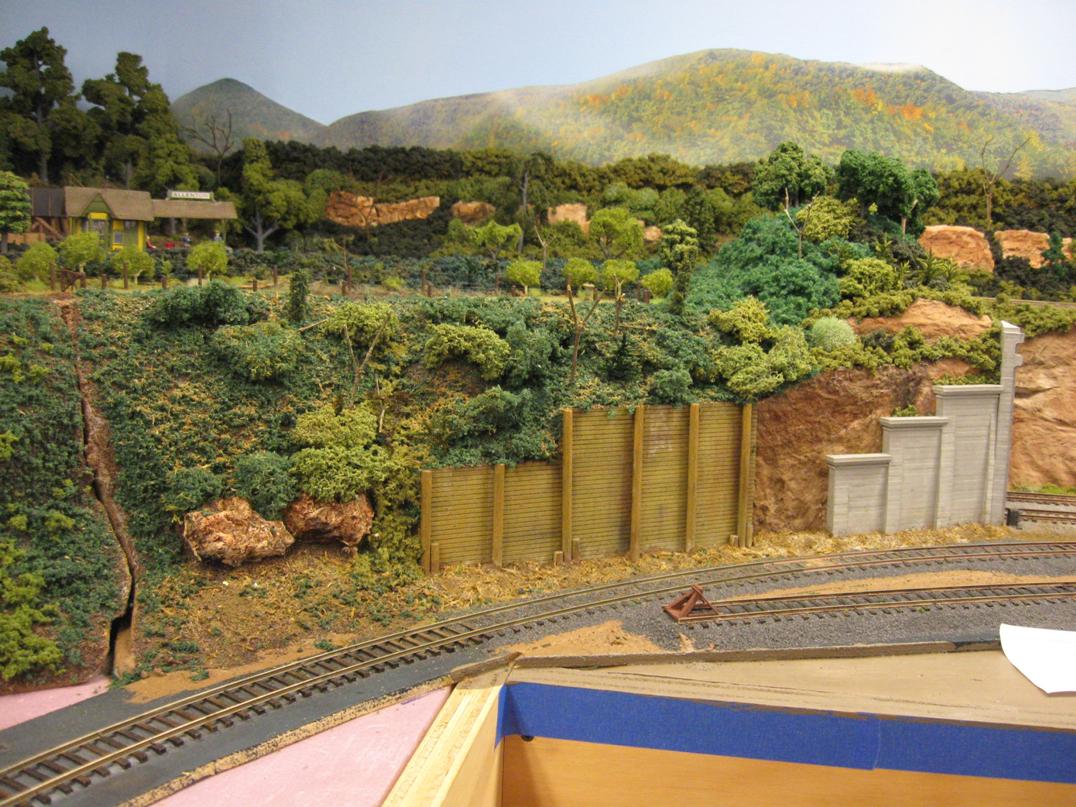
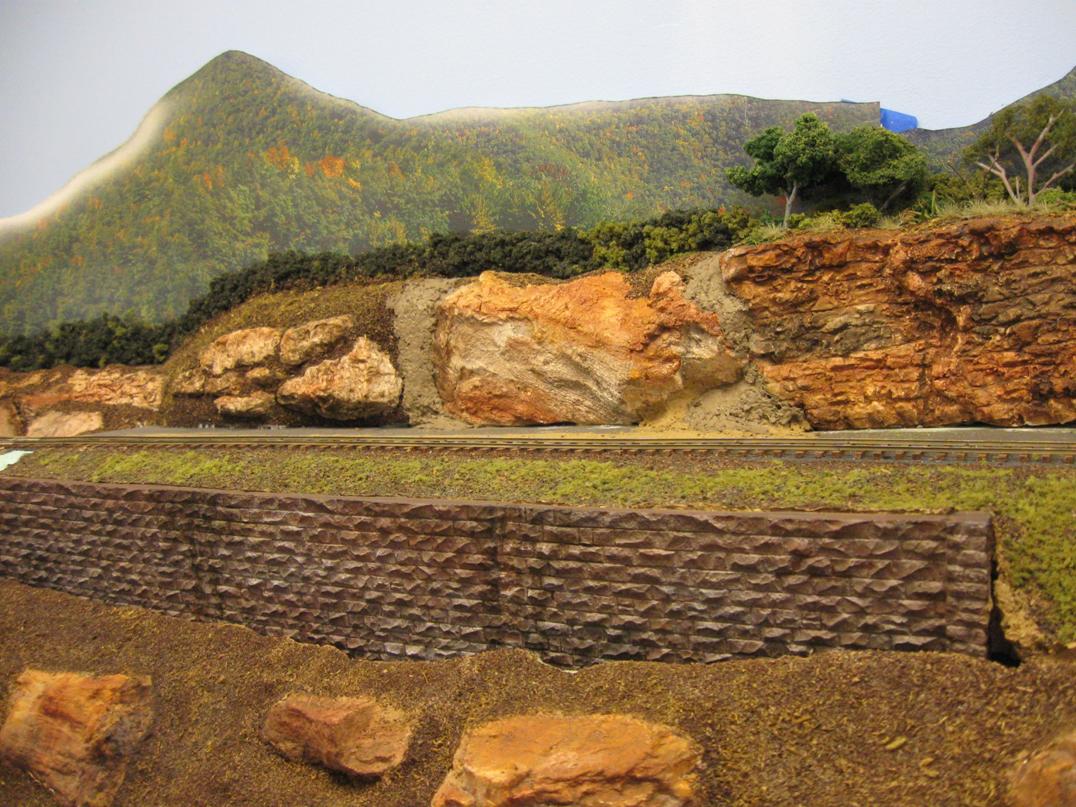
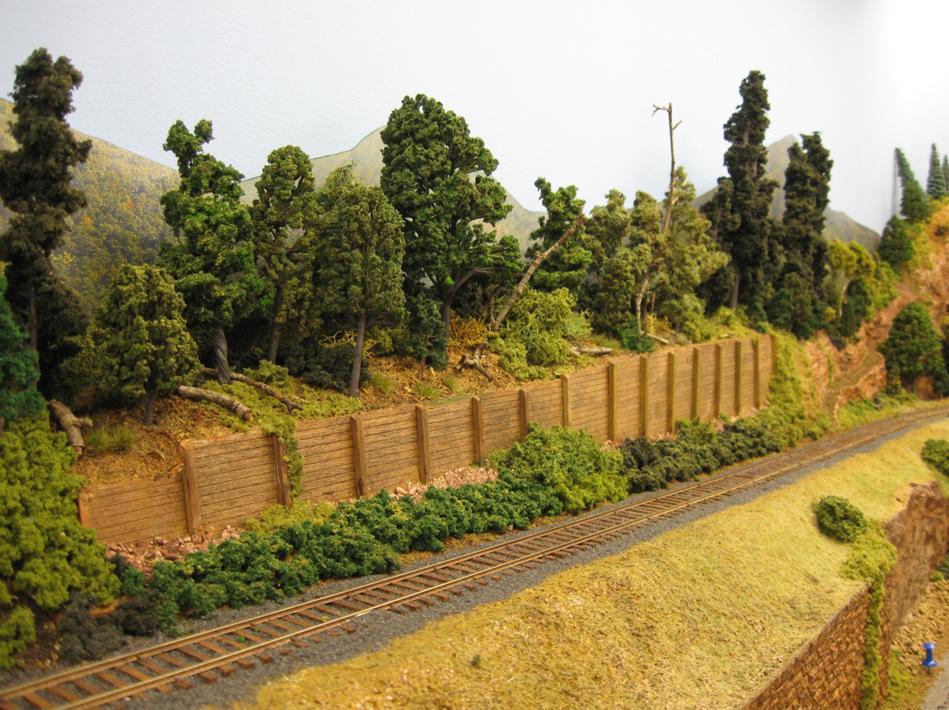
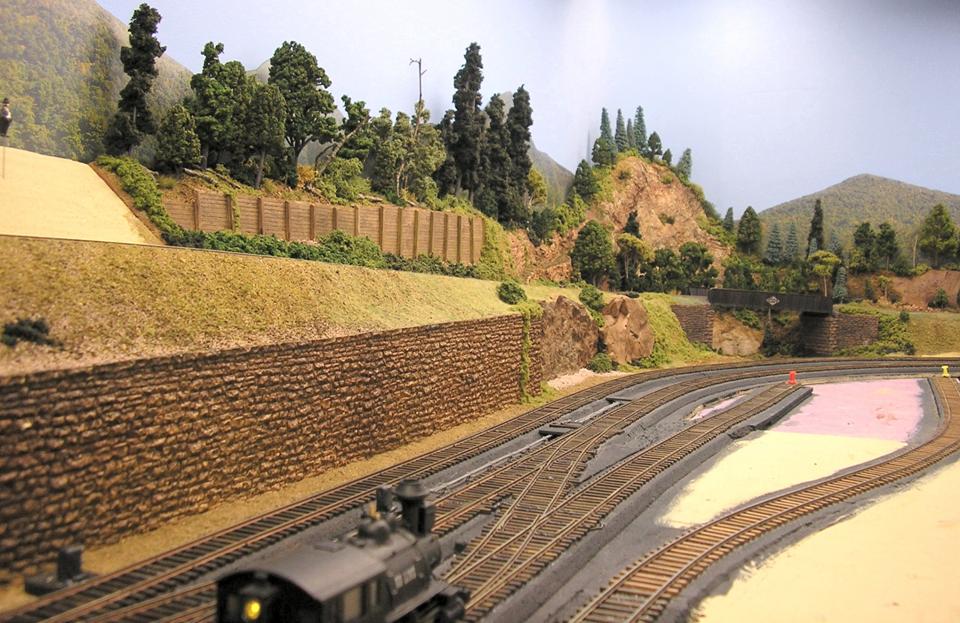
- Built the east side wall, painted and installed it
- Added lighting to the caboose facility
- Added rock castings to east-side tunnel hatch
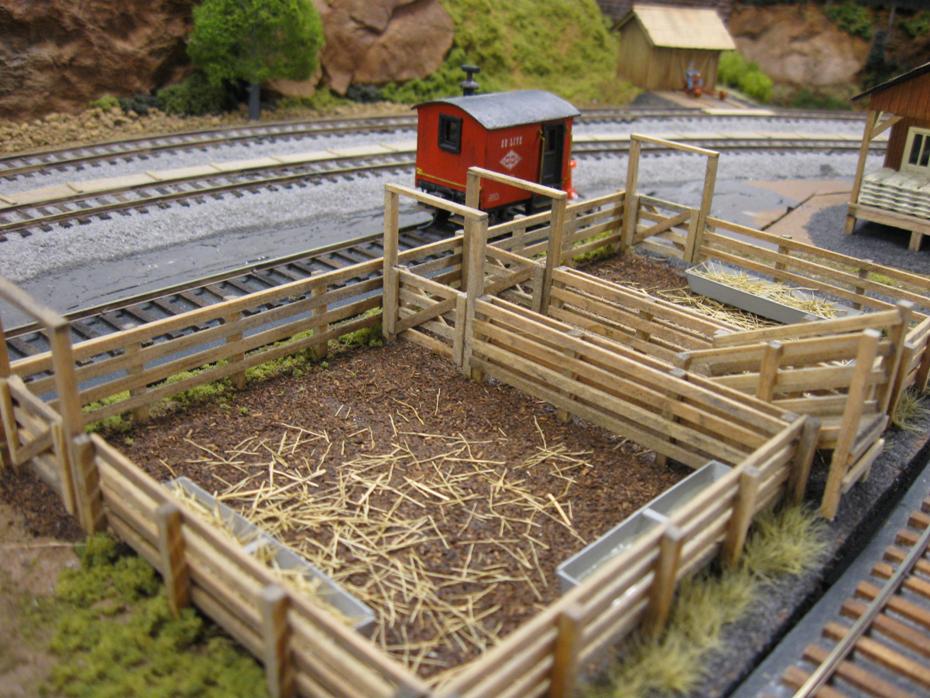
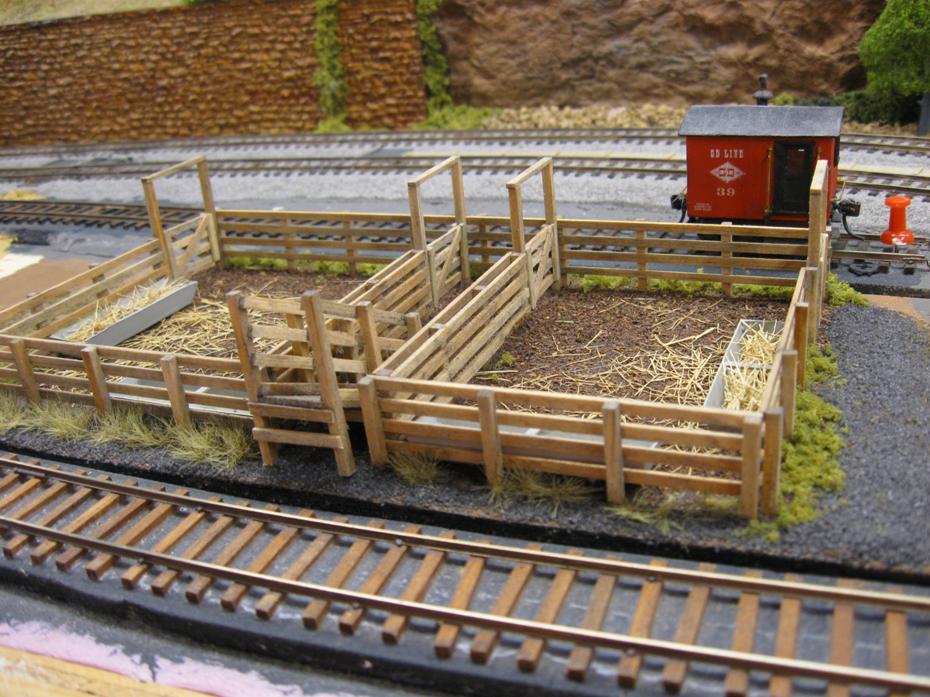
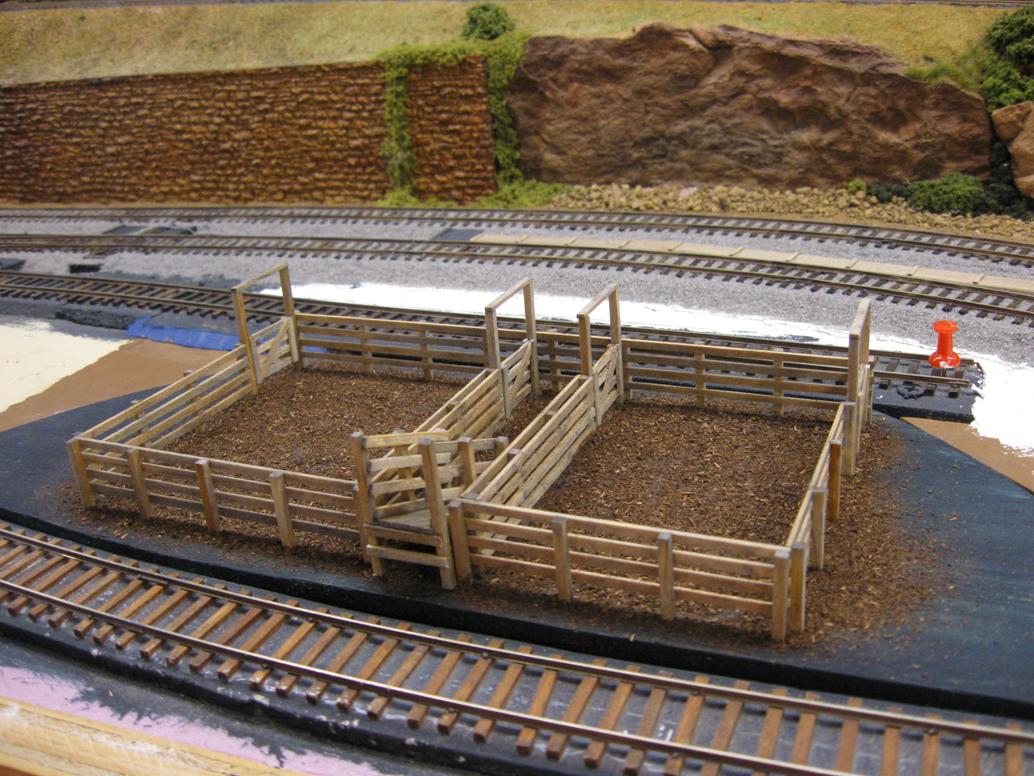
- Built and installed a cattle loading ramp for the branch line
- Added ground goop in front of, and ballasted the cattle pen spur
- Installed branch line cattle grazing fence, installed a water hole
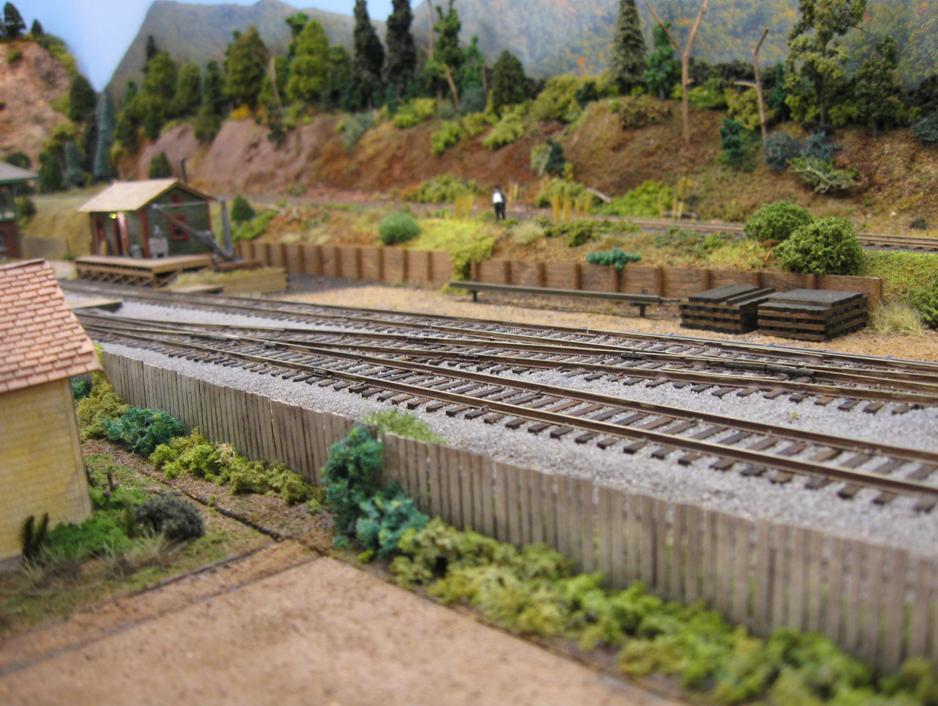
- Added brick station platforms to the south end main line tracks, and wood “crossovers”
- Added base pieces around houses, added a base for the junk yard (Mack’s)
- Added weeds and tress to the branch line cattle grazing area
- Installed several track-end bumpers
- Started building “Mack’s” junkyard buildings
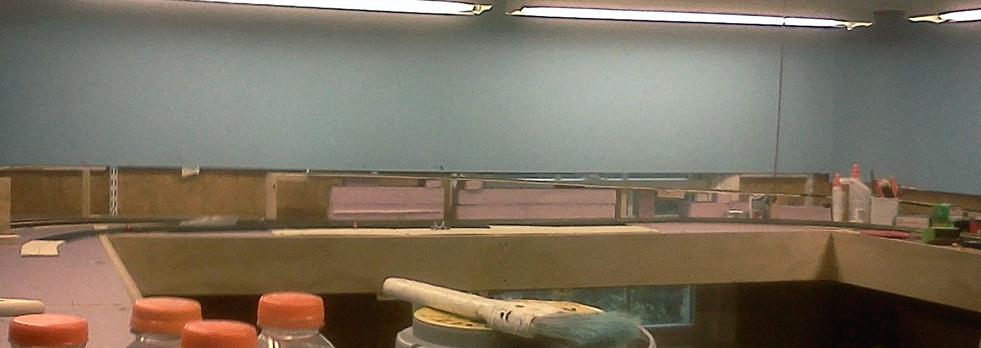
First, some general shots:
Next, some shots of “Mrs. O’Malley’s Place” and environs:
Next, some shots of the SE corner:
There is wire between the fence posts, but it’s hard to see:
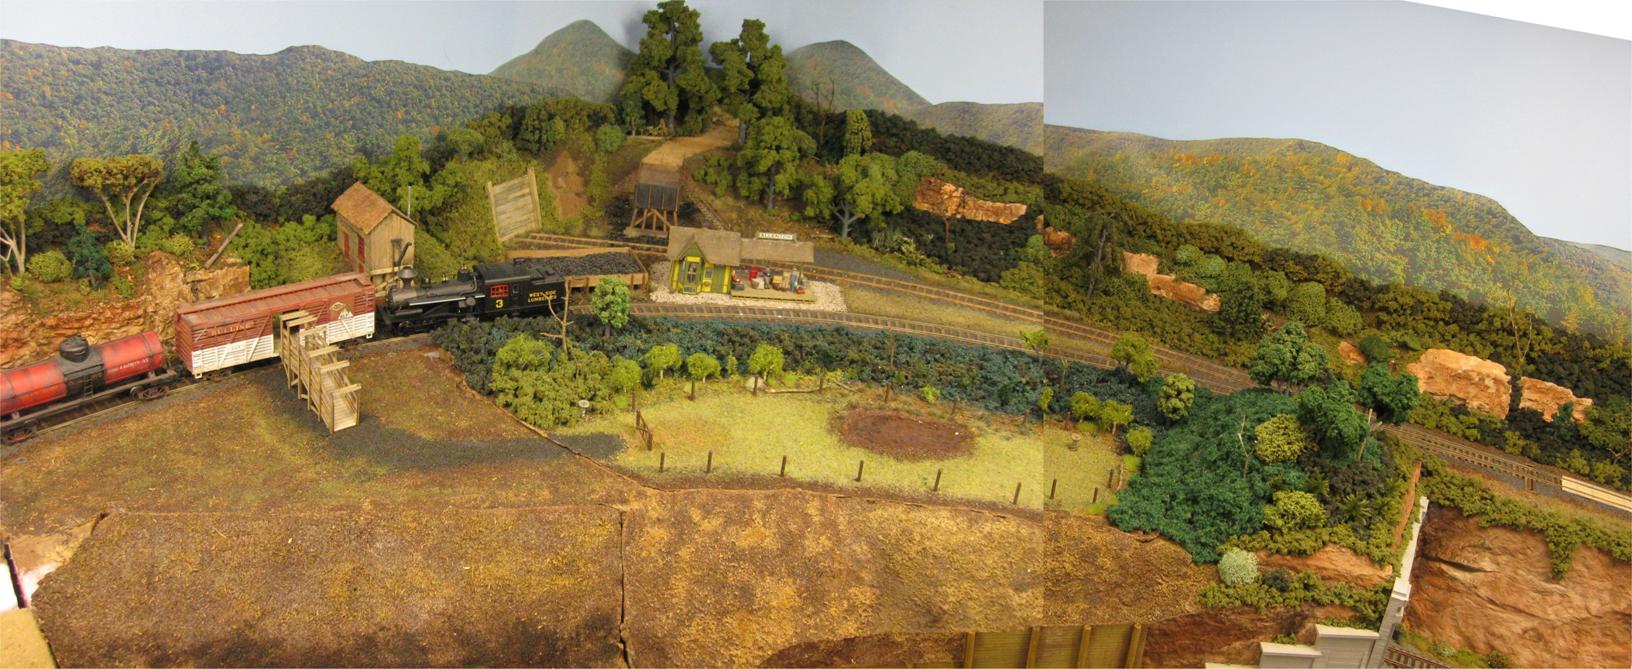
The cattle loading ramp:
An overview of the whole area, half-ass patched together:
The
east-side retaining wall and rock castings:
The station platforms on the south end main line:
Lighting
added to the caboose facility:
March
2018 through October 2018
Progress:
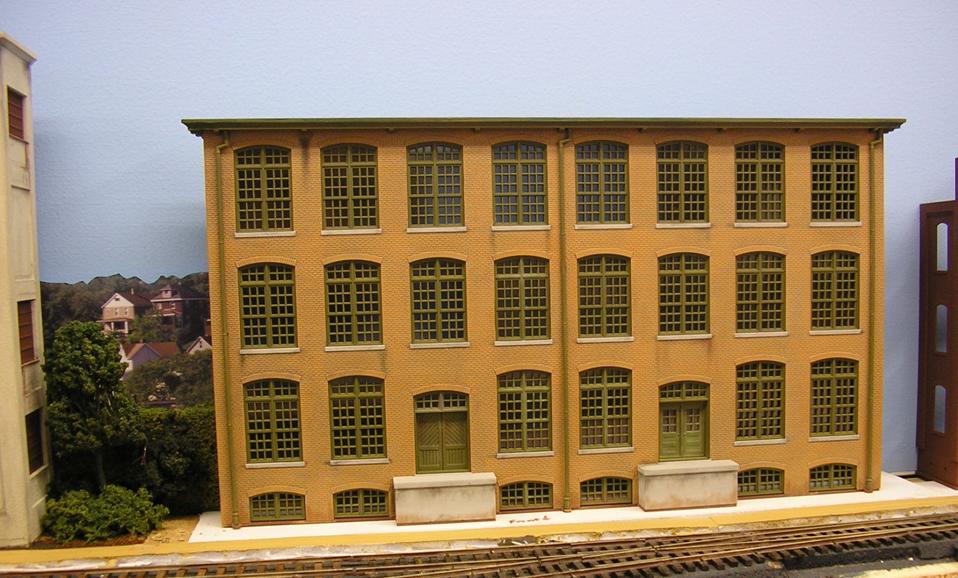
- Built “Mrs. O’Malley’s Place”, a vintage Dyna-Models structure with full interior details
- Cleaned and lubed all locos, cleaned all the track, cleaned and organized the train room for…
- Had my NMRA AP (Achievement Program) inspection on 7/17; was awarded:
- Engineer – Civil (trackwork)
- Engineer – Electrical
- Master Builder – Scenery
- Golden Spike
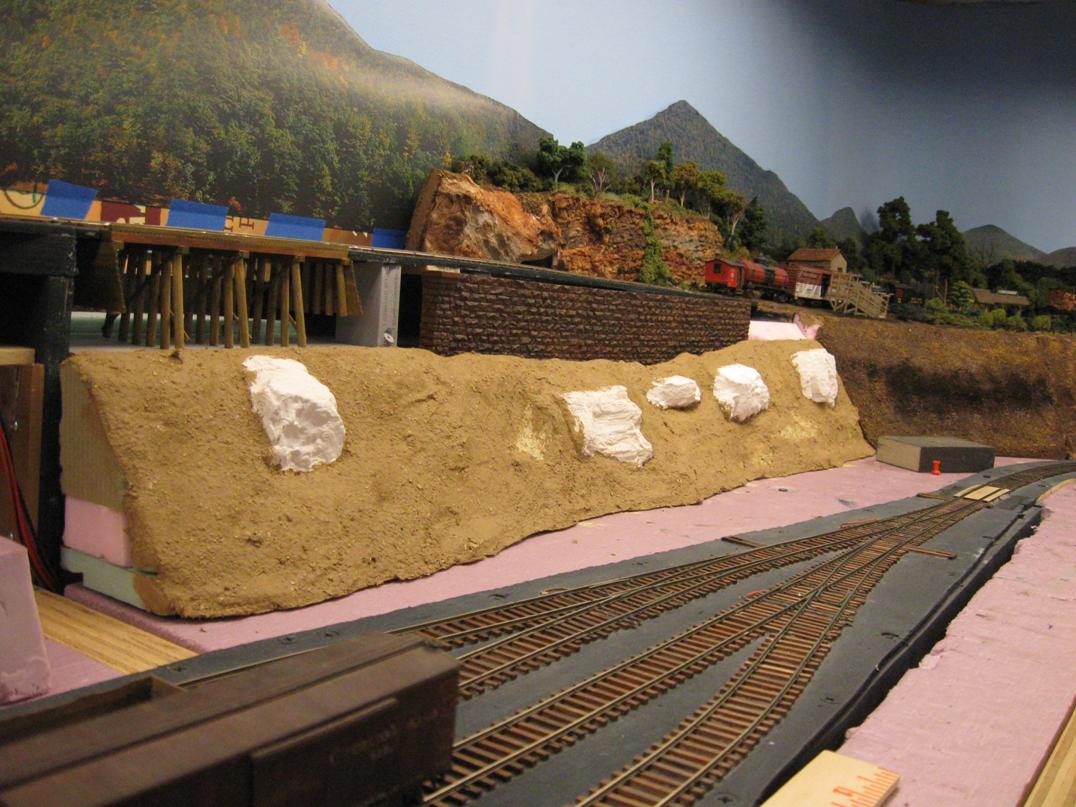
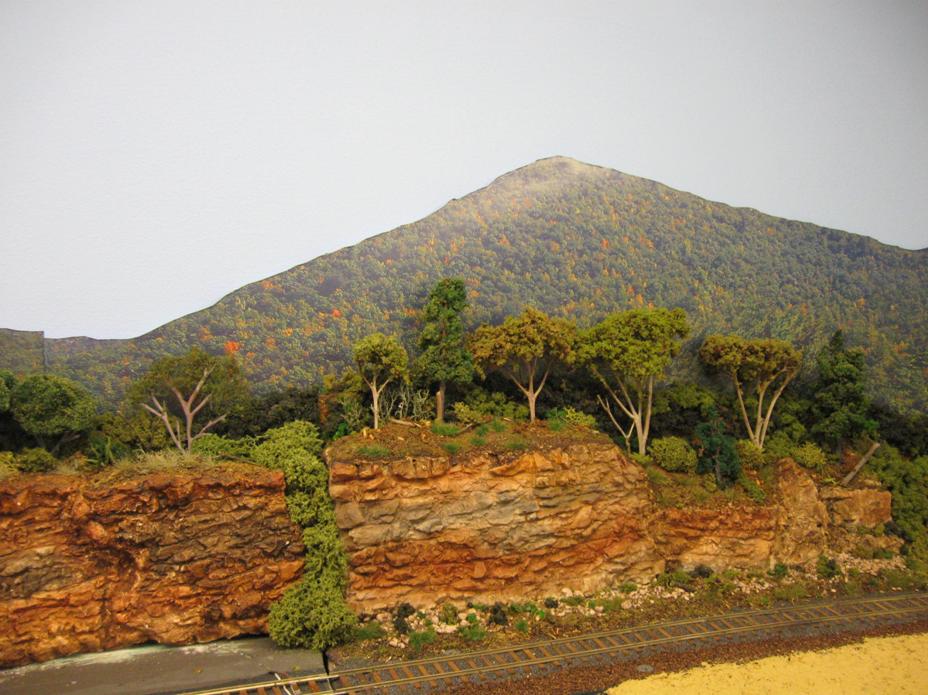
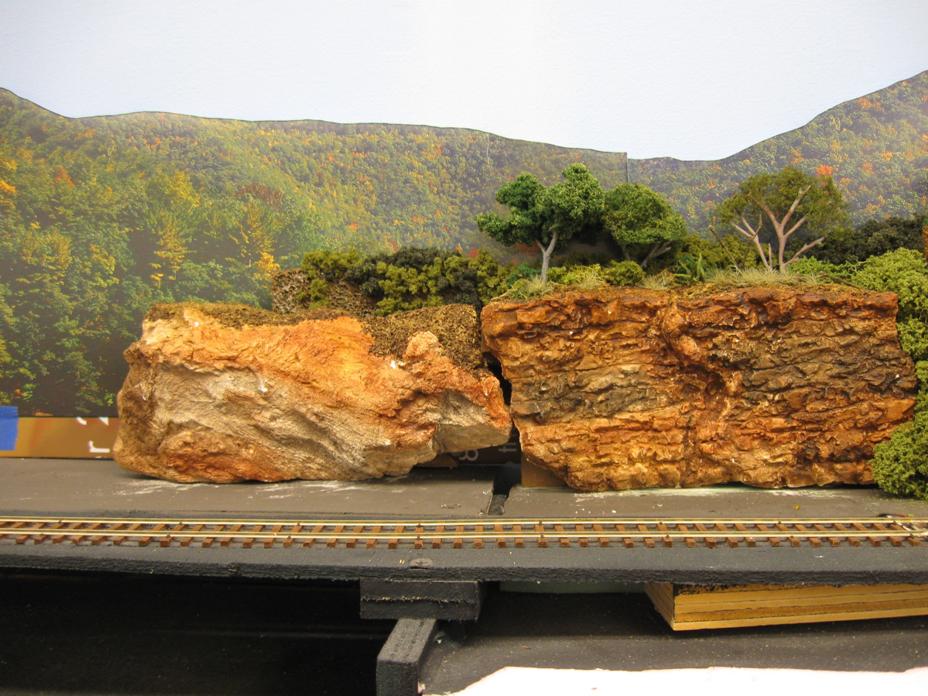
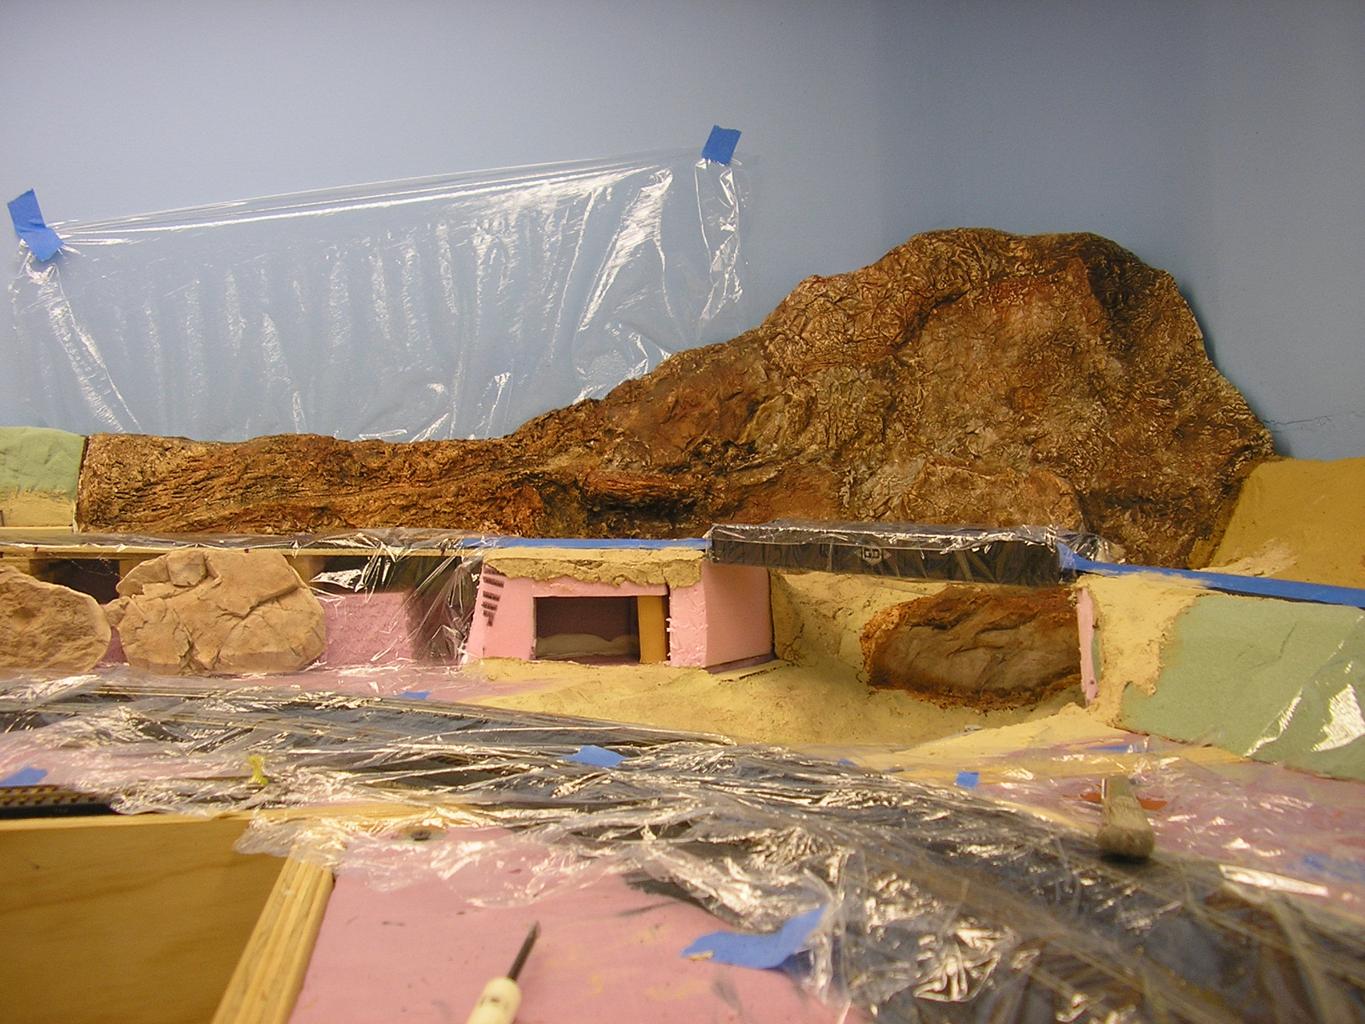
- Added more rock castings to the east side, stained them and the existing rocks darker/better
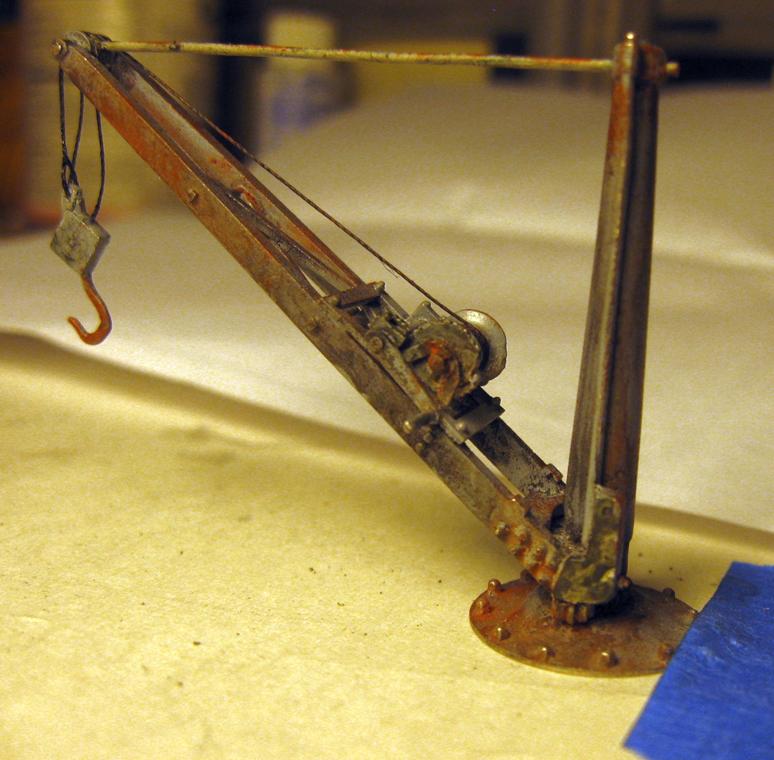
- Added a crane to the supply shed
- Added scupltamold, ground goop to the SE corner tunnel hatch, in preparation for scenicking it
- Put down ground goop and basic dirt in many areas
- Flocked some lichen for current and future use
- Added all the east side backdrop photos
- Built troughs for the livestock pen, assembled the Bar-Mills “Insta Fence”
- Cut masonite bases for the west-side structures
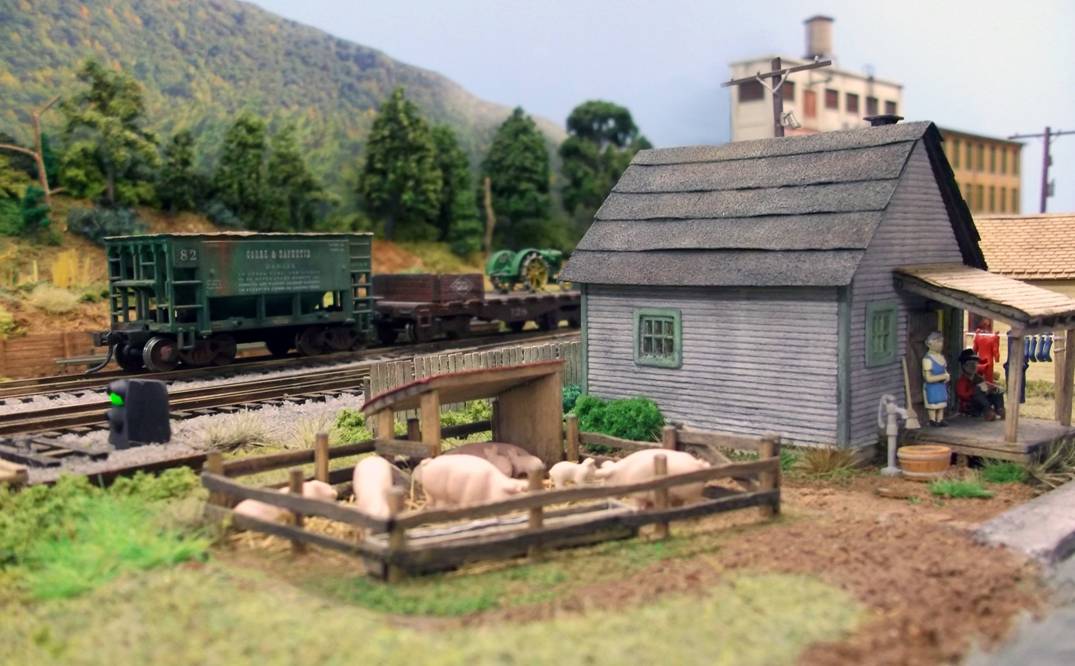
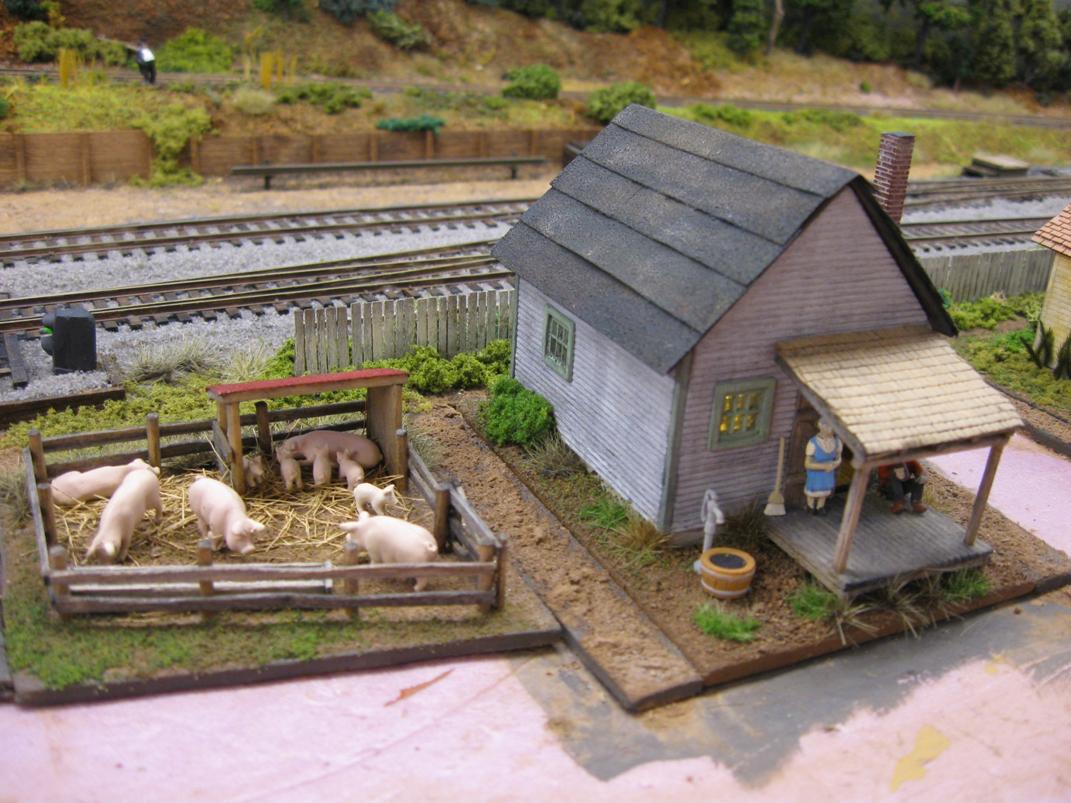
- Built a pig pen for Mrs. O’Malley
- Ballasted the branch line and connector to the turnout, ballasted the main line almost around the NW curve
- Built a “rail rack” for the maintenance area
- Added truck washers to a couple of cars to fix coupler height issues
- Built the LaserKit “West End Shack” kit, added lighting and figures
- Made a new batch of “ground goop”, prepped the west side for ground cover
- Added ground cover to the west side, between the main and branch, almost up to the sanding tower
Some
excerpts from “The Dispatcher”, the newsletter of the Philadelphia Division of
the NMRA.
Dave
Messer and Earl Paine visited to review my work for my AP certificates.
Next, some shots of “Mrs. O’Malley’s Place” and
environs:
The
“West End Shack” and environs:
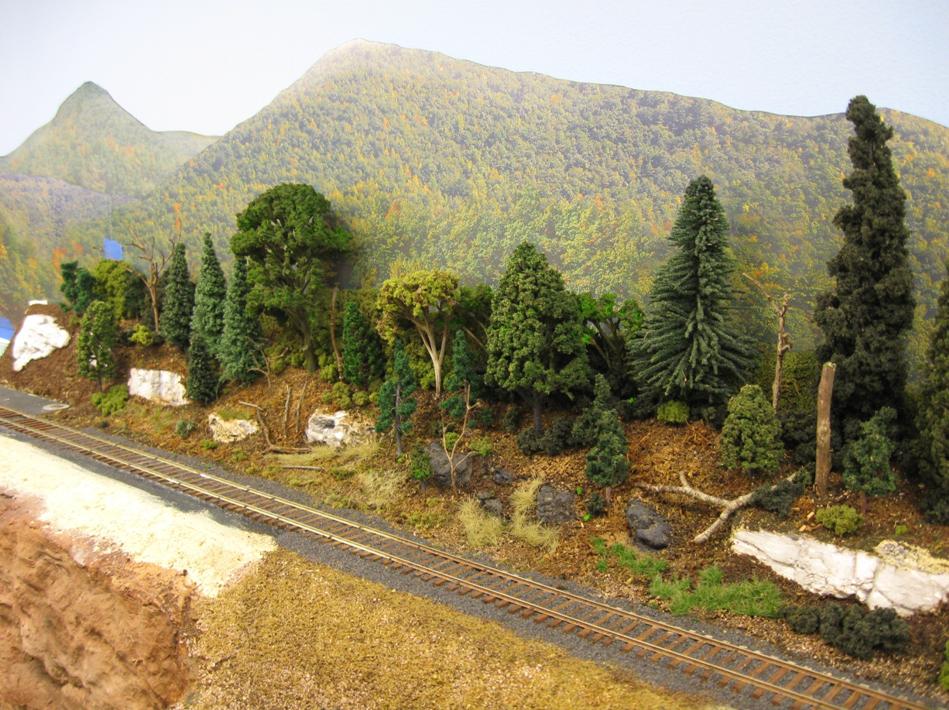
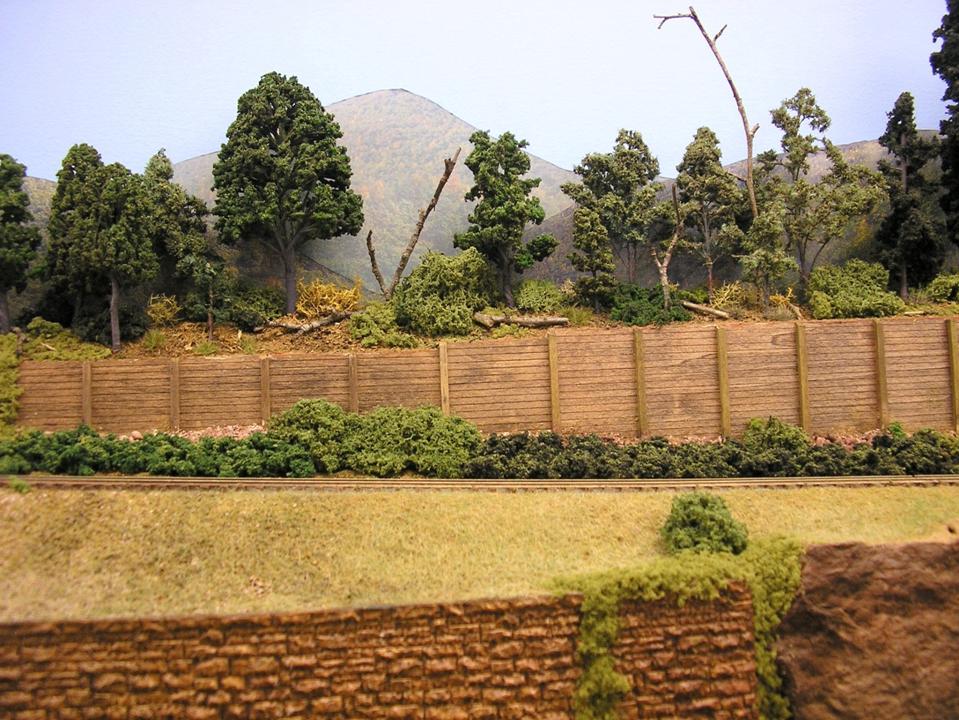
The east-side scenery and backdrop additions (work in progress):
The livestock pen improvements:
Various
west-side scenery work:
Note the crane added to the supply shed in the background.
Note the “rail rack” and tie stacks:
Some of the matte-medium is still wet in this photo:
Another view with the crane in evidence:
A year since I last updated this? Where does the time go…
Progress has slowed, but continues:
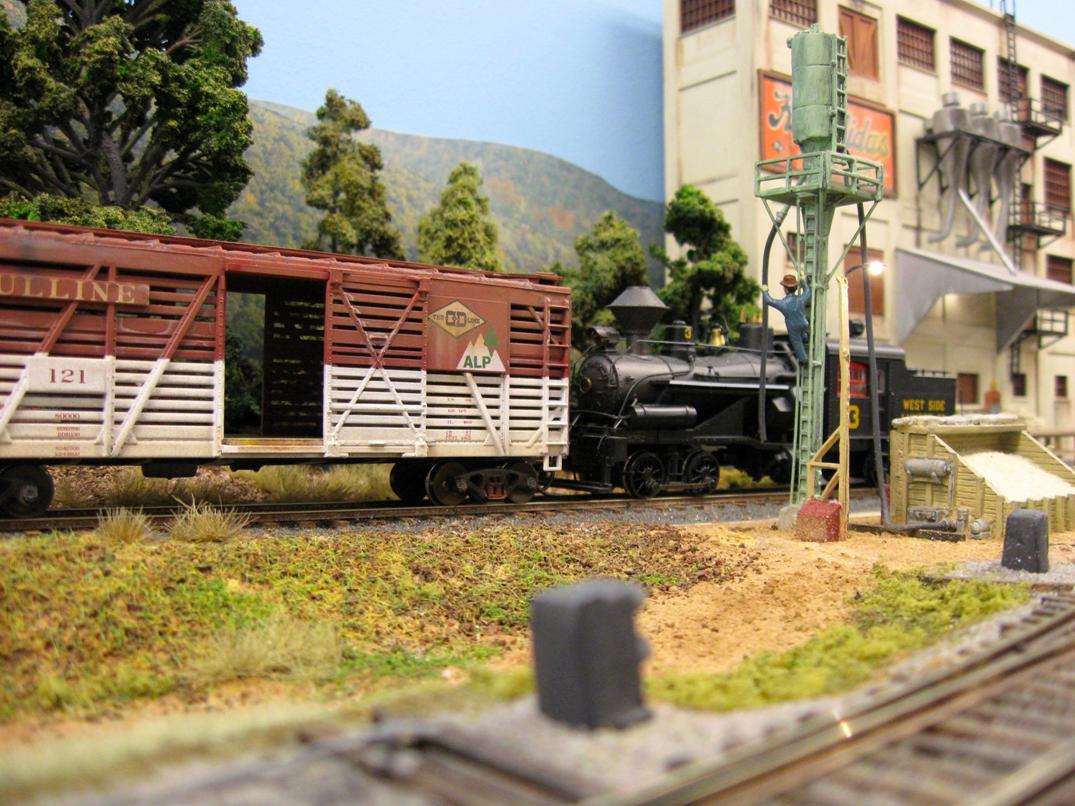
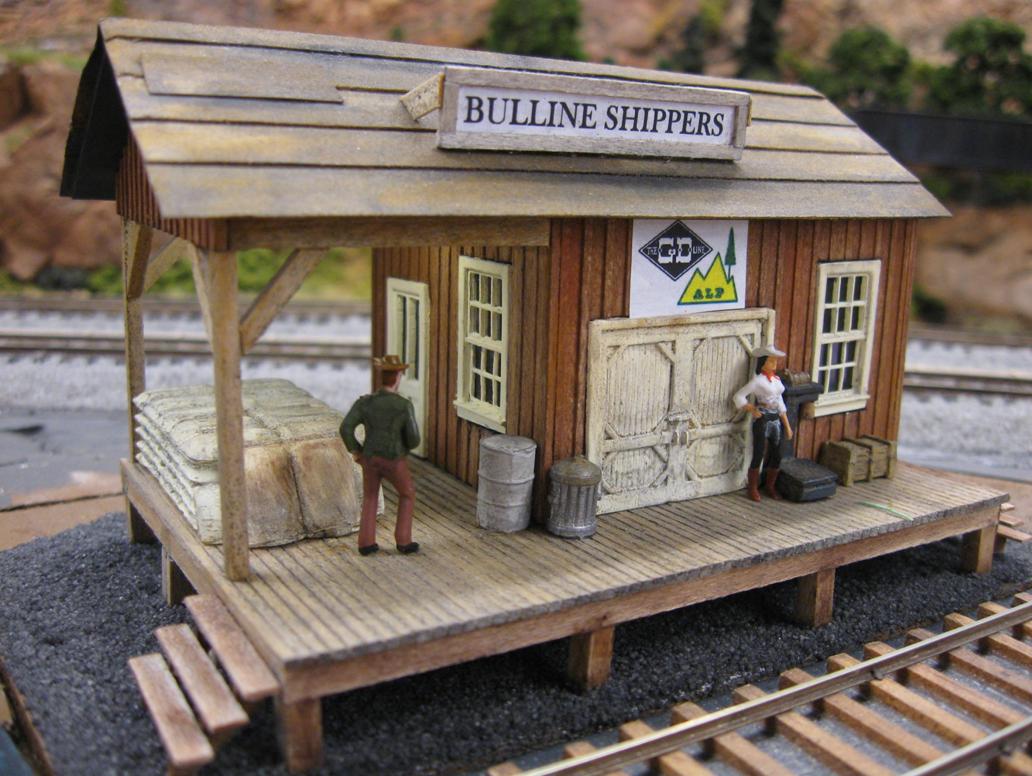
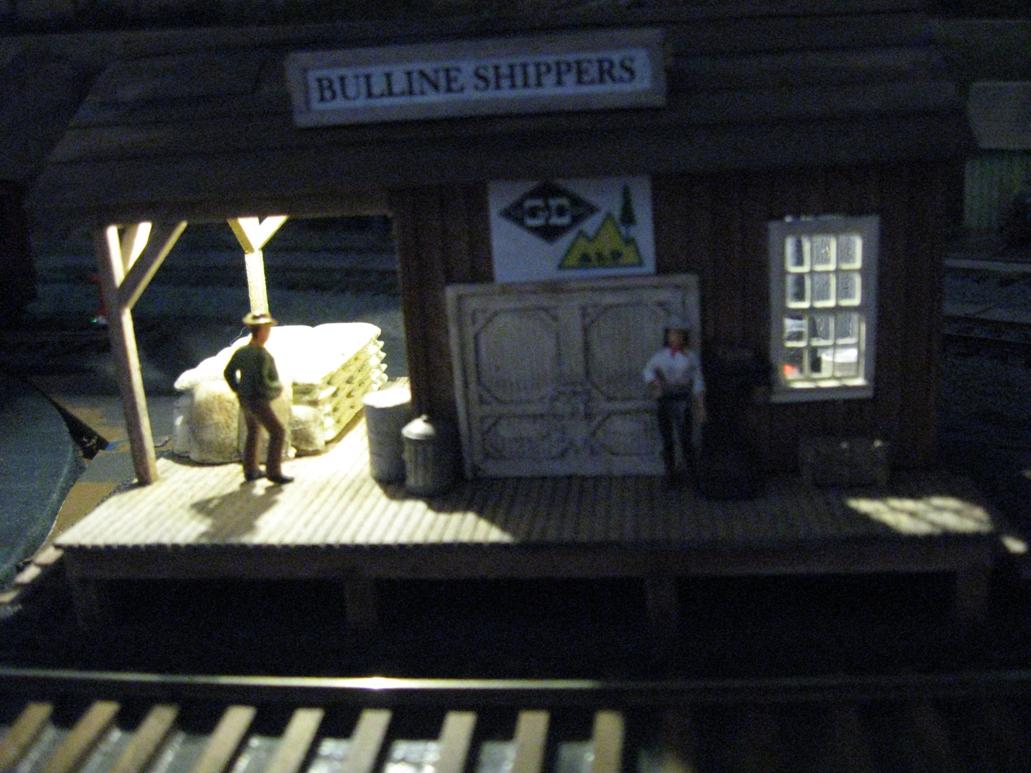
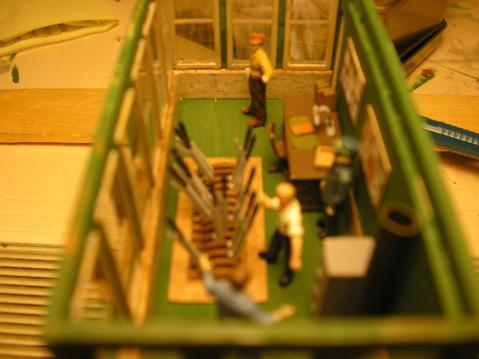
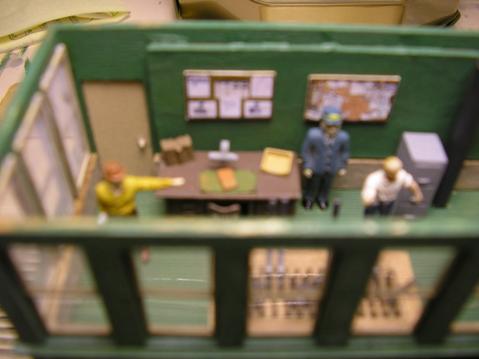
- Finished Bulline office; added lighting, a base, signage, details, and figures.
- Finished, made a base for, and installed the caboose facility (still needs ground cover)
- Added lighting infrastructure for multiple structures
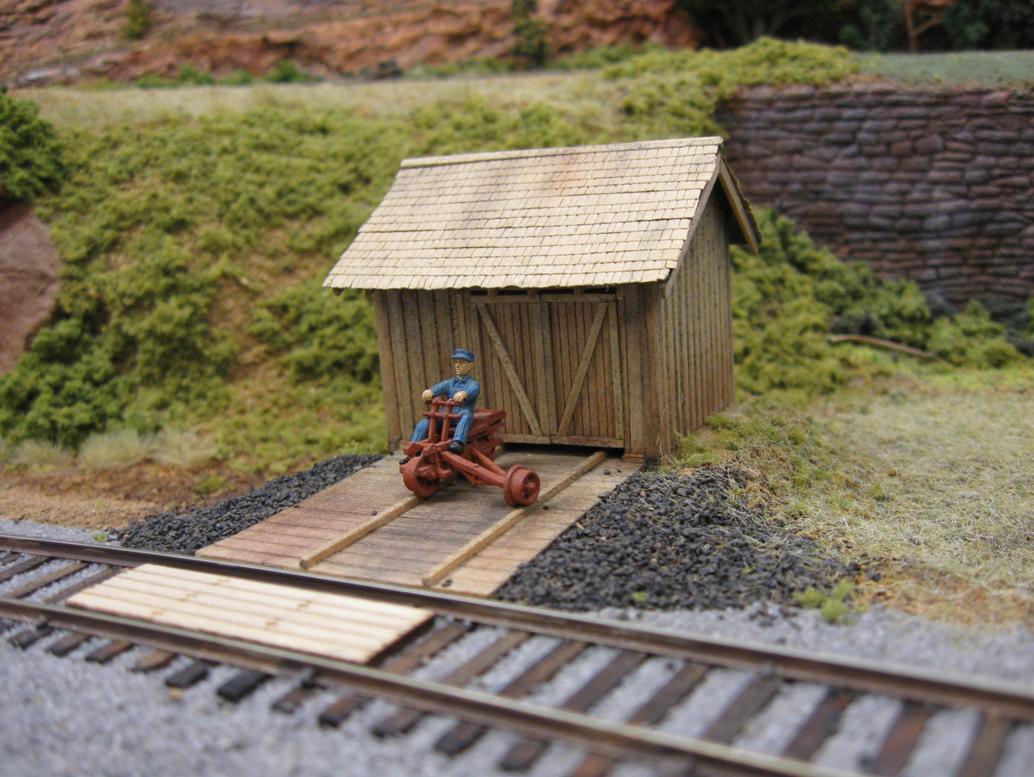
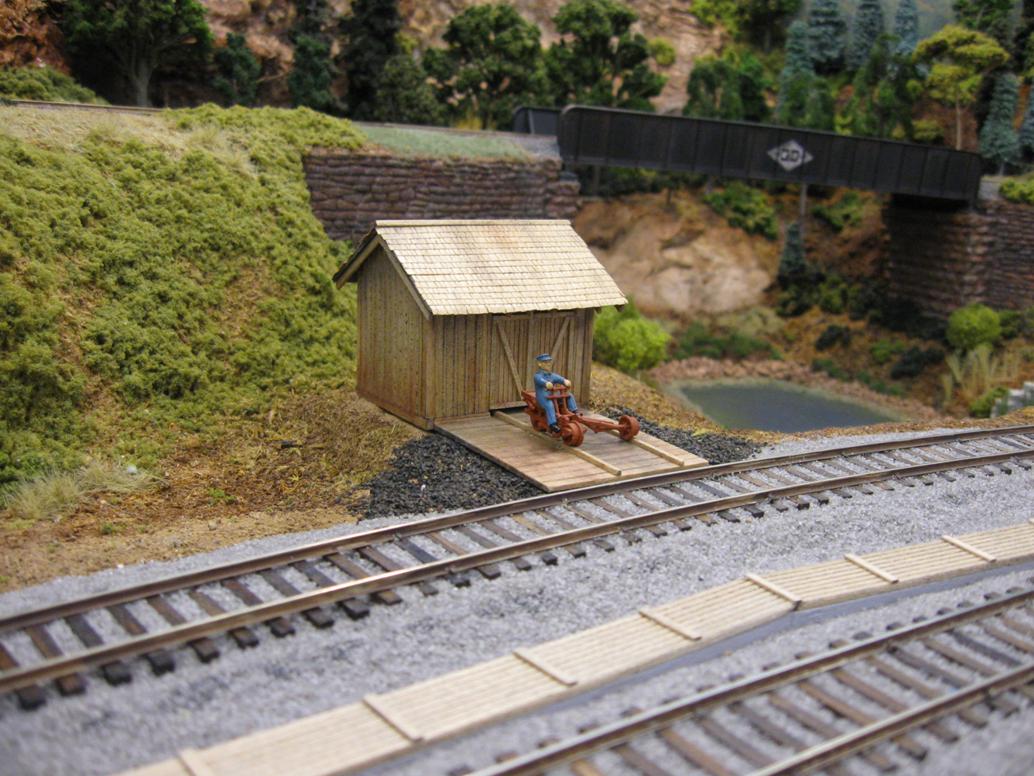
- Installed the handcar shed
- Installed the water tank and coal dump in the south-east corner module
- Added a mirror at the end of the road to the coal dump.
- Finished the SE corner with foam hills and scotch-brite backers
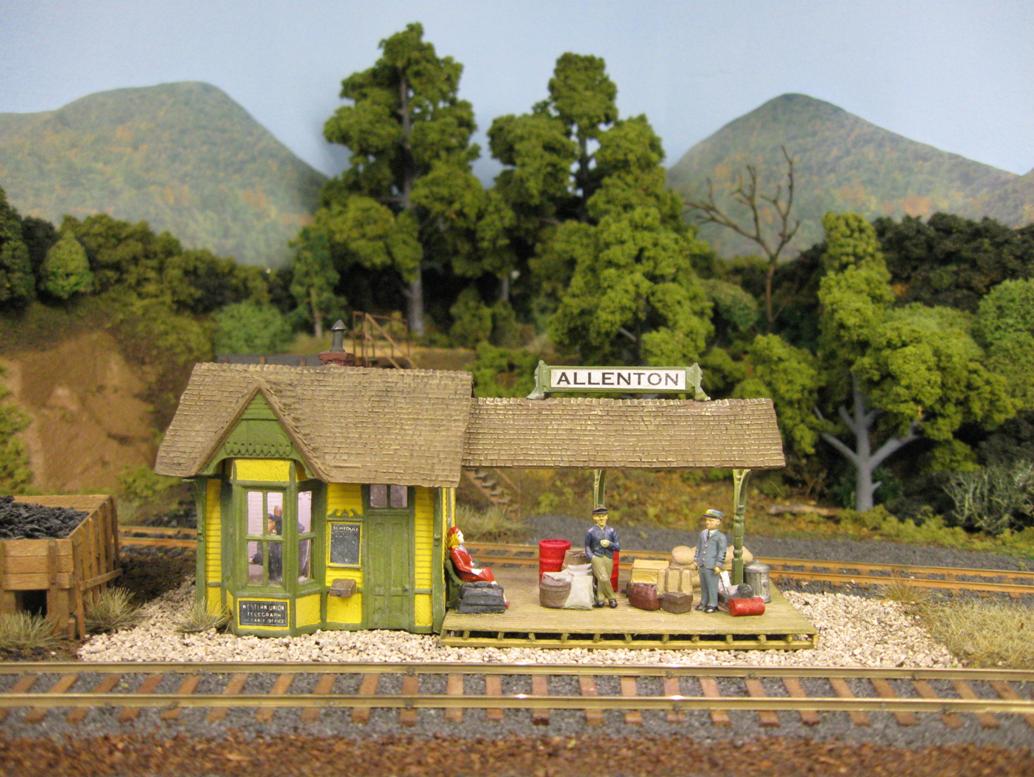
- Installed the station and coaling platform, added ground cover, rock castings, static grasses, lichen bushes
- Ballasted the SE corner track
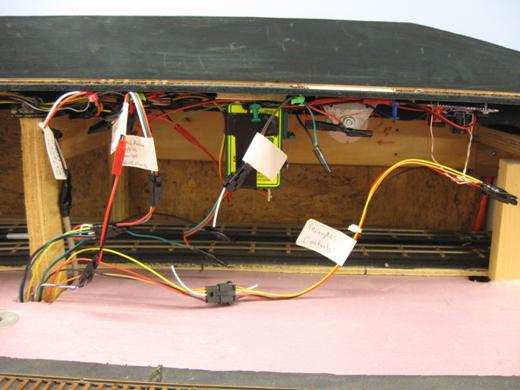
- Installed track power switches for all the roundhouse tracks
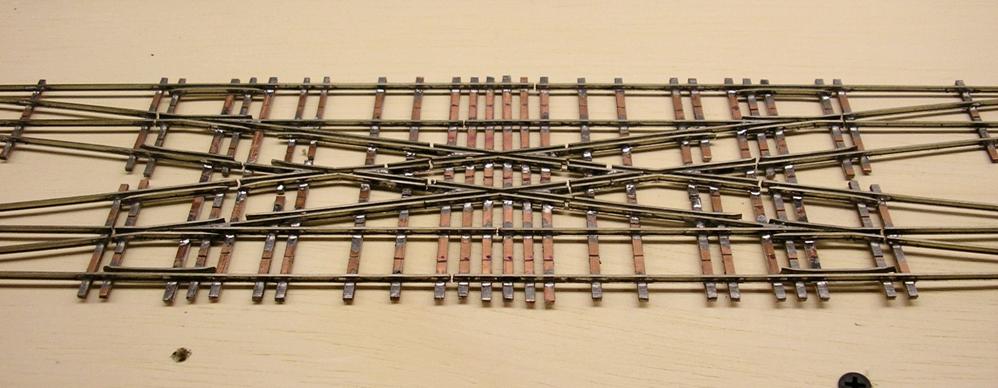
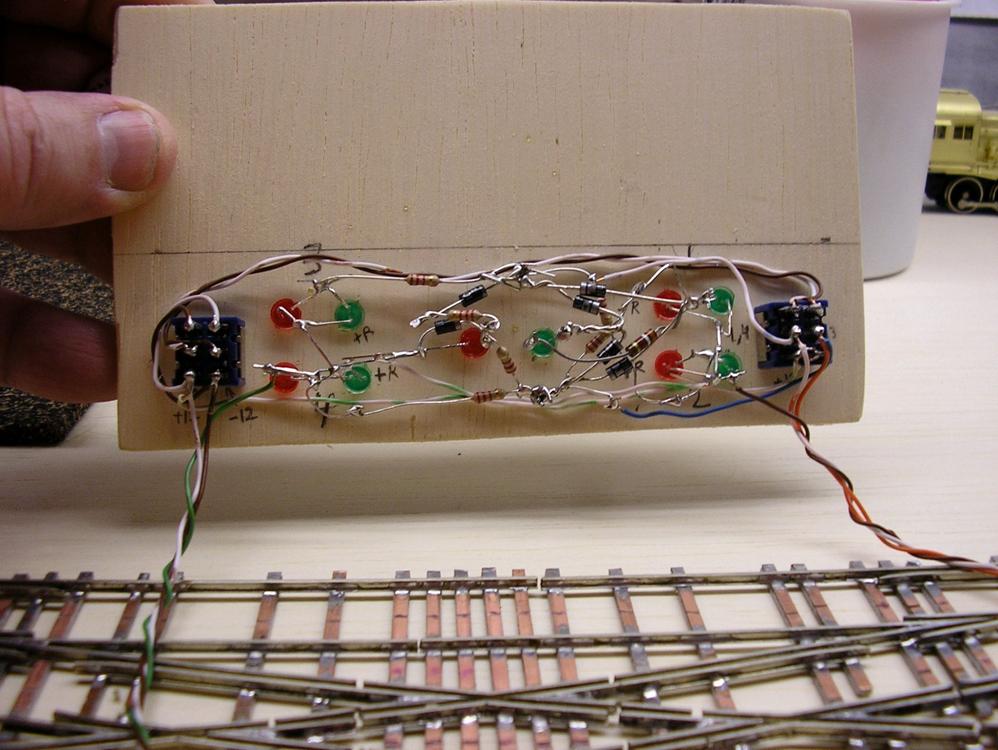
- Ballasted and detailed (frog bolt bars, rail joints) the double-crossover for AP merit judging
- Added details to the west-side crossover
- Repaired/painted the switch rodding
- Repaired my four LaBelle cars: added lead weights underneath, shortened truck screws, painted/polished wheels, repaired brake wheels
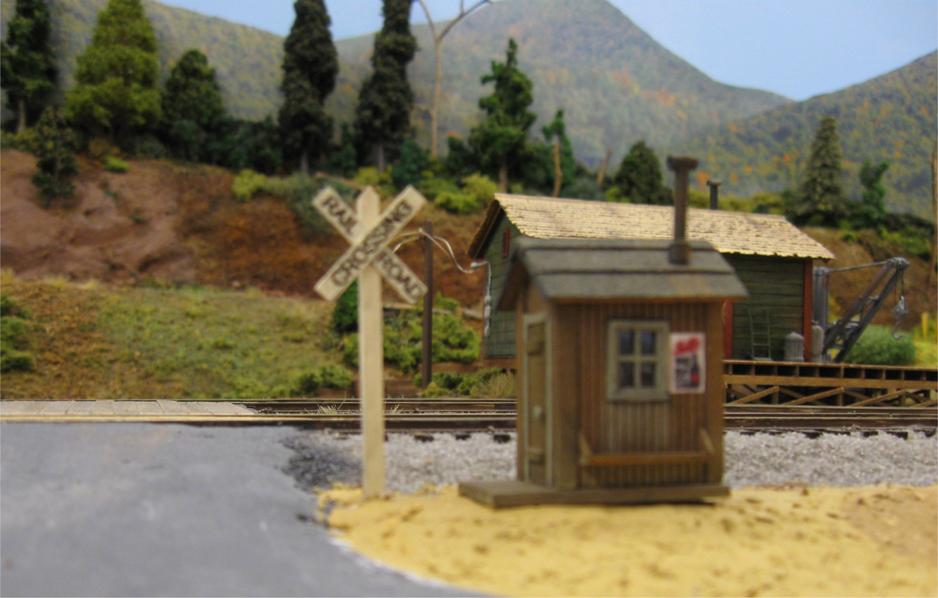
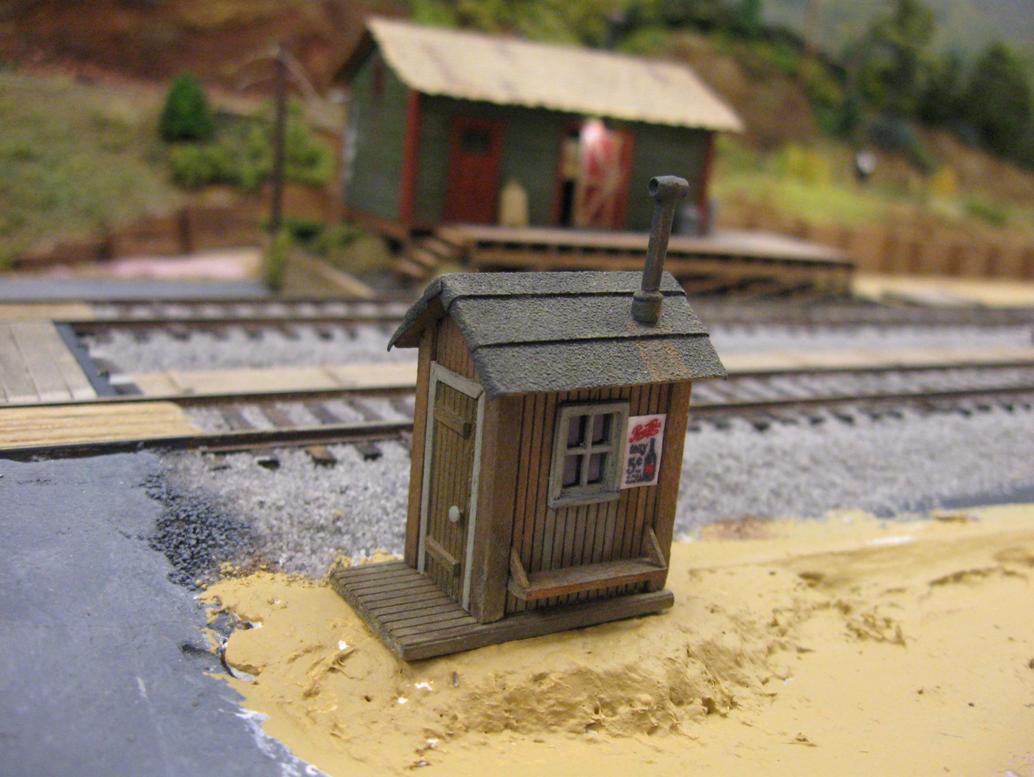
- Repaired the watchman’s shanty, placed it near the grade crossing
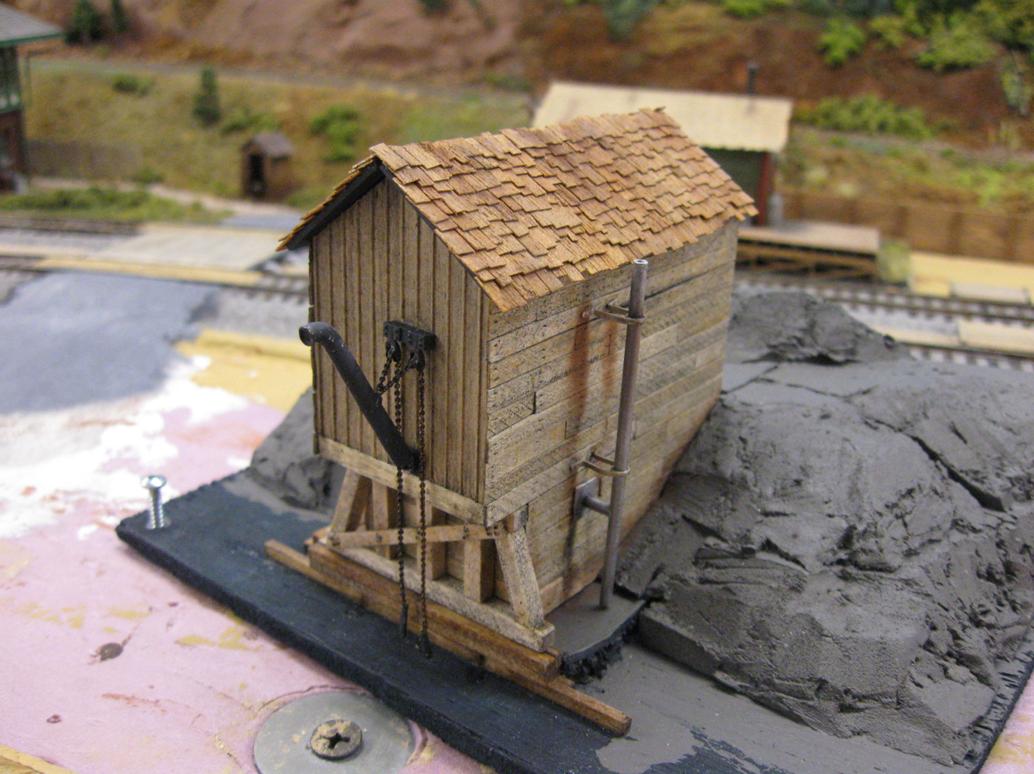
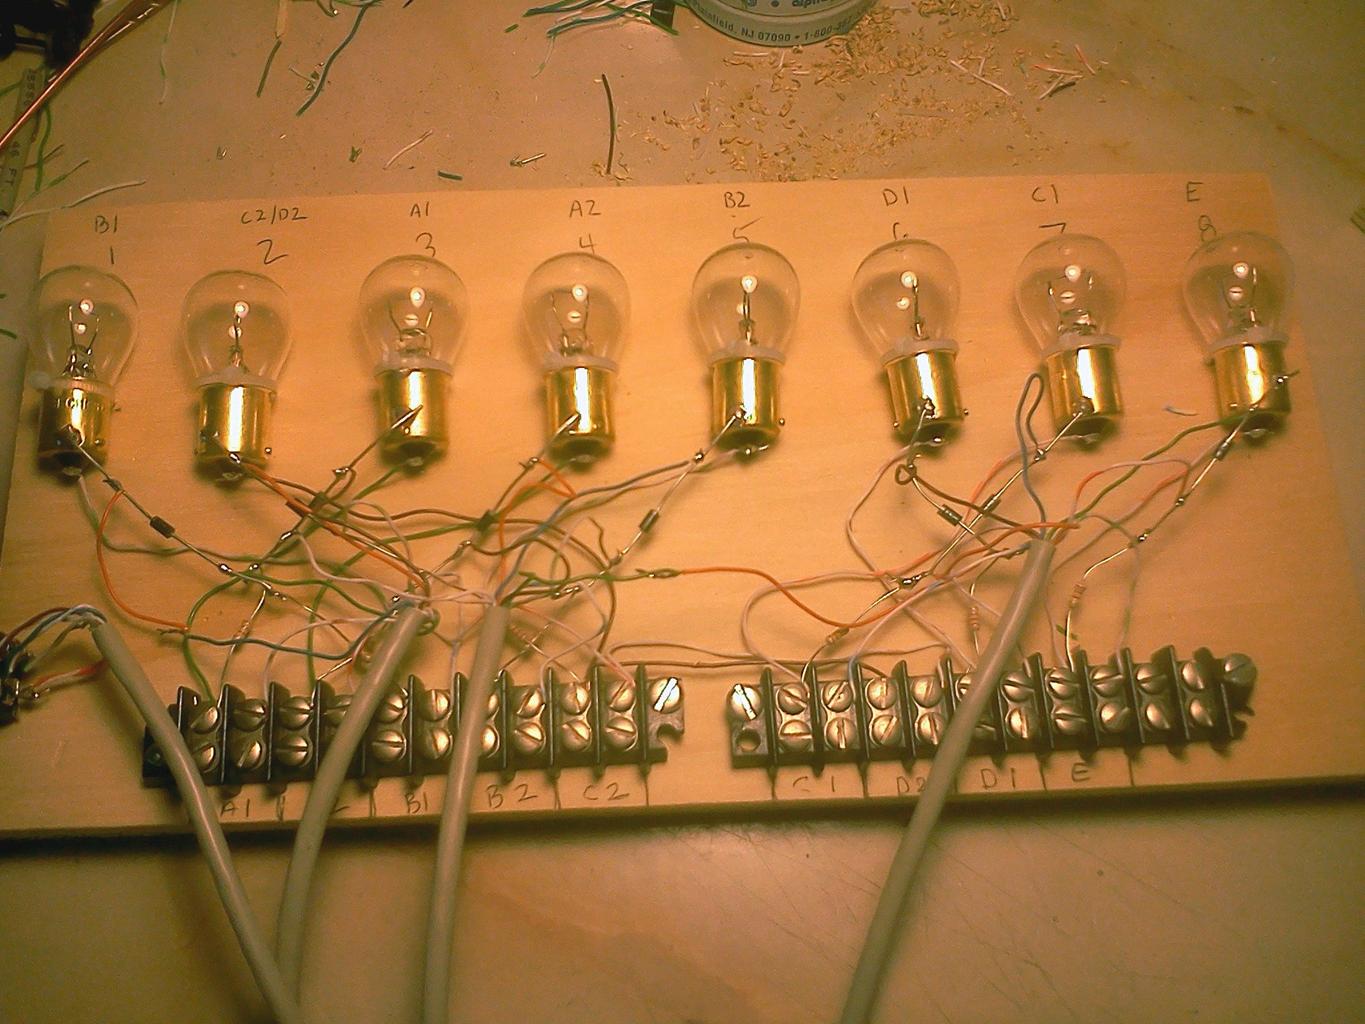
- Built the Woodland Scenics sanding tower; added an LED light to the pole.
- Made a base for the sanding tower, added ground cover, ground goop to the surrounding area
- Built Woodland Scenics “Daniel’s Outfitters”, installed lighting
First, the finished Bulline supply shed:
A night shot, showing the lighting and
some of the interior details:
The caboose maintenance facility:
The handcar shed:
Some views of the south-east corner. The
module is installed, track ballasted, foliage, rock castings, and grass added.
The wood strips cover the
electro-magnetic uncoupling ramp:
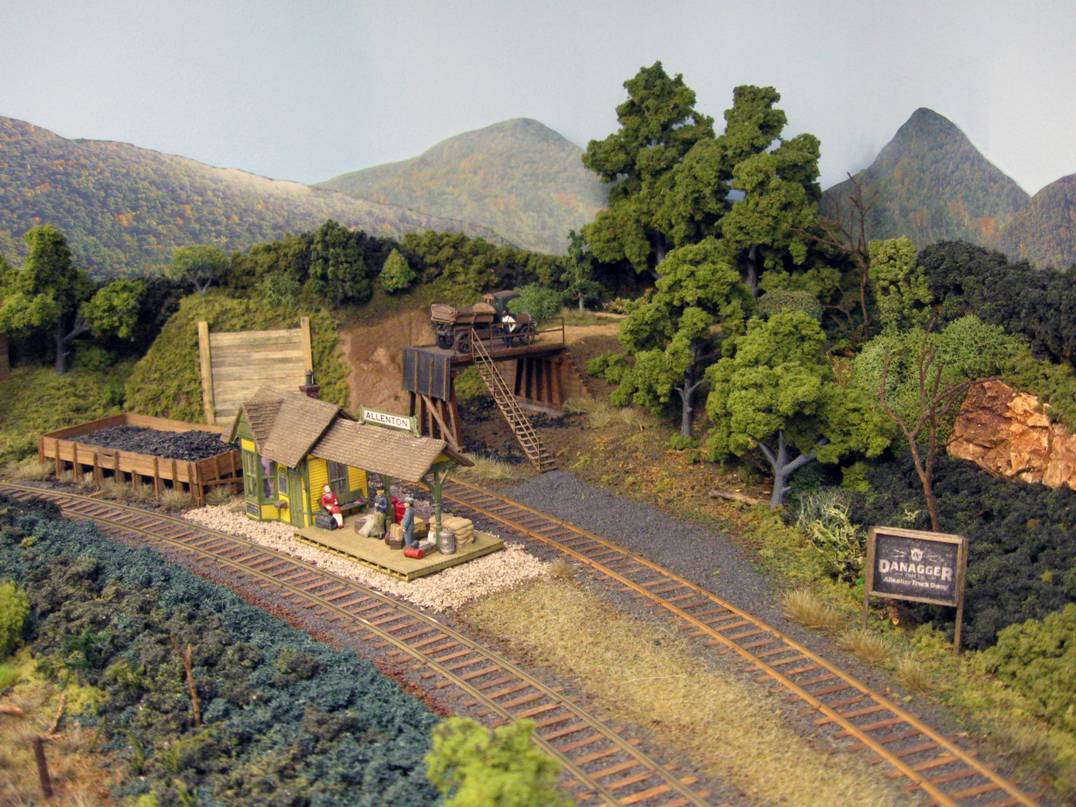
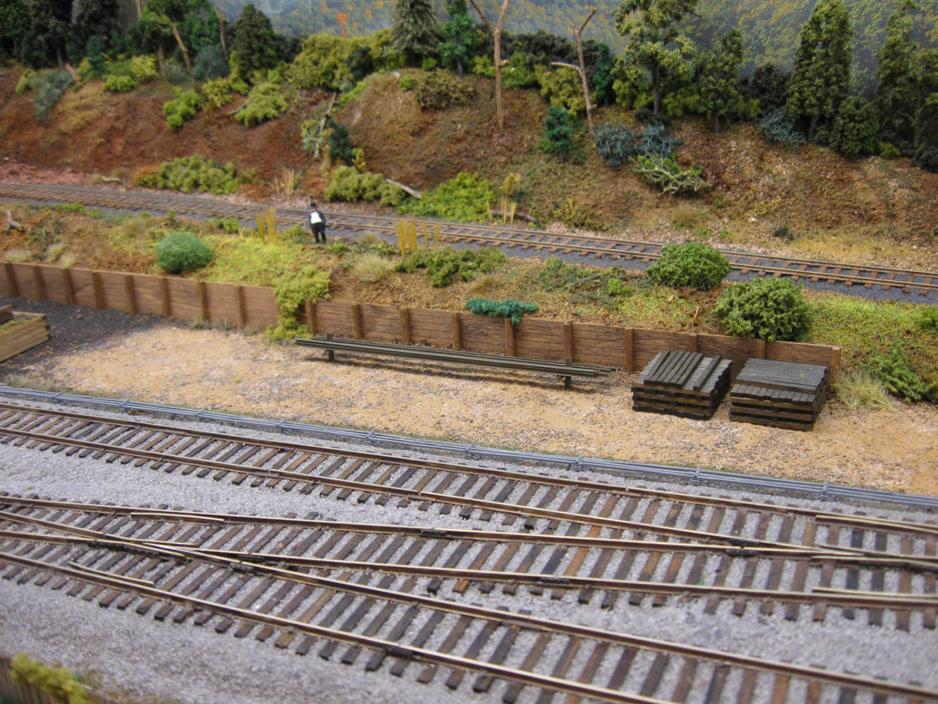
Rock castings along the east side:

The station at Allenton; figures and
lighting added. Static grass at the right, various weed tufts around:
A night shot:
The water tank and coaling platform:
An overview of the Allenton area:
The mirror on the road to the coal dump:
The sanding facility, at the base of the
branch line grade:
And a night shot showing the pole light:
The watchman’s shanty,
built many years ago and refurbished:
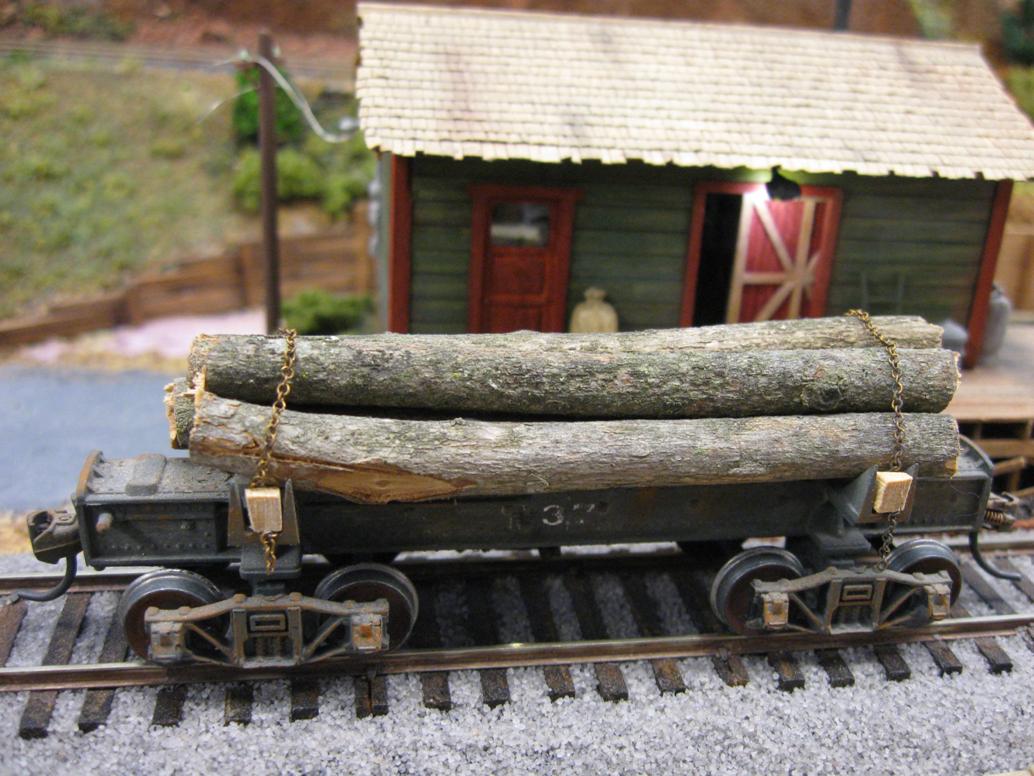
Added a log load to one of my log cars;
these are rhododendron branches:
A LaBelle box car, repaired and weathered:
Labelle gondola, repaired with weight
added:
And two LaBelle
flat cars
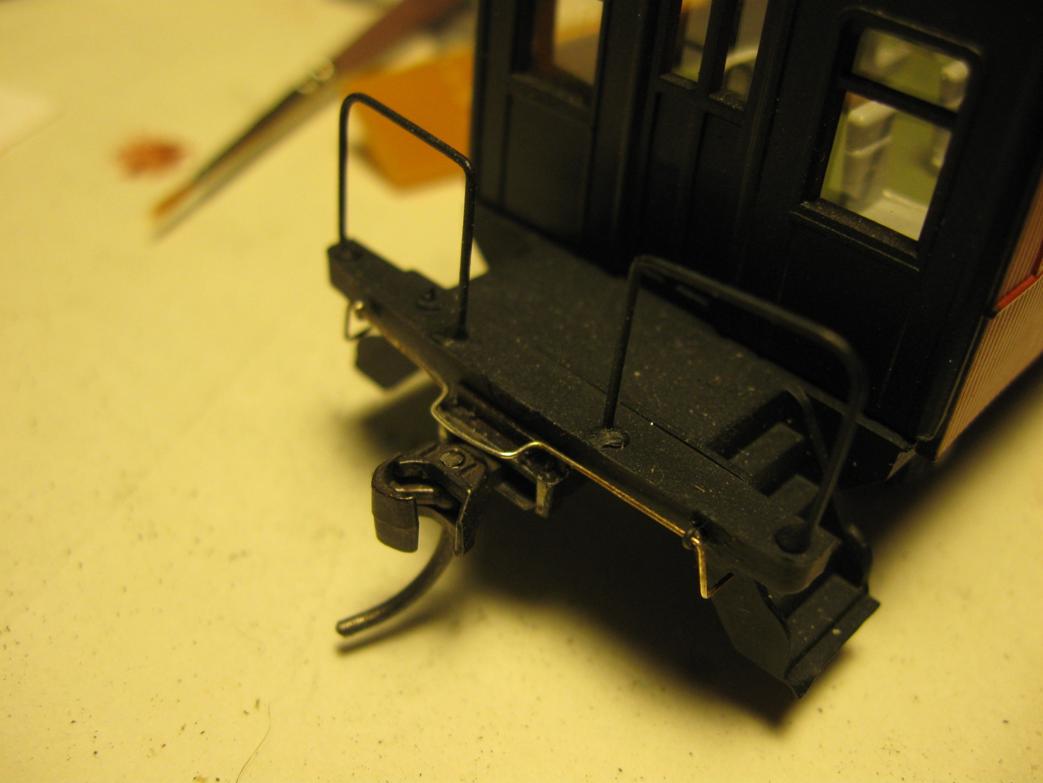
The Overland observation with interior seating,
passengers, and lighting:
December 2016 through March 2017
A variety of things were accomplished:
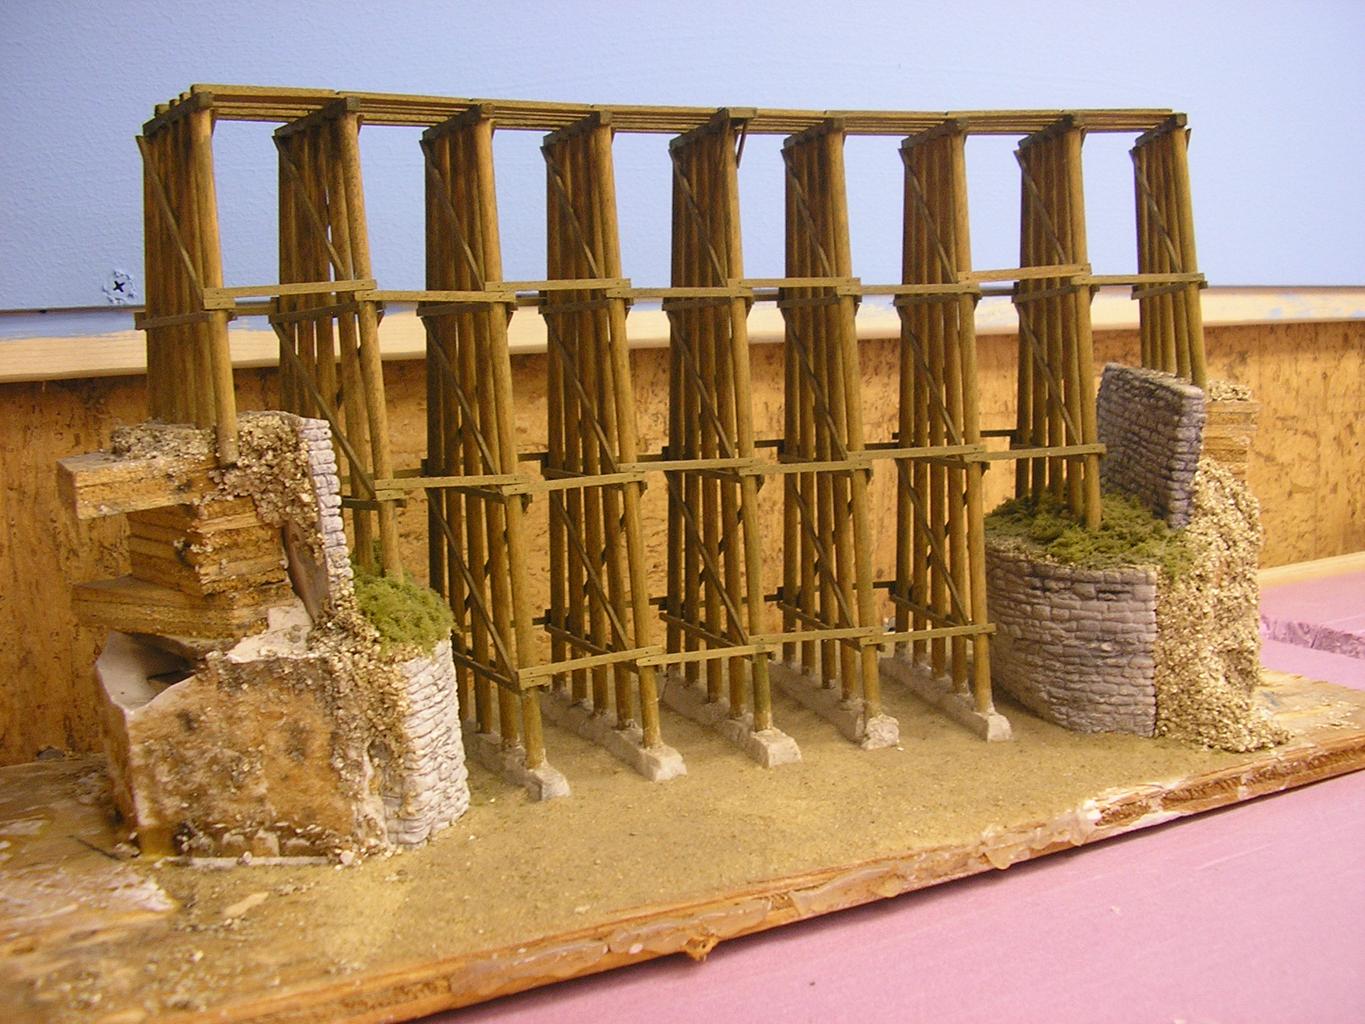
- Built the Durango Press QT&L water tank; replaced the cardstock superstructure with styrene, used cedar shingles instead of the corrugated iron, and built a base for it.
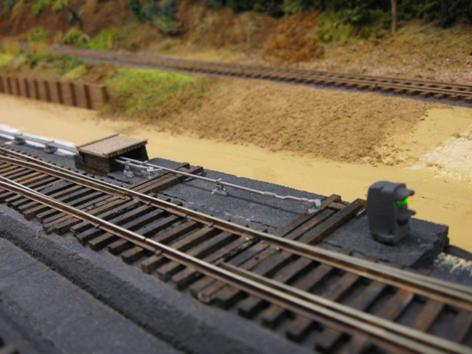
- Installed two electro-magnetic uncoupling ramps; one on the south side branch line, just before the turnout and one on the north-end outside main line.
- With Carrie’s help, installed/carved/painted some foam landscape along the south-end branch line.
- Programmed an Arduino nano-computer board to run the new un-couplers; it activates for ten seconds, and begins flashing a warning three seconds before the end to allow you to re-activate if needed.
- Built the Blair-Line “truck dump”, which will be used on the siding behind the branch line depot. Made a base with foam terrain for it.
- Upgraded the train room PC to Carrie’s old HP desktop, running Windows 10, and re-loaded and tested the JMRI interface to the Digitrax PR3. Re-read all the locos and updated the roster files.
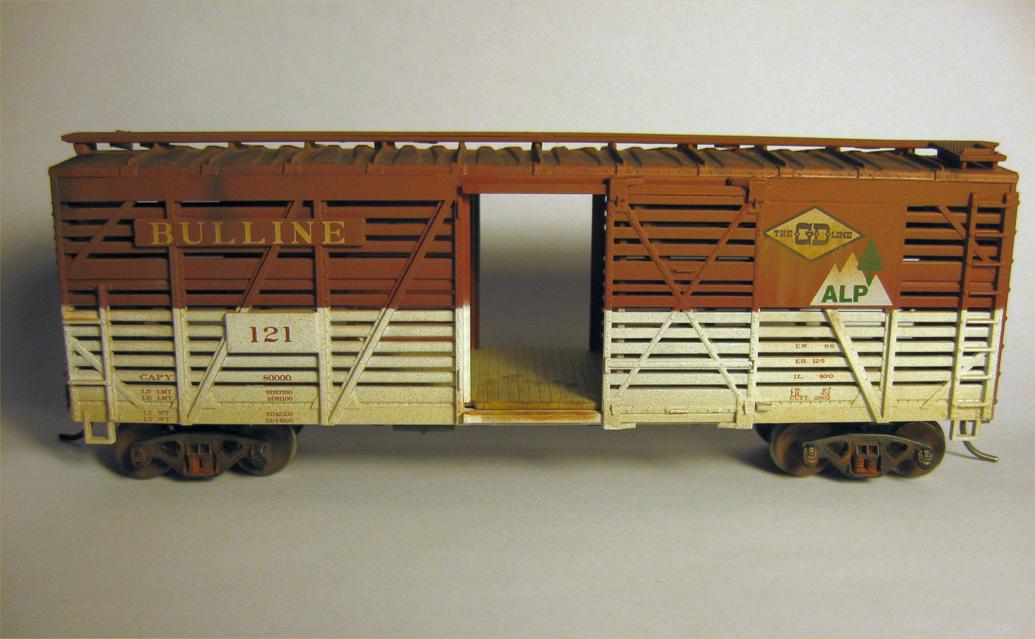
- Modified one of the Athearn NMRA Bulline stock cars: replaced the steel weight with styrene, added lead weight inside, painted the interior floor, trucks, and wheels, replaced the e-z mate couplers with Kadee #5s, did some additional chalk weathering.
- Re-Dullcoted the G&D box car to tone-down the previous weathering
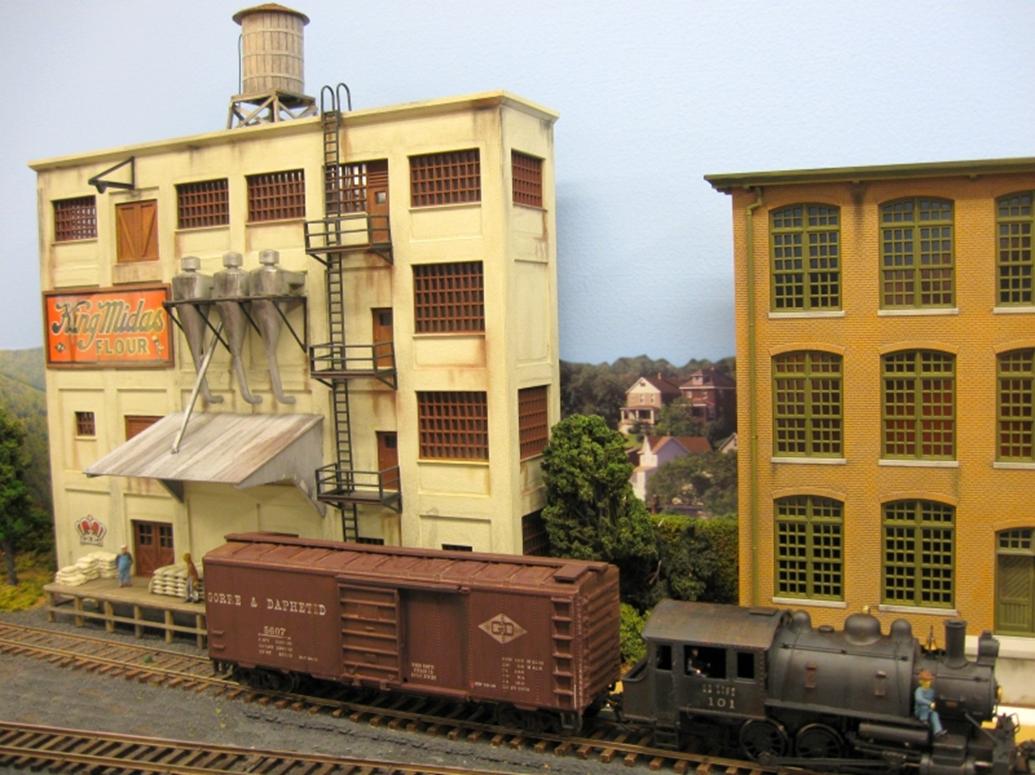
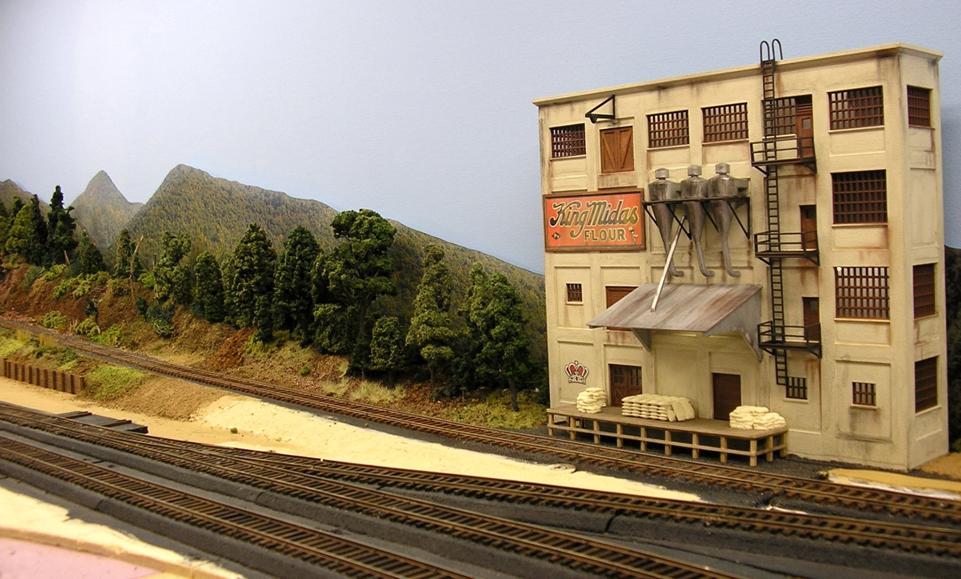
- Built a “Nick & Nora Designs” rooftop water tank for the mill building; installed it, weathered the flour sacks, added figures to the loading dock.
- Built the Campbell cattle pens for the south end spur on a sandeply base; added some ground cover
- built up the “foundation” for the handcar shed and added it to the layout.
- Started on the caboose maintenance facility: cleaned up the castings, partially assembled it, primed it.
- Filled in terrain around the cattle pens, including building a base for the Bulline office.
- Started a Gloor-Craft small freight depot, which will be the Bulline office next to the cattle pens.
First, the
re-worked Bulline stock car:
Some shots of the water tank:

This shows the rooftop water tank, the figures on the loading dock, and the
re-work G&D box car:
Here’s the truck dump (not where it will
eventually be); needs weathering and lots of coal laying
around.
The cattle pens,
temporarily placed:
The handcar shed in place:
Mid-July 2016 through November 2016
Not as much progress as I would like, but some:
- Wired the roundhouse tracks, complete with connectors, trimmed the rails, and added the final PC ties
- Built two electro-magnetic uncoupling ramp controllers
- Replaced the branch line ramp (bottom of the hill) with one of the electro-magnetic ramps, and added “crossing” boards
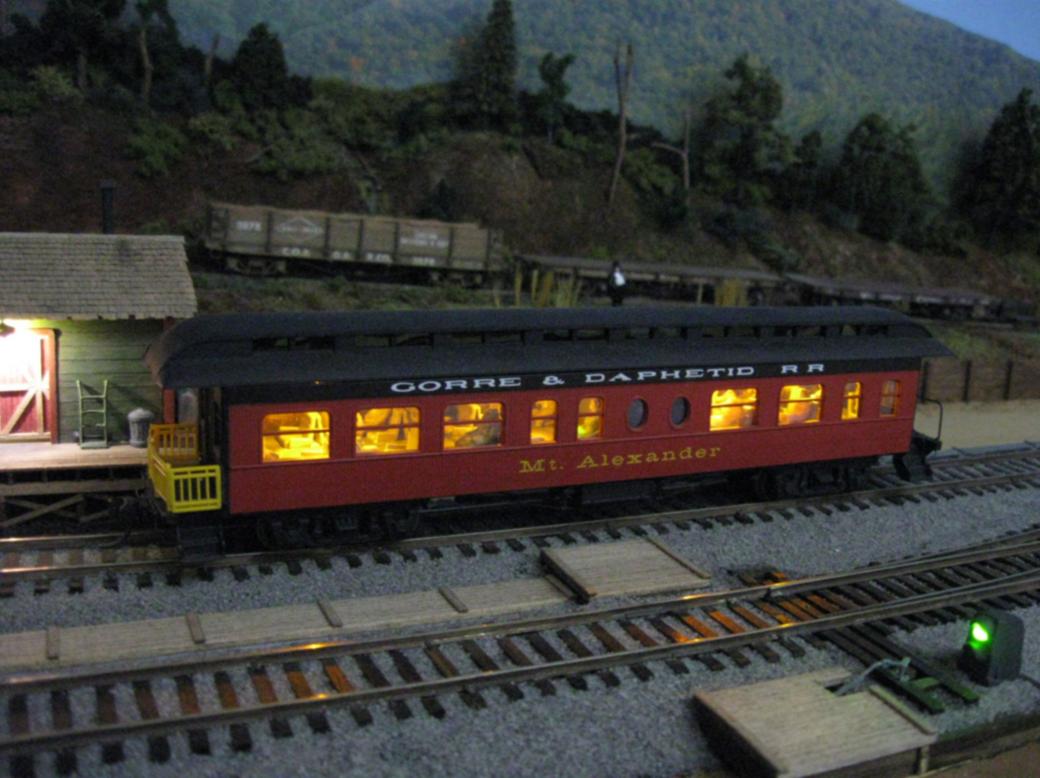
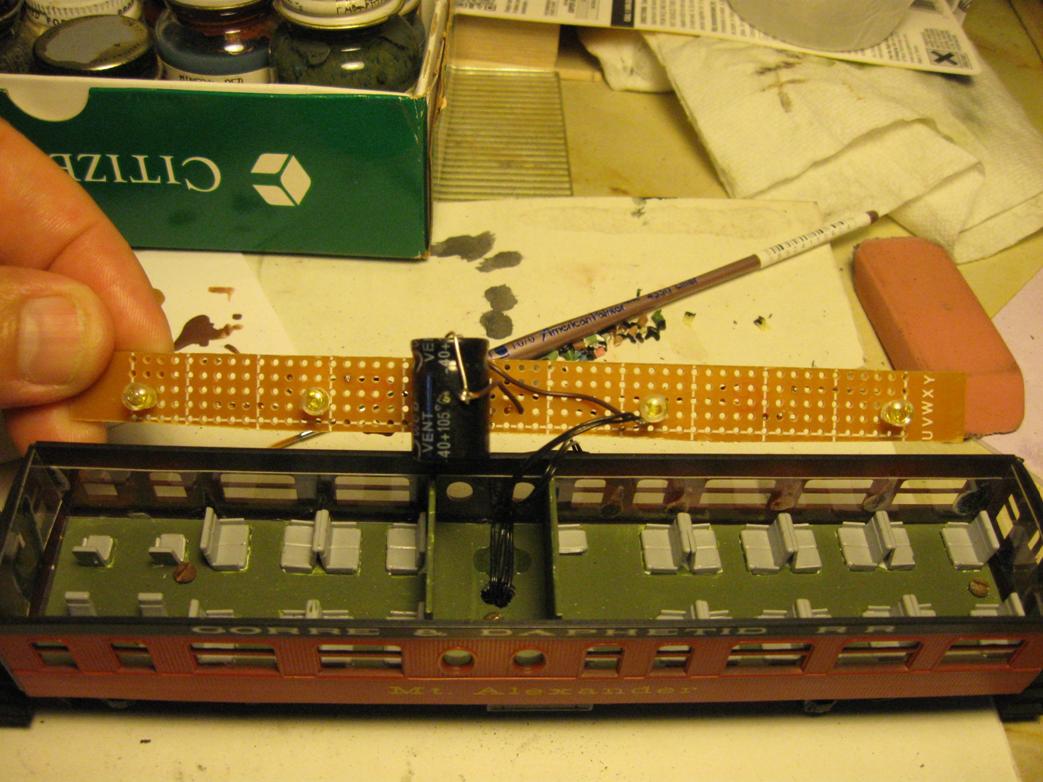
- Finished the “Mt. Alexander” car; mounted the light board, painted and added passengers, touched-up paint, etc.
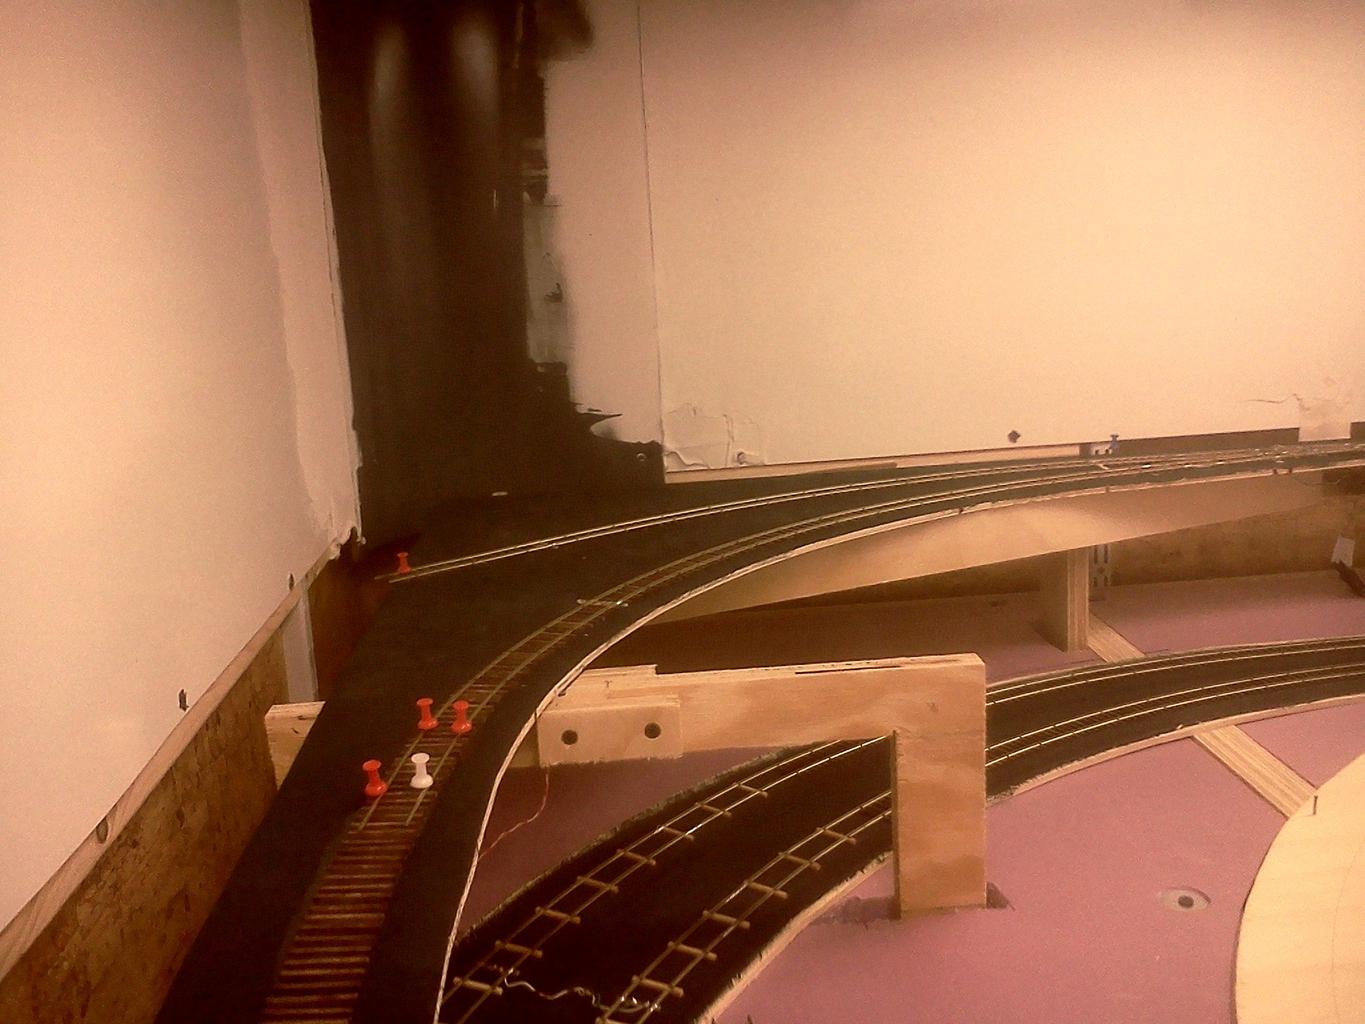
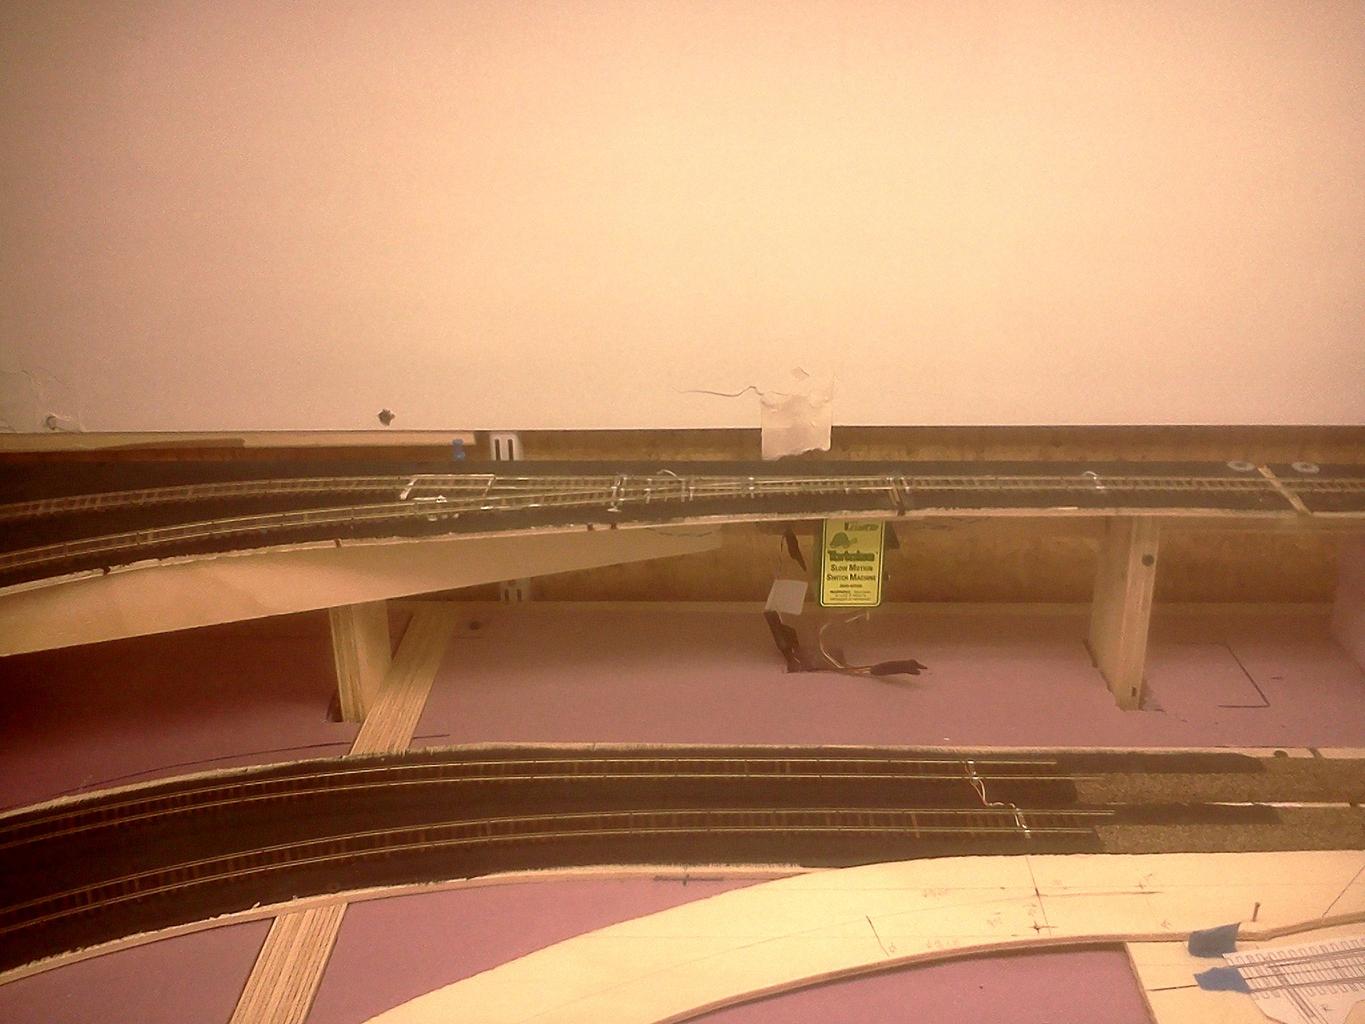
- Built the east-side branch line deck, painted it, mounted and leveled it (had to adjust one riser and shim others)
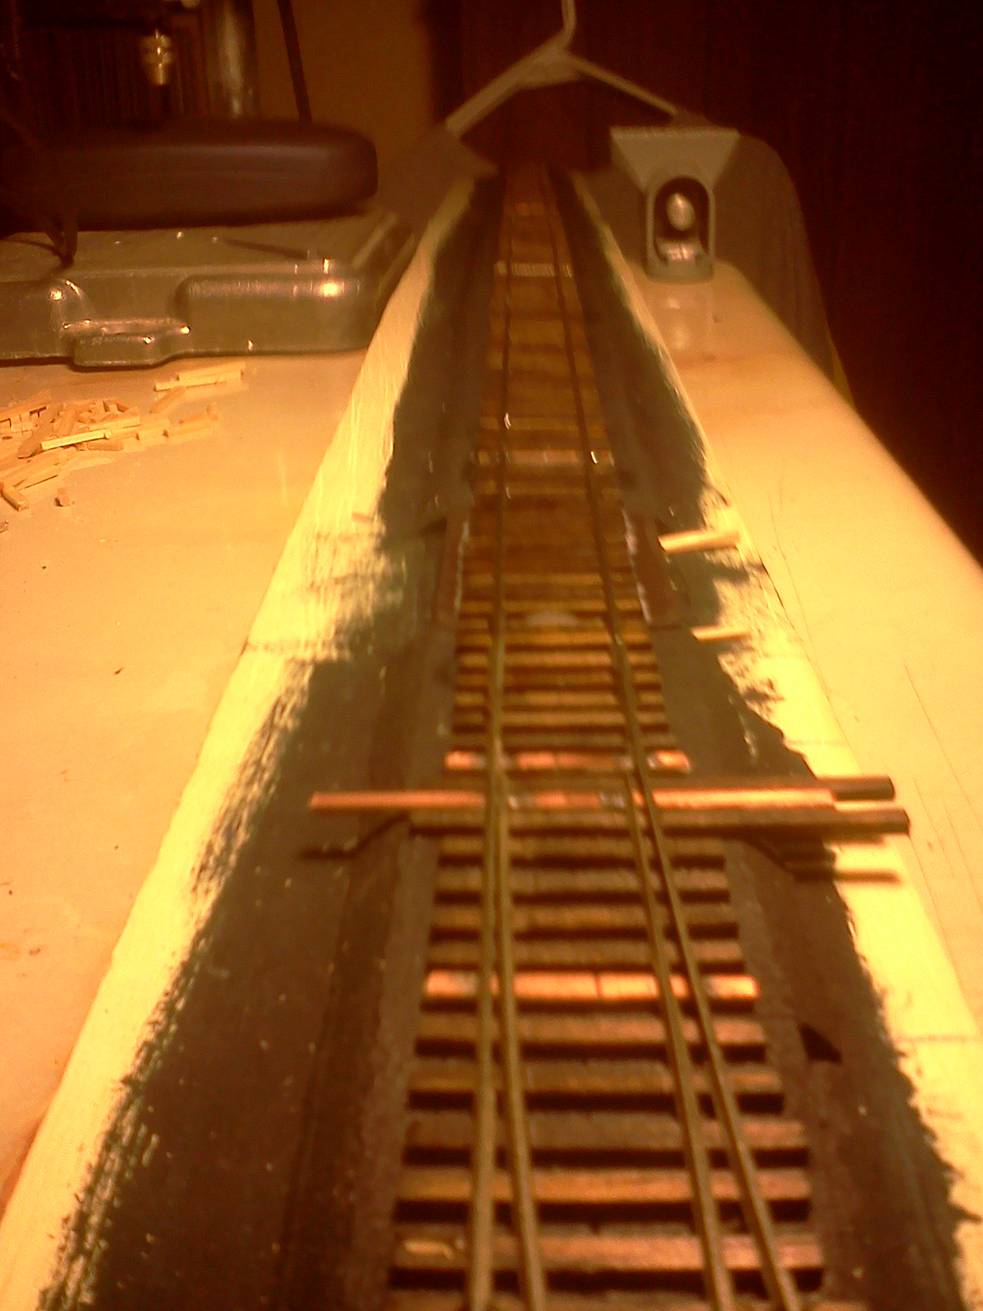
- Built four #4 wyes, laid ties and track on the branch line addition (pre-ballasted under the turnouts); painted the rail.
- Installed two uncoupling ramps (one fixed and one electrical), four Tortoises, and wired everything to connectors
- Built bridge track using pc ties, installed it
- Built control panels for the turnout and uncoupler and installed them
- Installed a TCS T1 DCC decoder in the Rivarossi Heisler – it runs great
- Added wood to the tower main-line road crossing and re-painted the roads a more realistic color
- Scenery work: painted “depth” in the pond, added cat-tails, finished ground cover between the tower and the road
- Ballasted the rest of the west side branch line (on the hill), ballasted the main line up to the end module
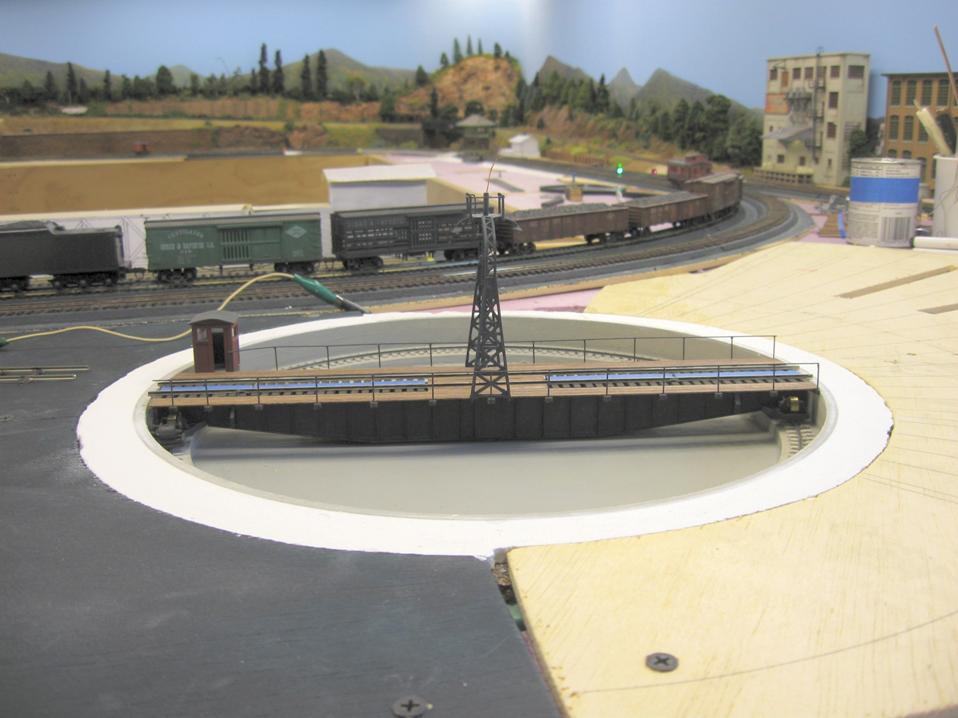
- Touched-up the paint in the turntable pit
- Performed coupler tune-up on some sticky couplers
Pictures:
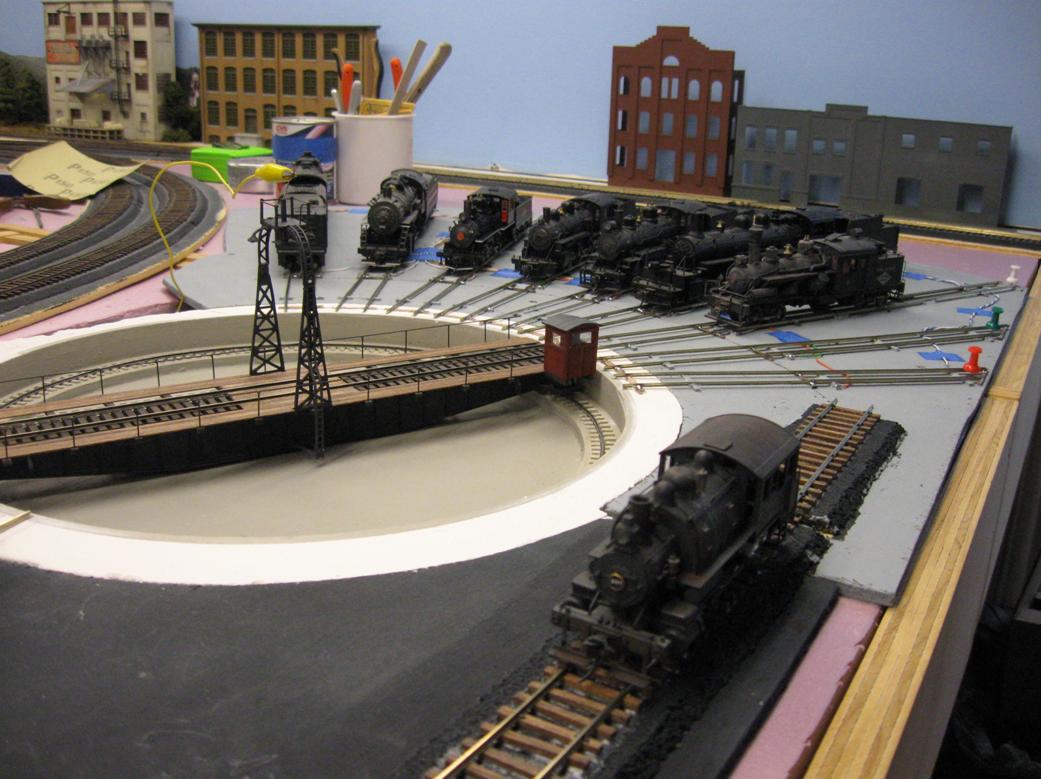
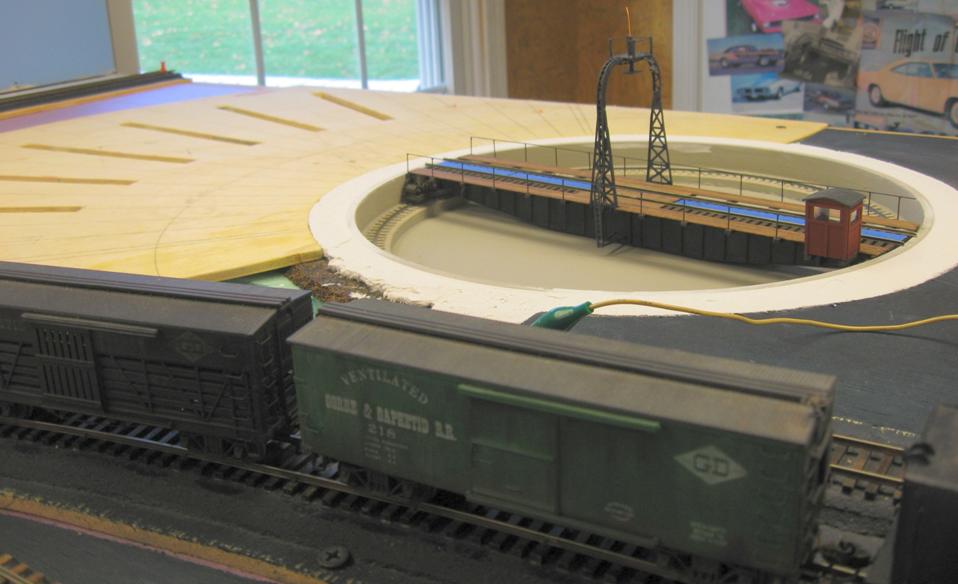
First, the turntable and roundhouse tracks:
Next, some views of the east-side branch
line module (the white cardstock covers the uncoupling ramps):


The wiring and connectors:
The passenger yard is in use:
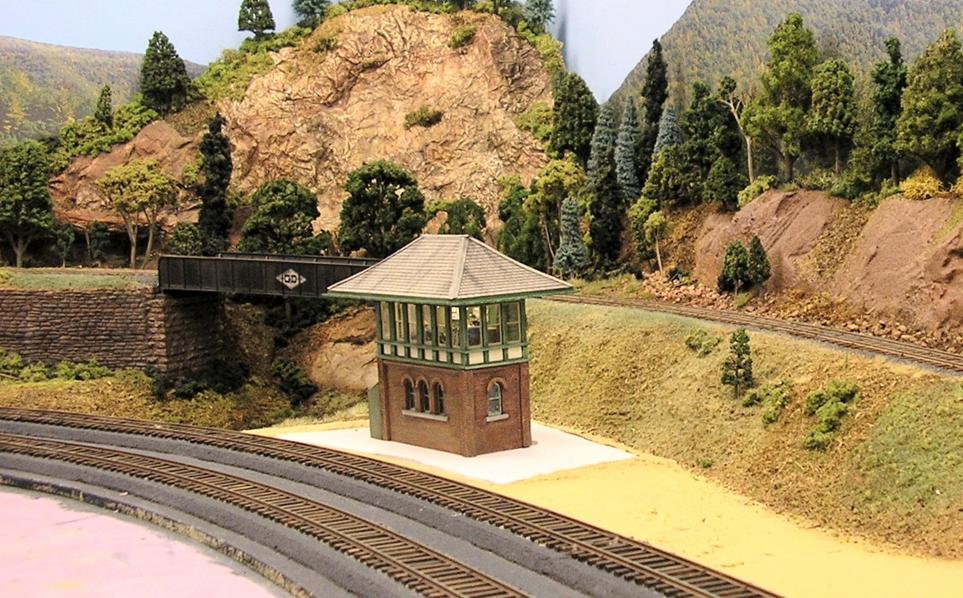
The updated tower area:
The newly ballasted section:
April 2016 through Mid-July 2016
I thought I didn’t do much in the last few months, but it adds up. Progress:
- Layed and wired all the remaining passenger yard tracks
- Cleaned, lubricated, and replaced the factory couplers with Kadee on the Bachmann 0-6-0 #101
- Painted the 0-6-0 grimy black, lettered it for the G&D, and weathered it.
- Stained ~500 branch line ties for the east side trackwork
- Cut/stained ties for two #4 wye turnouts
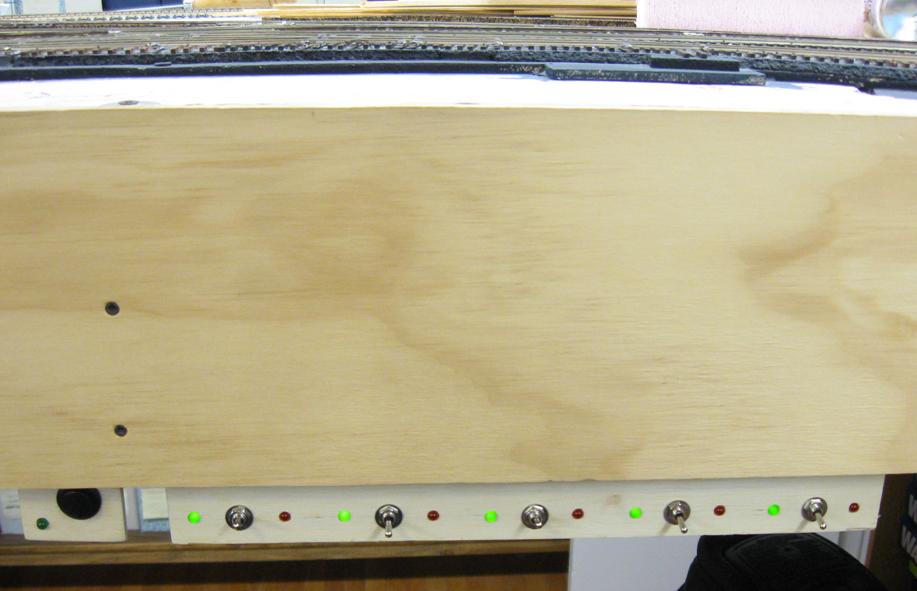
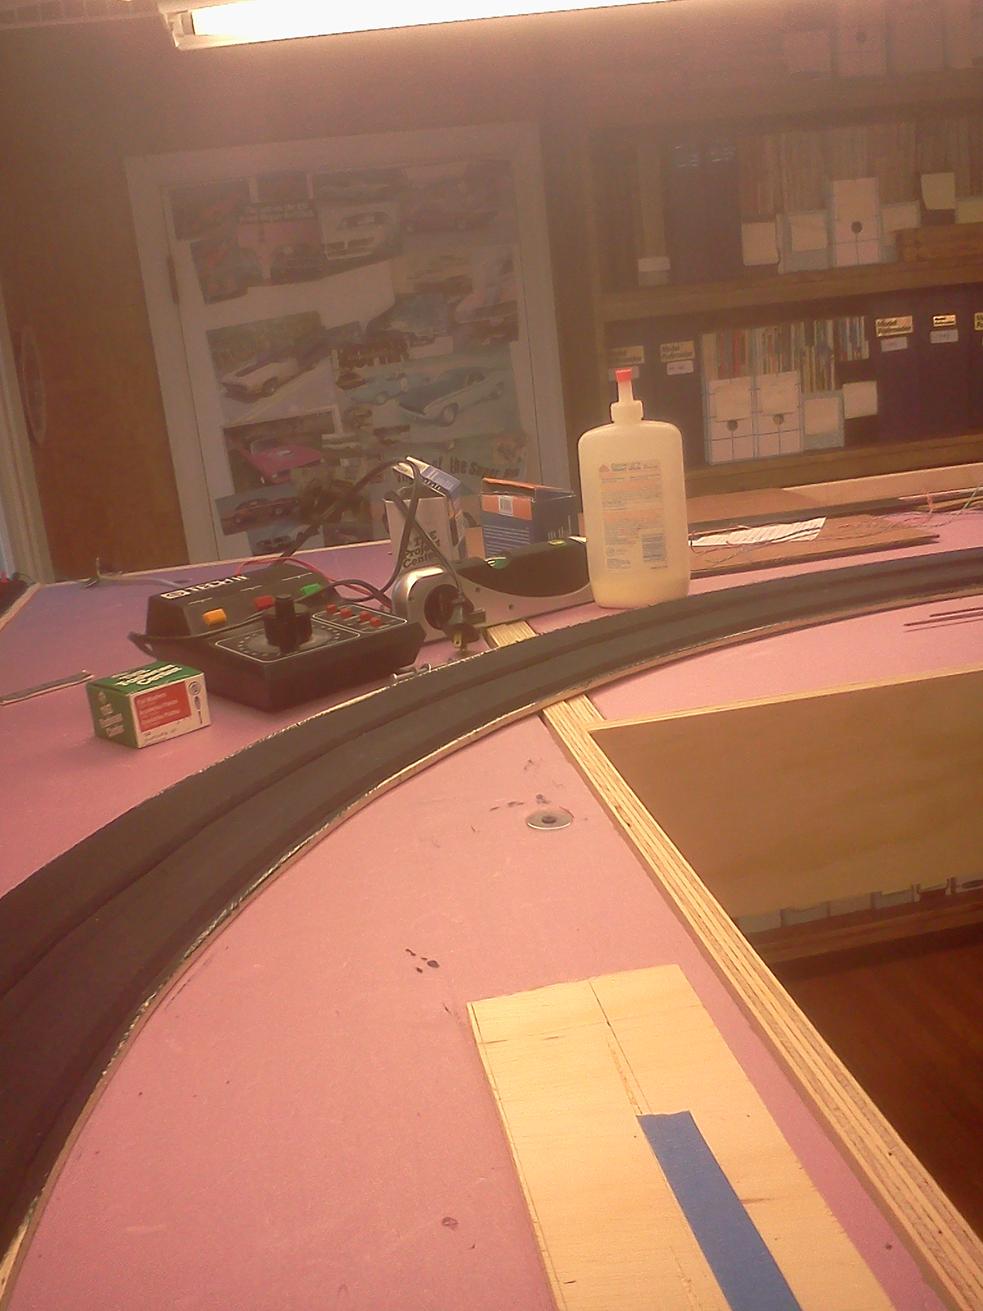
- Designed and built the control electronics/panel for the turntable
- Re-worked an (already built) MDC G&D boxcar: changed the # from 5600 to 5607, replaced the wheelsets, changed the steel weights to lead, and weathered it
- Started re-working a set of G&D Overland passenger cars: cleaned, painted the roofs, trucks, and underbody, added coupler lift bars
- Built interior lighting for one of the above; added pickup wipers to the trucks, installed an interior. I have figures, but they need paint as they are Chinese imports painted in garish colors.
- Ballasted the rest of the south-end turnouts
- Built all the rest of my dwarf signal heads (using Sculpy bankable clay); installed two on the south-end yard lead off the main
- Installed the rails of the roundhouse tracks on the plywood base, and painted it. Installed steps into the roundhouse track pits, painted the pits/steps, than added guard rails to all the tracks. Started wiring it.
- Installed a TCS T1 decoder in my new Bachmann modern 4-4-0 (the Bachmann factory decoders stink). Unfortunately, not enough room in the tender for a keep-alive module. Programmed the decoder to have a prototypical speed profile and mild momentum. It runs much better now.
Pictures:
First, just a nice picture:
The passenger yard:
The 0-6-0:
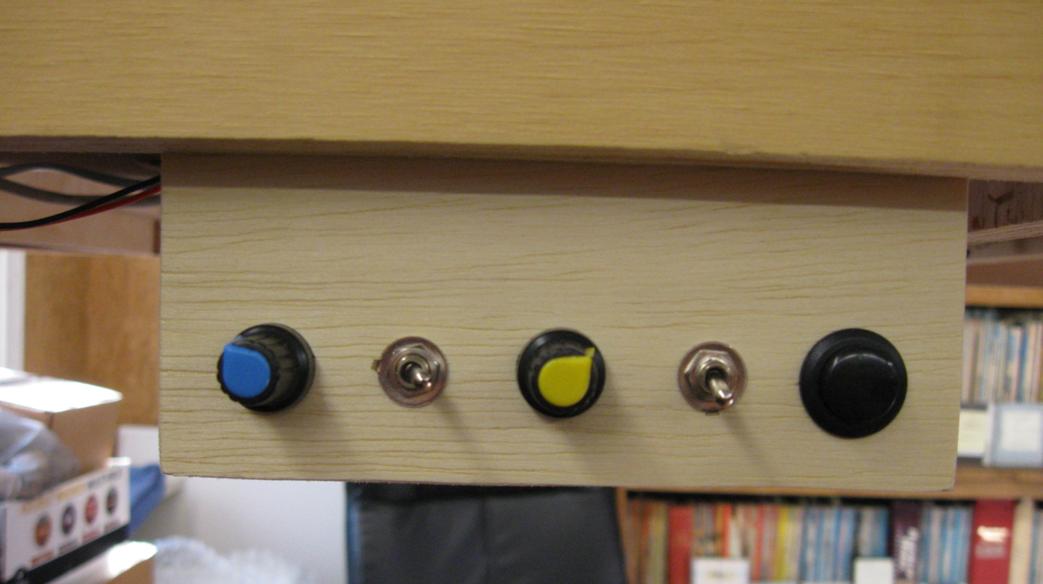
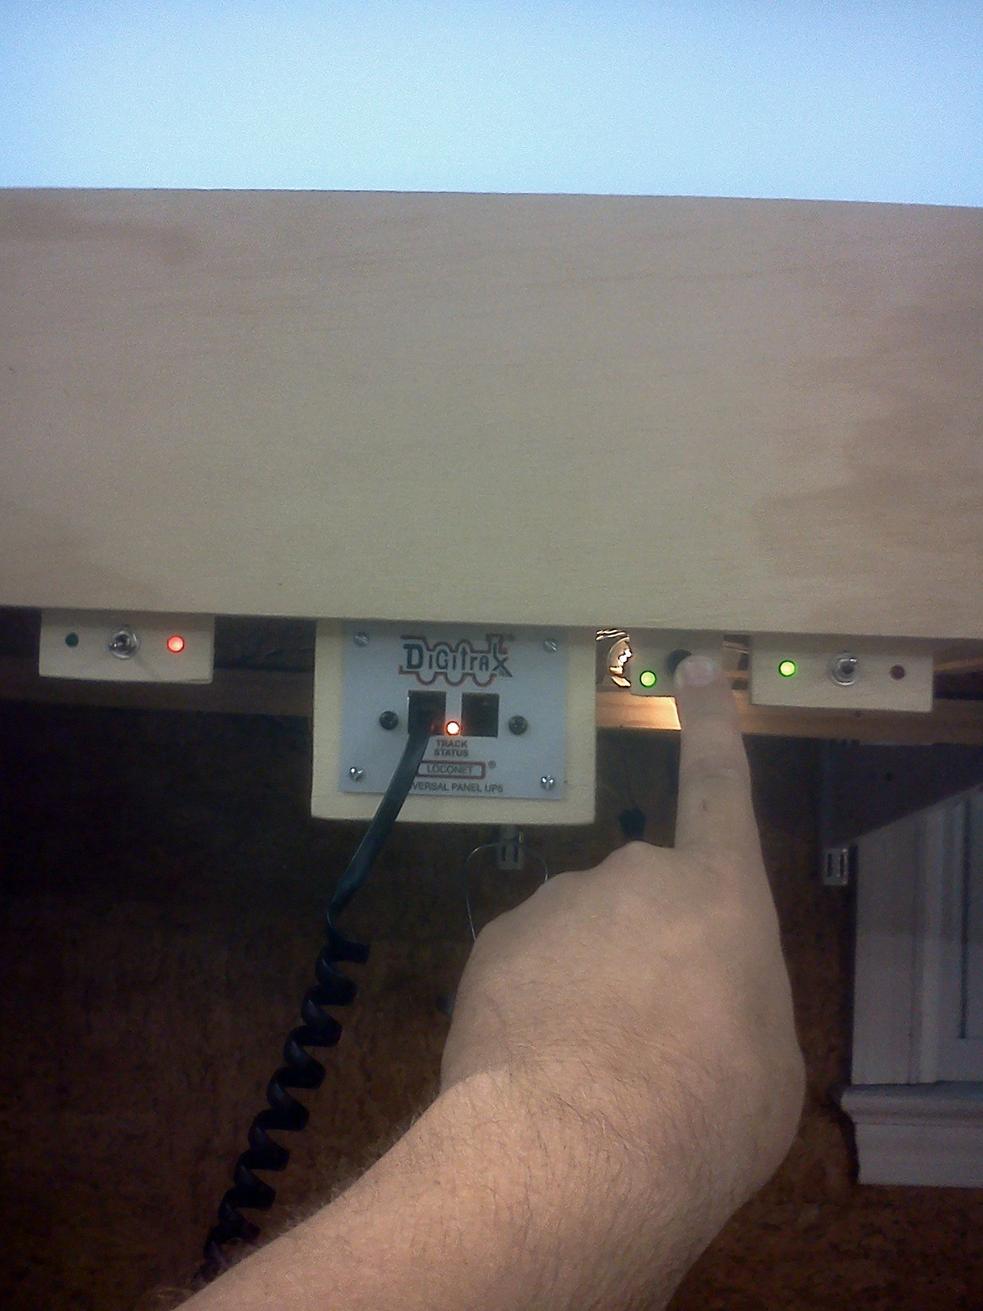
The turntable control panel – the left
knob is “fast” speed adjustment, the left switch is fast/slow speed select, the
middle knob
is the slow speed adjustment, the right switch is the direction, and the
push-button runs it. It is easy to nudge the turntable into
alignment:
The unfinished Overland cars, and the
new 4-4-0:
The interior and lighting underway on
one car:
The roundhouse base:
The guard rails are code 83 rail layed sideways inside the
code 70 rail. This will allow me to pour a plaster floor and
keep the flange-ways clear:
Mid-January 2016 through March 2016
Progress:
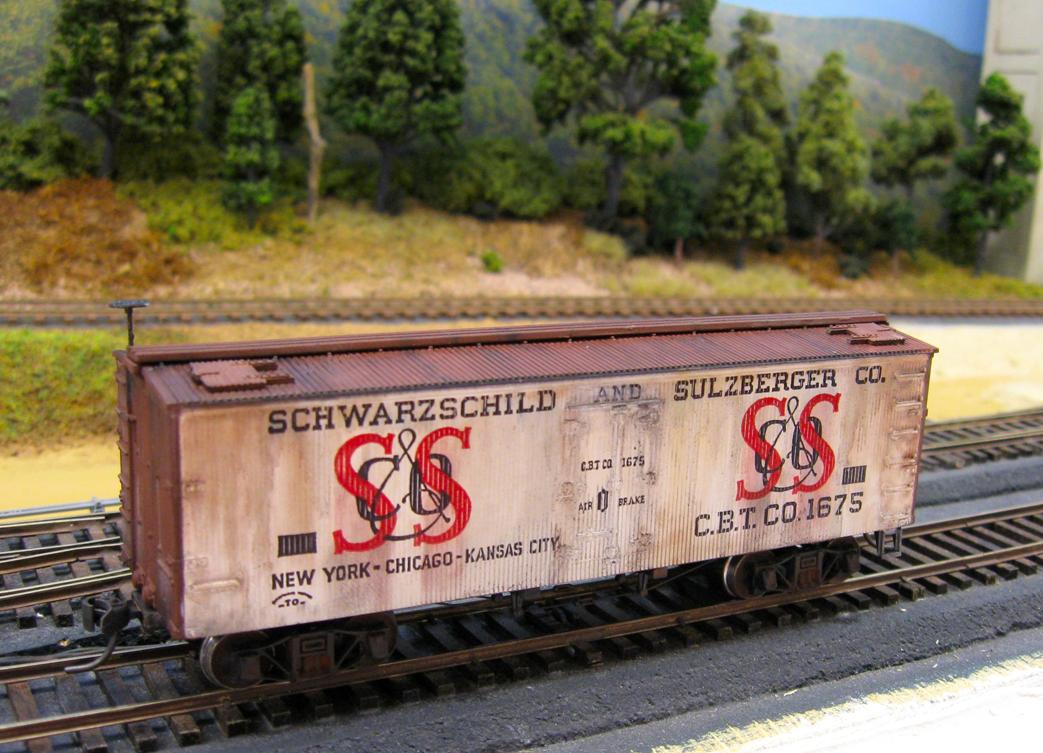
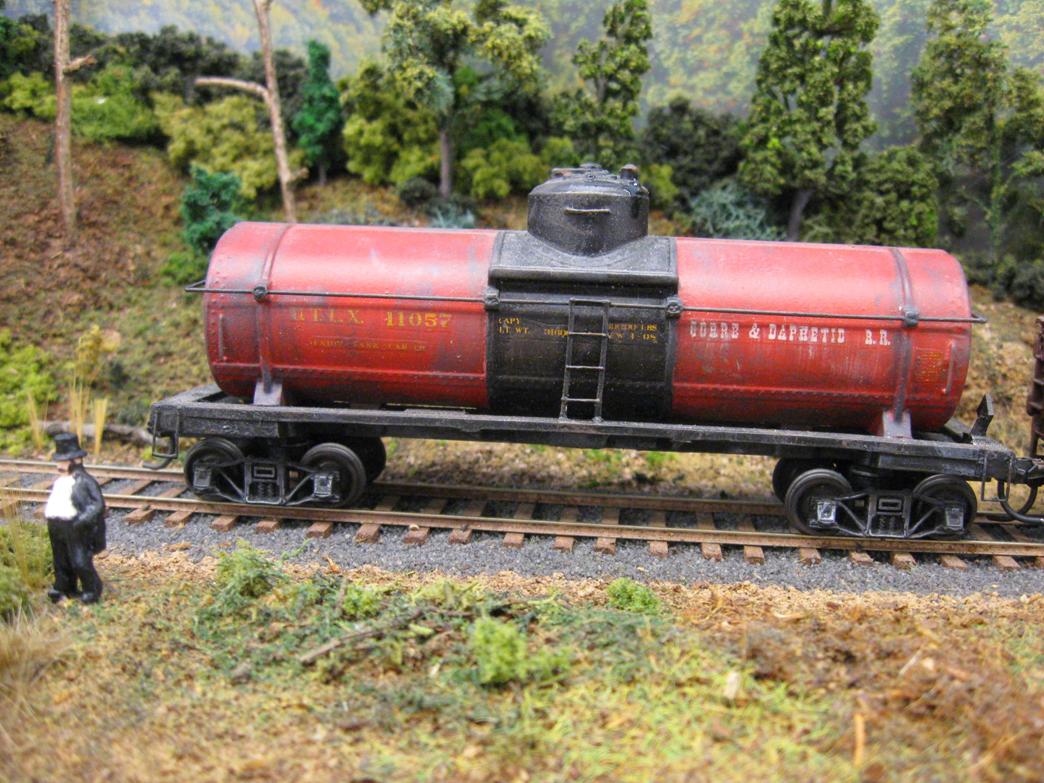
- Built two more G&D ore cars, refurbished an S&S reefer
- Ballasted most of the south and west end main line track
- “boxed” all the turnout throwbars in anticipation of ballasting
- Cut and stained ties for (2) #6 turnouts and (5) #4 wyes, and some “profile” ties for use in tight places
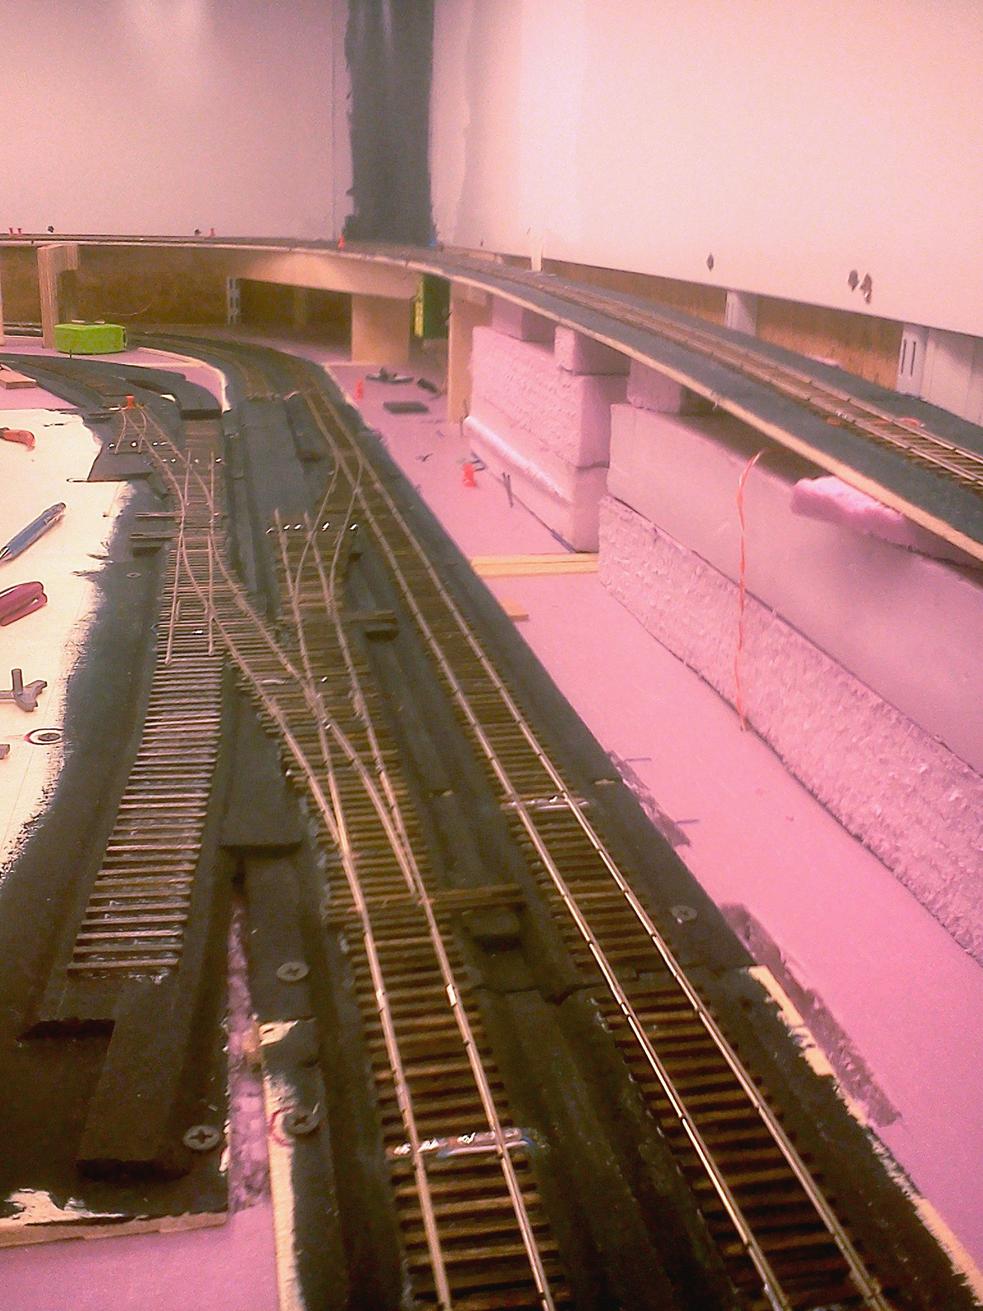
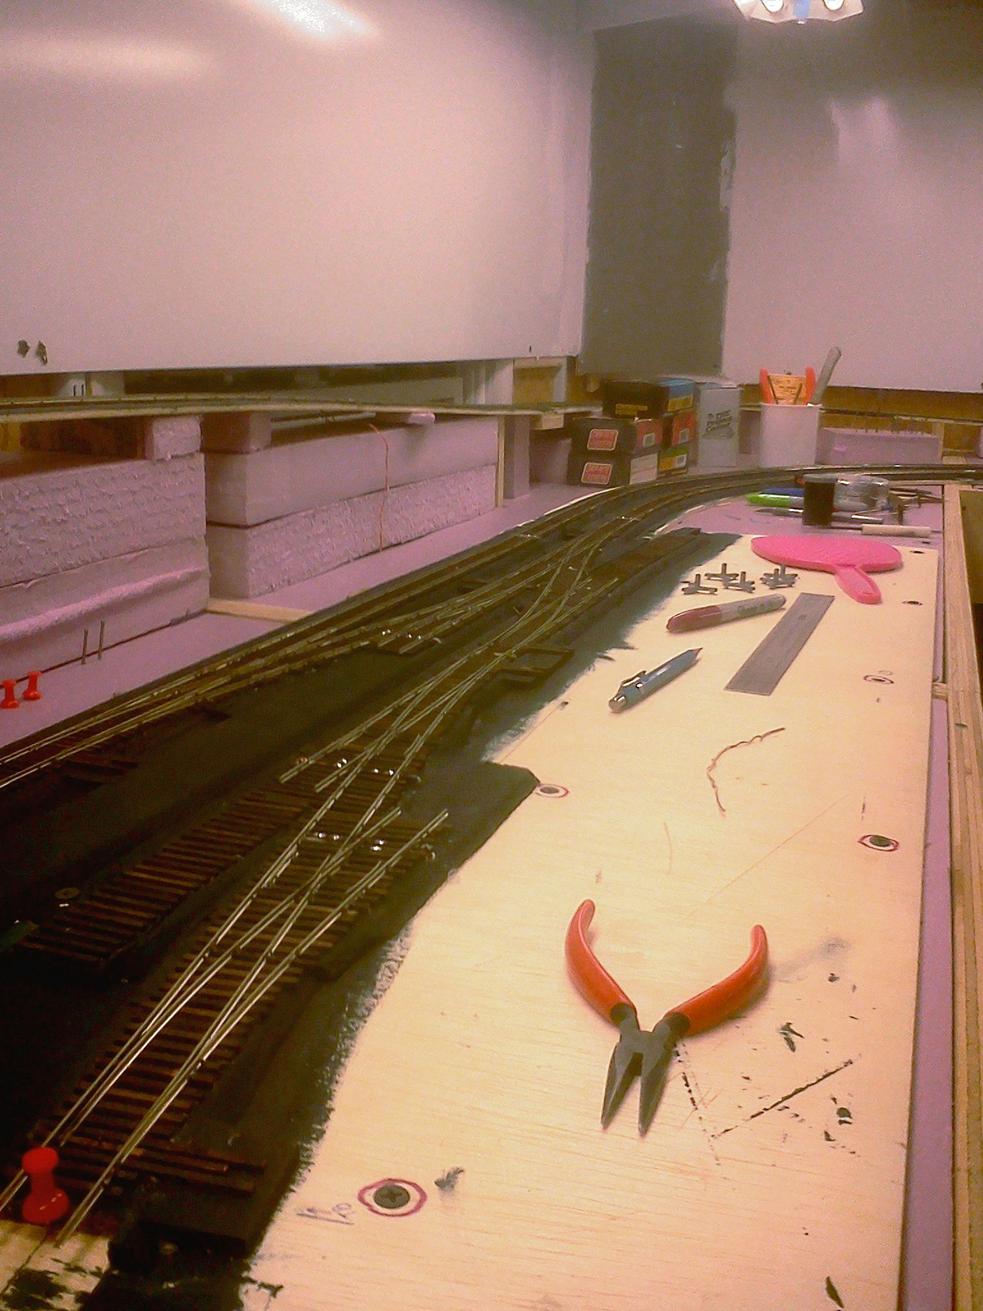
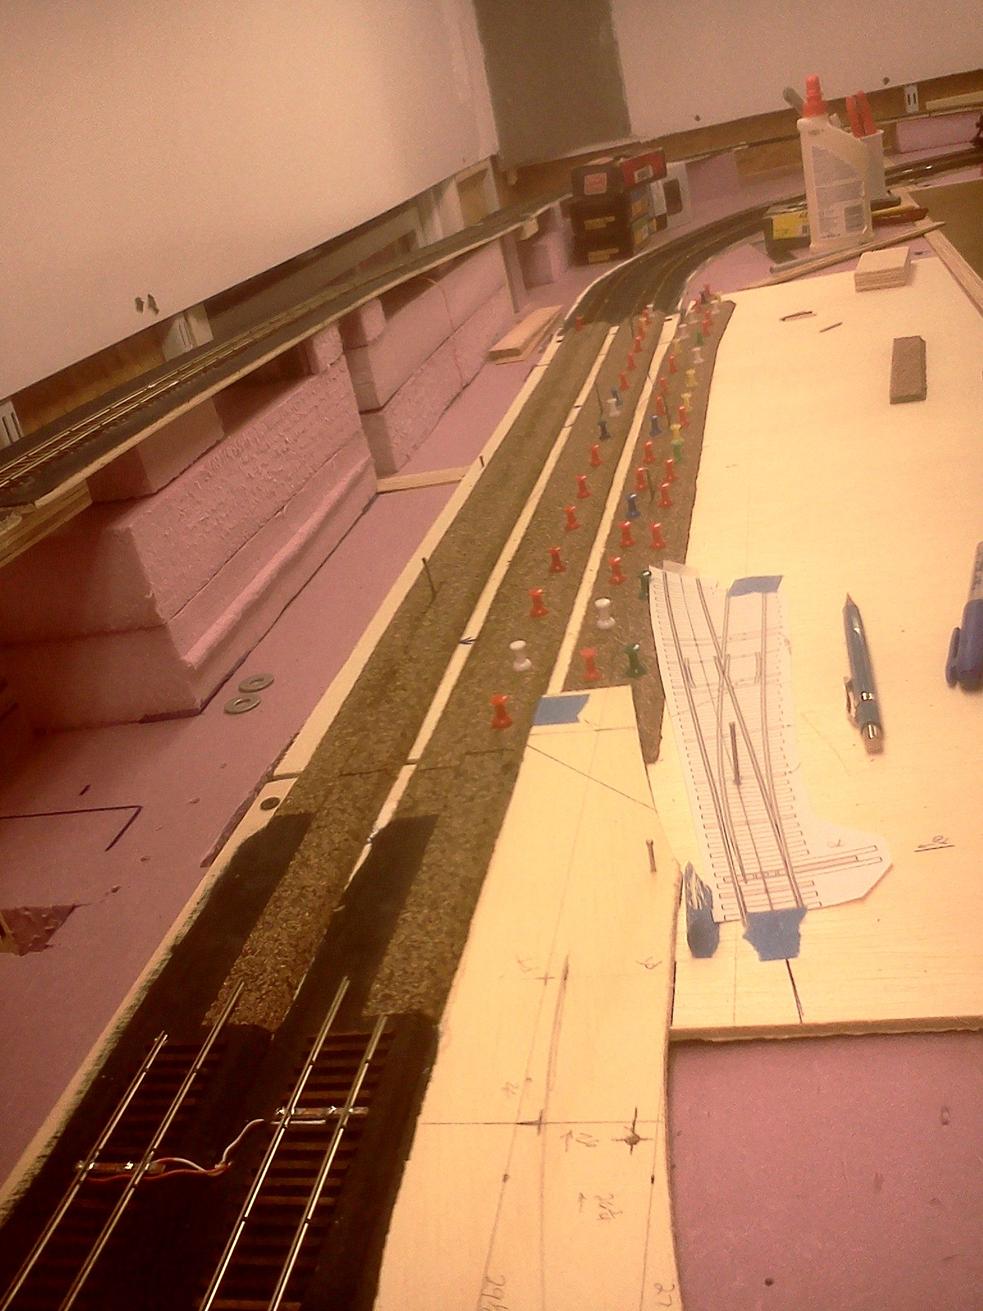
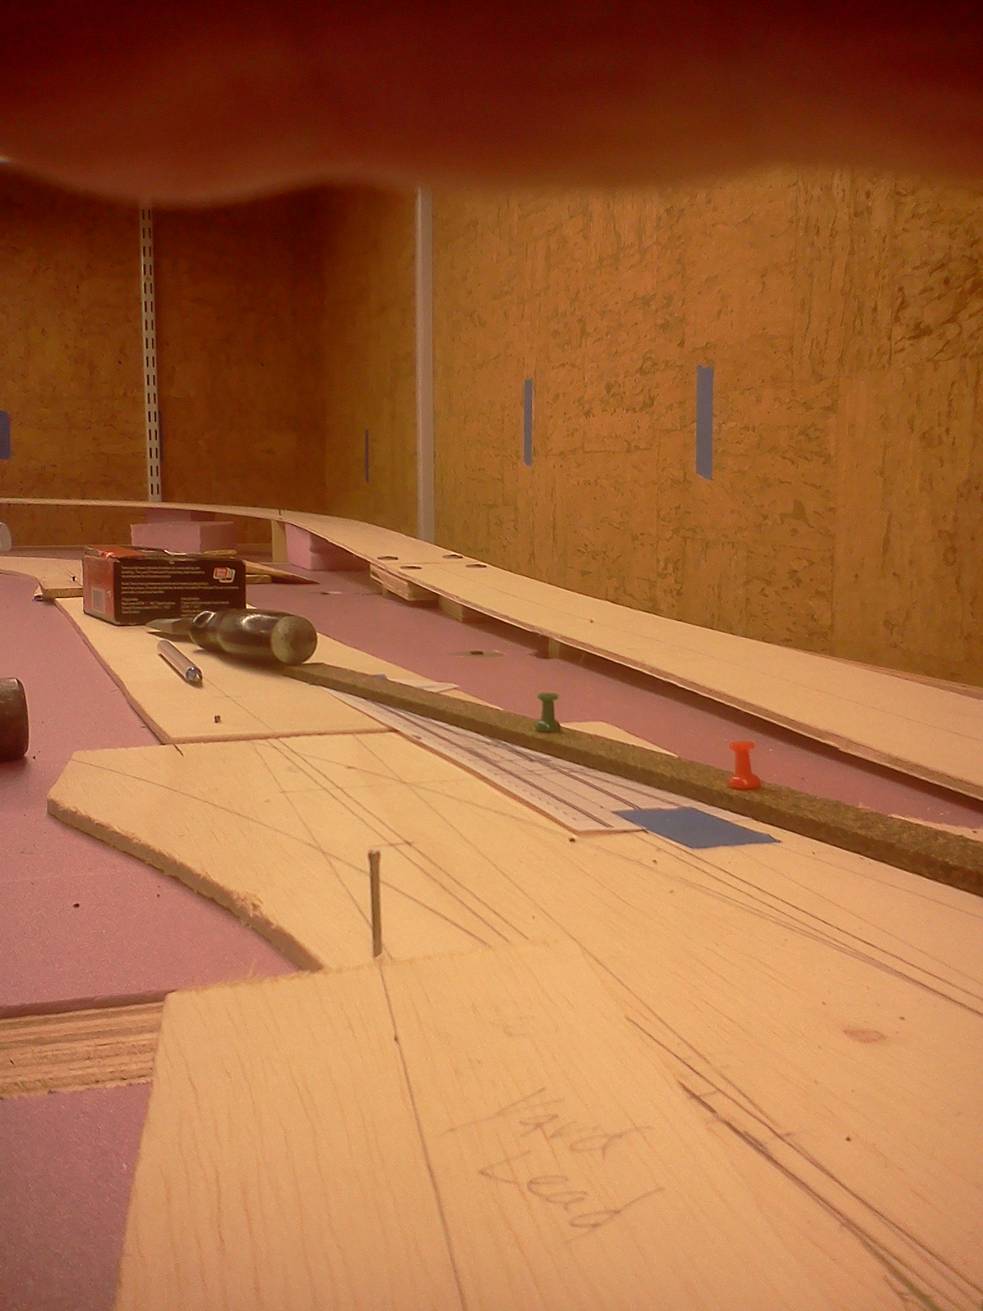
- Layed out the east-side branch line trackwork full-size on a piece of cardboard – will use four #4 wyes
- Cut and installed the remaining risers for the east-side branch line
- Built cardboard mock-ups, for the brach line, of:
- Suydam Black Bart mine
- Taurus Products branch-line oil facility
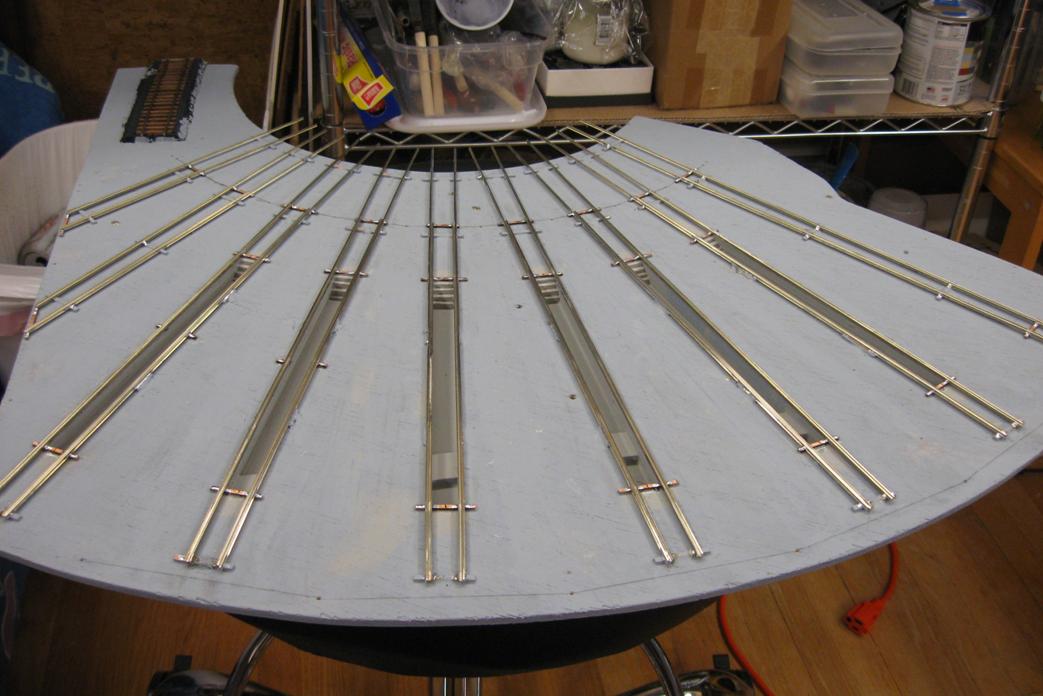
- Layed out the passenger yard tracks on the north end
- Built three #4 wyes for the passenger yard, installed and wired them, complete with Tortoises.
- Layed ties for the tail track and two yard tracks (ran out – have to stain more ties!), laid the tail track
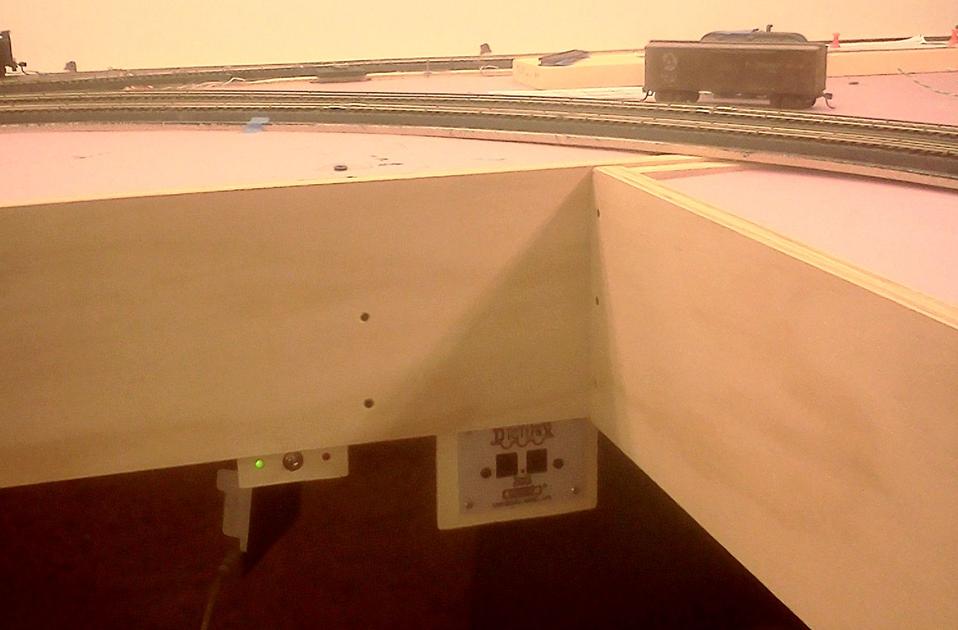
- Added a Digitrax DCC panel at the yard, per Steve’s request
- Finished
the
Pictures:
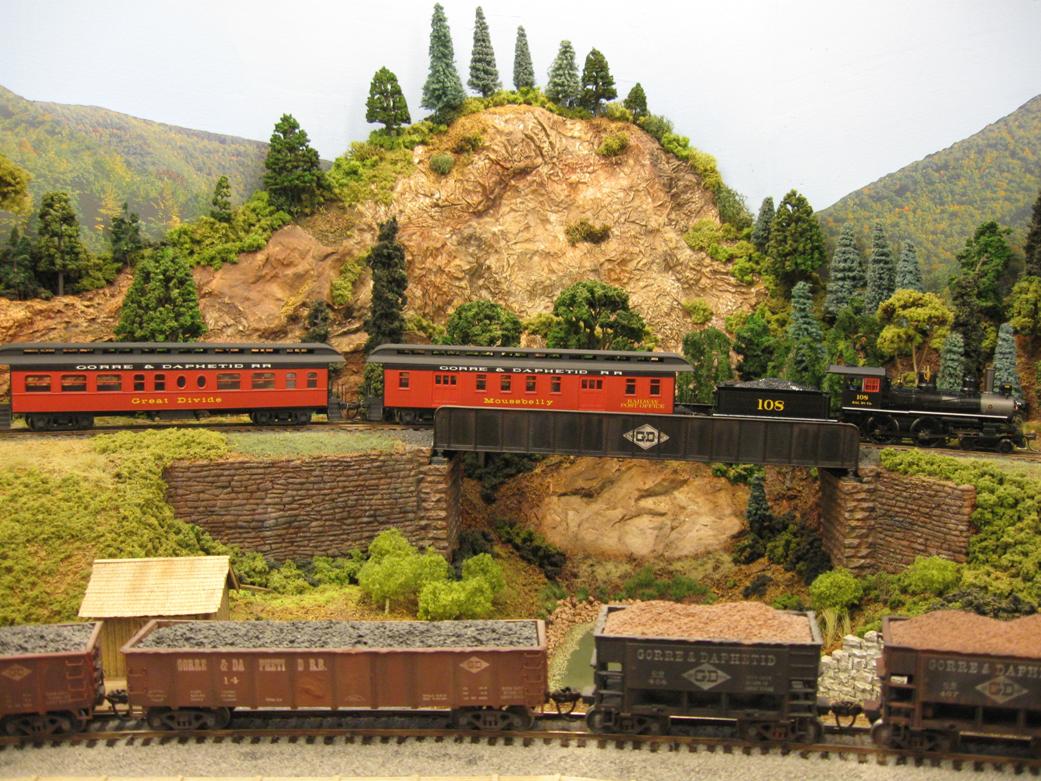
Easter operations, Steve’s Heisler and Emma:
Some shots of the (partially finished)
passenger car yard:

Some views of the future branch line, on
cardboard with cardboard structure mock-ups:
The (mostly) ballasted west-side main
line:
The handcar shed:
And now some shots of the ore cars,
S&S reefer, the tank-car Steve gave me:
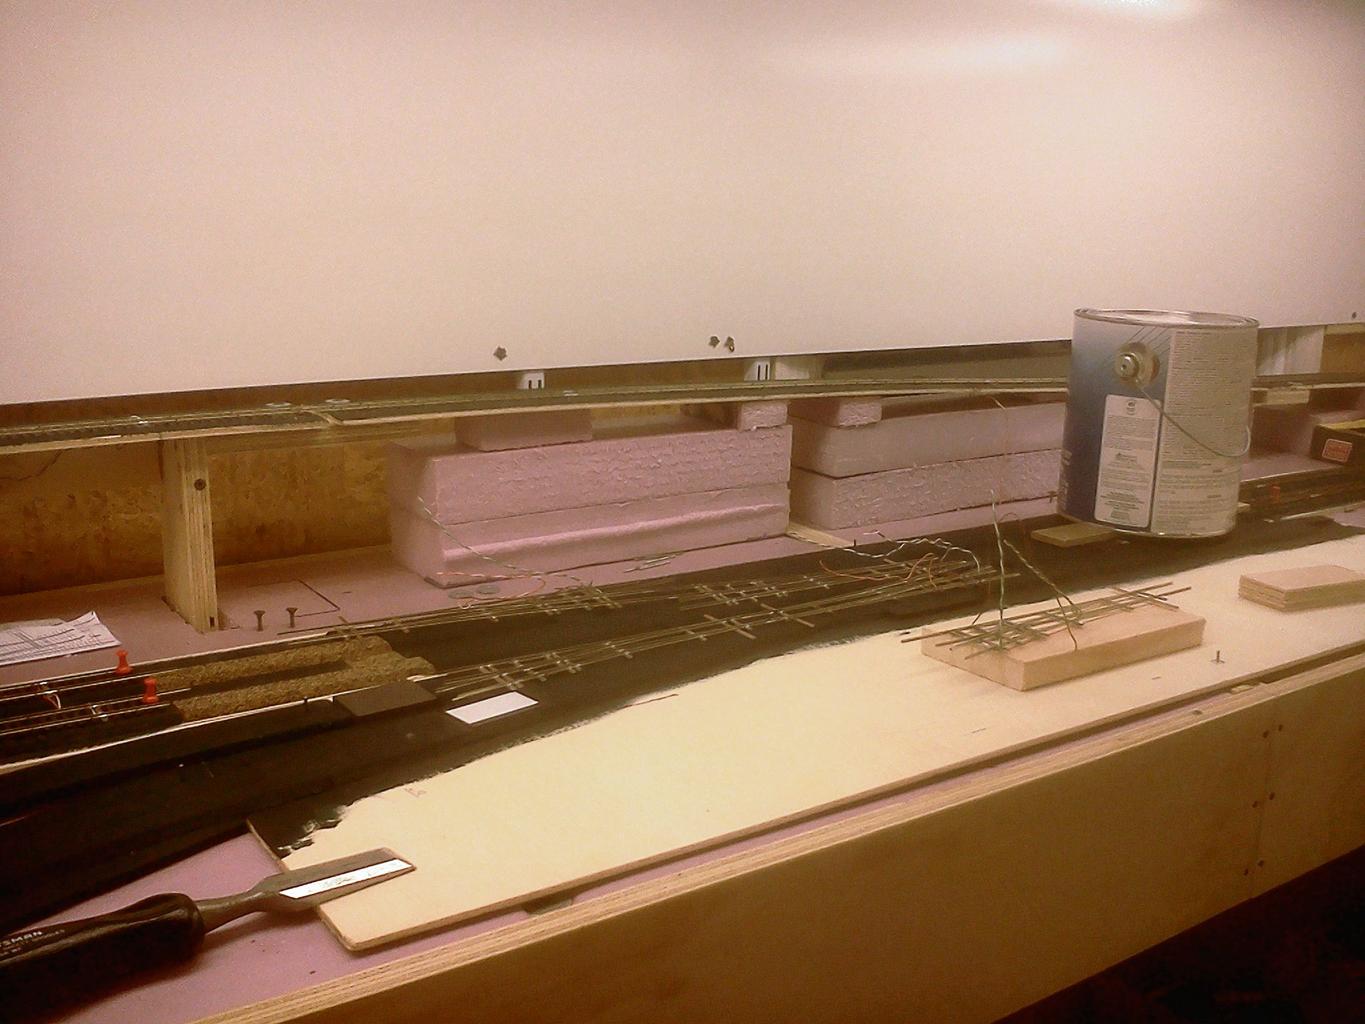
December 2015 through Mid-January 2016
Progress:
- Built
a supply shed (
- Built a loading crane for it (not yet installed)
- Prepped the area leading into the turntable, shimming it so the tracks line up, with cuts for vertical easements
- Cut the sandply base for the coaling tower/ash pit for the “underground” parts
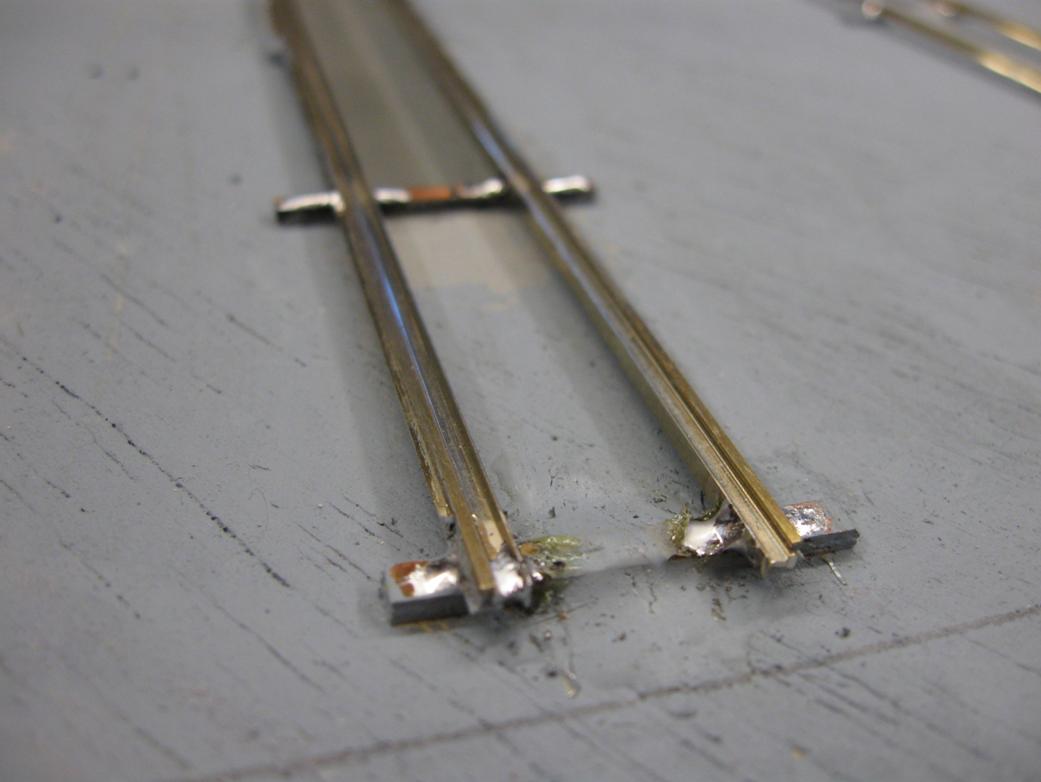
- Built a code-70 #4 wye for the engine facilities, installed it and a Tortoise motor to control it
- Laid all the ties for the engine terminal tracks, and then laid the rail; it includes code-83 to code-70 adapters and zone isolation gaps
- Added an uncoupling magnet on the “service track”, the one that dumps coal, removes ashes, and delivers sand
- Ran engines on/off the turntable, turning them around 180 degrees – success. Lining up the turntable by (old) eye can be tough, though.
- Installed a Digitrax auto-reverser for the turntable track – works great!
- Installed stiffer actuation wires in a couple of “sticky” turnouts (the Tortoises come with 0.025, changed to 0.039)
- Added some scotch-brite background foliage transitions on the west side
- Cleaned all my locomotive wheels – running MUCH better now
Pictures:
Some shots of the supply shed (note the
interior details):
The wires to the electric service are
not in their final place yet. The windows are real glass.
Here it is “in context”:

Here’s the loading crane – I don’t like
the way the cables are hanging, and will re-do them.
Otherwise, I like it and it will go on the supply shed platform.
Here’s the new engine service facility
tracks (the three to the left of the main line), looking east:
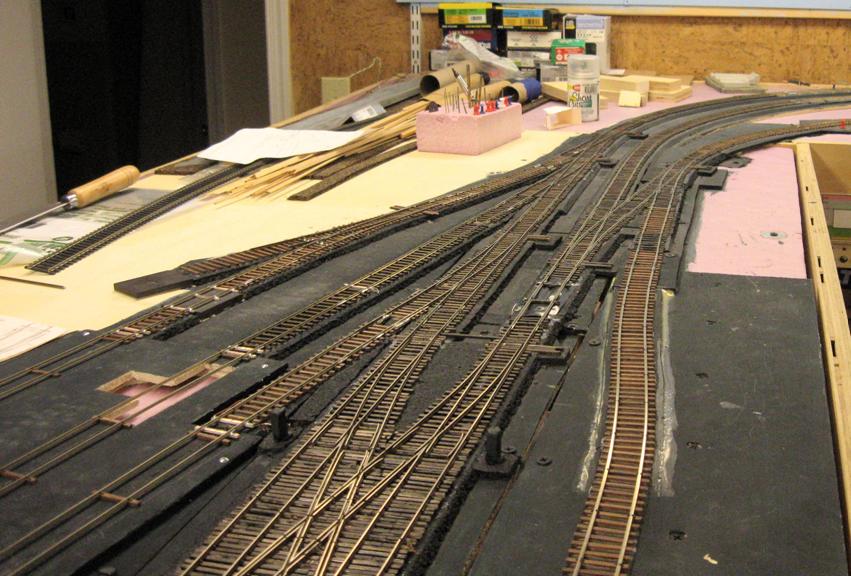
Here’s the track looking west.
Obviously, some ties are still missing and the track needs painting.
The piece in the middle (with minimal ties) is removable, so I can build the
coaling tower
and ash pit (Both Scale Structures Ltd. Kits) on the bench. Notice the cutout
sections for the coal and ash dumps.
The spur on the left will eventually
service the Fine Scale Miniature “John Allen” icing platform.

A close-up of the turntable tracks. PC
board ties are wonderful things.That turntable pit
needs some weathering!

All those turnouts were just “tied off”,
but now needed real controls. So I built a new control panel to handle all the
turnouts in this area. I know, some kind of diagram would help…but (for now, at
least) I know what they do.
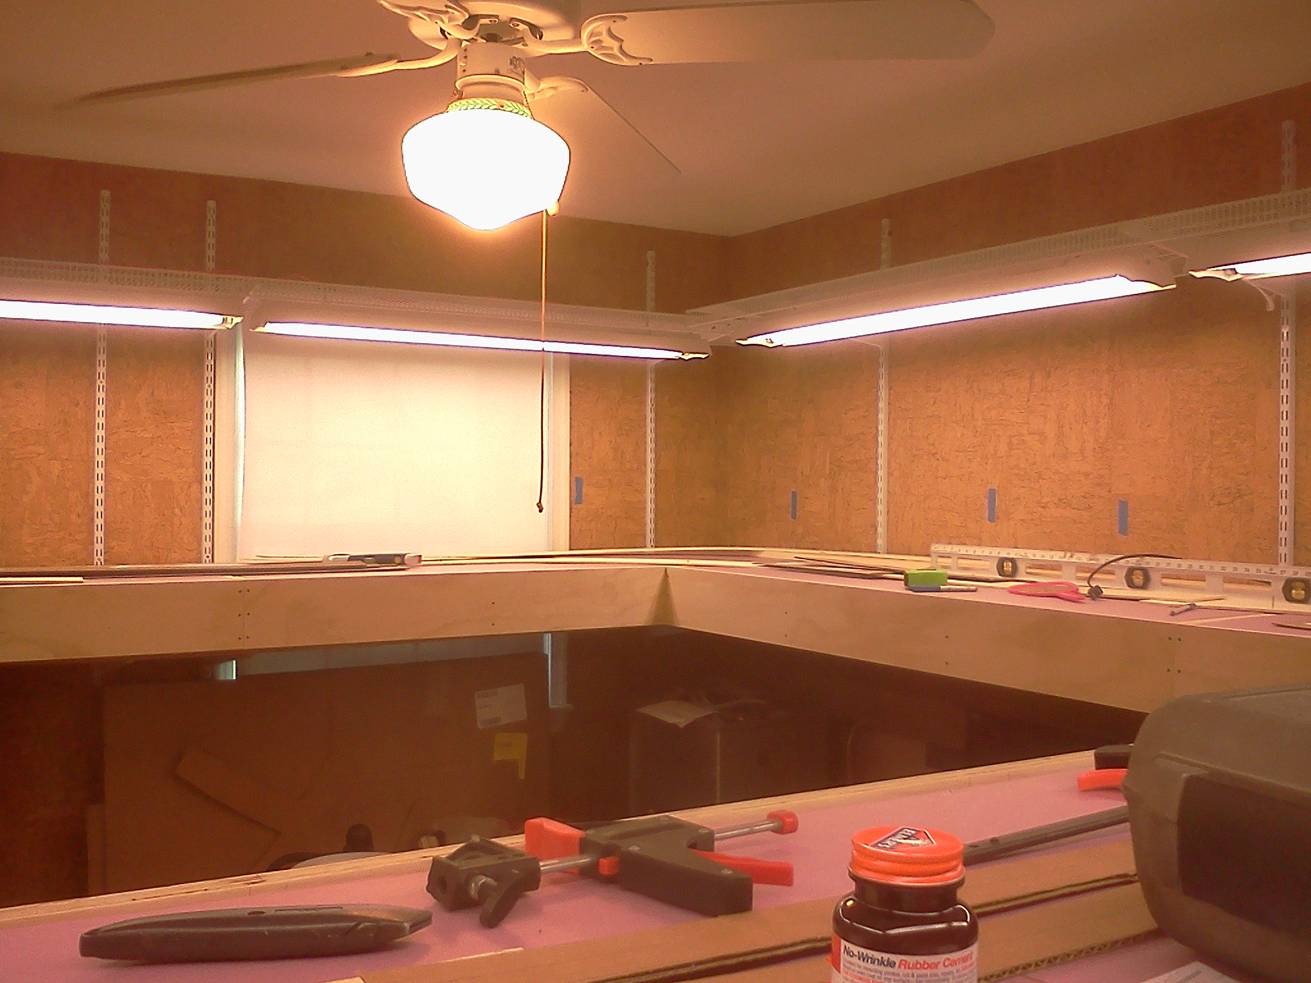
Mid-May 2015 through November 2015
The PEX install/office remodeling project (plus general summer activities) put a real drag on my progress – it’s been over six months since the last update.
Here’s the progress:
- Painted the turntable pit
- Installed adjustable mounts for the turntable, installed, and leveled it with Steve’s help
- Cut/installed sand-ply to fit around the turntable, including aluminum bracing for the roundhouse section so it can be built off-layout.
- installed a TCS M4 DCC decoder in the Bachmann 0-6-0 in place of the horrible factory unit
- built metal handrails for the turntable bridge from phosphor-bronze and brass wire (rather than build the wood ones that are stock for the kit) – these will be much more forgiving of any fat-finger events that are likely to occur
- installed the turntable bridge handrails and decking, and added wipers to the bottom for improved electrical pick-up
- cut inspection/service pits into the sand-ply roundhouse base, and “boxed” them with basswood sheet, then cut the foam base for clearance
- added mounts to stabilize all the turntable “surrounds”, and added foam and cork to vertically align the surrounds to the turntable
- spackled the area between the turntable pit wall and the surrounds, two coats to get it leveled
- cut a sand-ply base for the coaling tower and ash pit
- glued in the south end tunnel portal, wing wall, and retaining wall
- added rock castings and (real) coal outcroppings to the south end branch-line scenery, then added ground cover
- planted trees, dead-fall, ground cover on the south branch line
- ran switch rod housing between the mains to the tower
- mounted the tower to the foam-core base
- built the switch-rodding to go from the tracks to the tower (90 degree linkage, all built on a styrene base), ballasted it
- added window shades to the tower, as well as the rodding/cribbing to the base. Also built a fence around the tower on the base, and more details, ground cover, weeds, and vegetation
- built a road-crossing over the rodding and the wood track crossings, and built up the approaches with spackle
- built up six dwarf signals, this time using bake-able modeling compound to fill the backs; bake at 180 degrees for 20 minutes and hard as a rock!
- Installed the dwarfs on the west-side crossover and at the branch-line turnout
- Added cribbing and switch rodding to the above
- Ballasted more of the south end branch line and the south-west end main line
- Built and planted the Dyna-models “Thinker Privy” for the signal tower
- Built
cardstock mock-ups of the
- Made and installed a sand-ply base for the supply shed
- Stained the supply shed parts
Now for some pictures!
An overview of the turntable area, with
future roundhouse tracks in the background.
The lights on the turntable bridge work:

Close-up of the turntable:
From the other side:
A close up of the privy:
Now, showing the switch-rodding installations:
Where the road crosses, and the supply
shed mock-up in place (final coloring/grading here is NOT finished):
 :
:
Crossover and branch-line rodding and dwarf signals:

Looking down the mains at the tower
area:
Finally, some of the south-end scenery and track ballasting (the rocks need more stain, still too bright):
Looking southwest:
Station mock-up:
Mid- January 2015 to Mid-May 2015
Here’s the progress:
- finished the “Fireproof Storage” background building, including lighting (except signage, haven’t decided what it is yet)
- added more trees near the branch line bridge
- tuned/installed the double crossover, including Tortoises and control
- built and installed four three-aspect dwarf signals for the crossover
- laid-out the engine facility trackwork and facility locations, including the basic outlines of the roundhouse.
- purchased a #4 wye FastTracks jig for the engine facilities and branch
line, but haven’t built one yet.
Note that this is like two #2 turnouts back/back, so it is even “easier” than a #6 turnout. - cut and stained 4 sets of turnout ties
- built one left-hand and two right hand #6 turnouts for
the engine facility leads, and installed them, with Tortoises
The left hand goes in the main line curve to get a longer terminal lead. - Laid/painted roadbed from the main line to where the structures will be placed.
Much of my time has been turntable work (yes, I finally started it! The pictures will prove it.)
· installed the pit rail, painted the pit and the base
· installed and aligned the shaft bushings
· built most of the bridge (handrails and control cab to be finished)
· cut the foam out where the turntable will go, installed adjustable risers to adjust and level it
· built the bridge arch (still needs paint and lights installed)
Fireproof Storage (to be re-named
later):
The crossover and dwarf signals:
Turntable Construction Pix:
Lots of cutting, drilling, filing, and
soldering are involved in this kit. It will be motorized.
The bridge
with unpainted arch temporarily in place. The wires will power the rails,
one rail from the pit rail wires and one from the arch wire.
Also, the control cab and walkways/railing is yet to be installed.

Another view (I straightened the arch
after this picture was taken, it bends easily).
I have two tiny lights made with surface-mount LEDs that I plan to install at
the top of the arch:
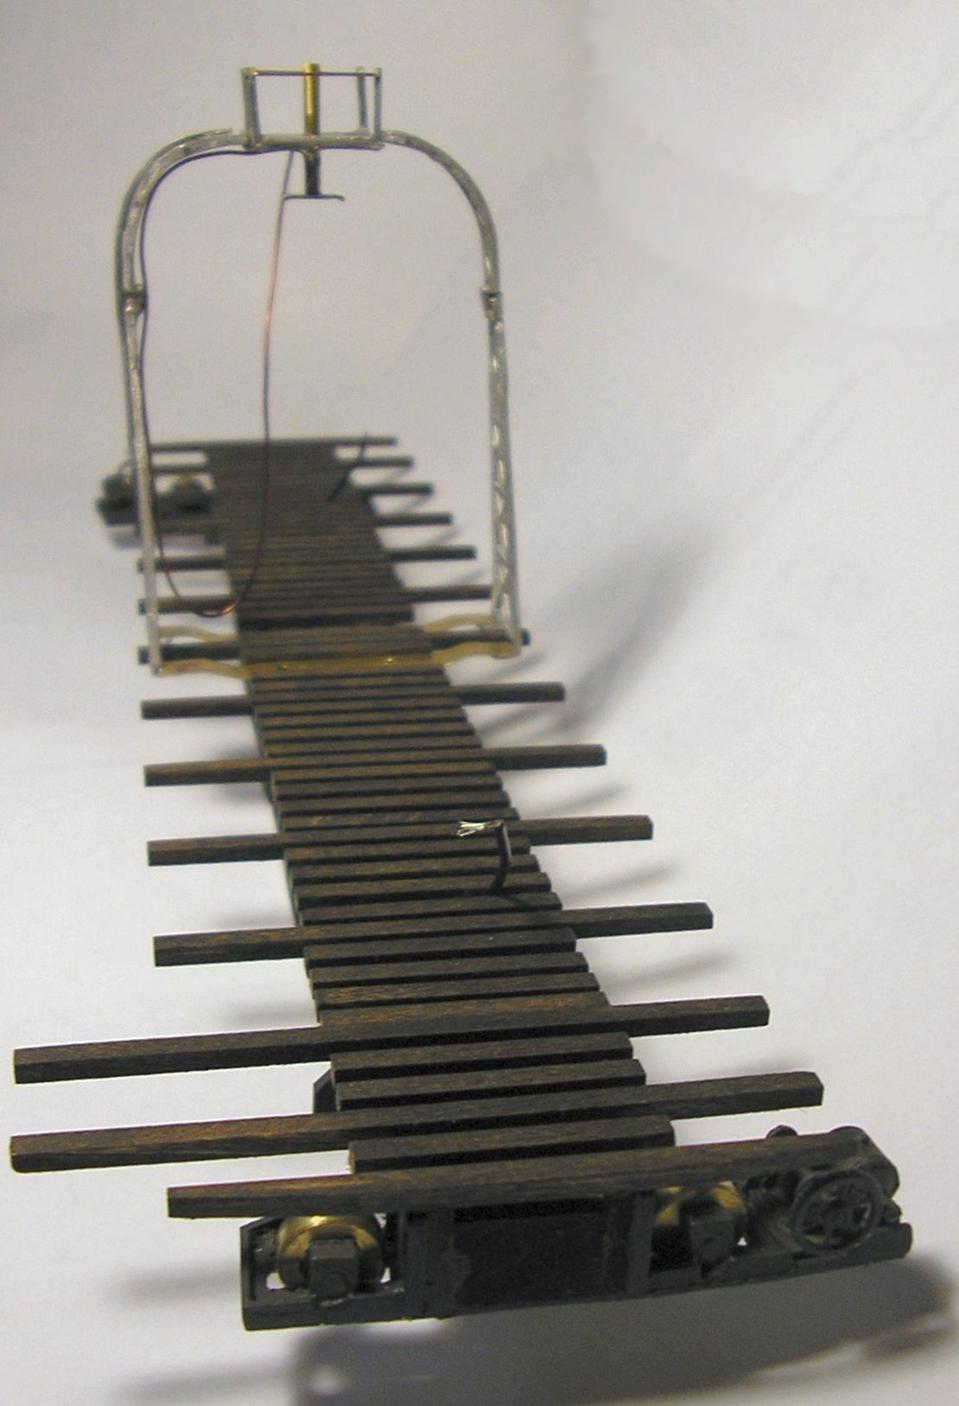
And another:

Here it is in the pit. It is cast
plaster (Hydrocal, I think) on a piece of MDF.
I sealed the whole base with latex paint. Lots of weathering and detailing to
come, once it is functional:
Mid- November 2014 to Mid-January 2015
Got a good amount done:
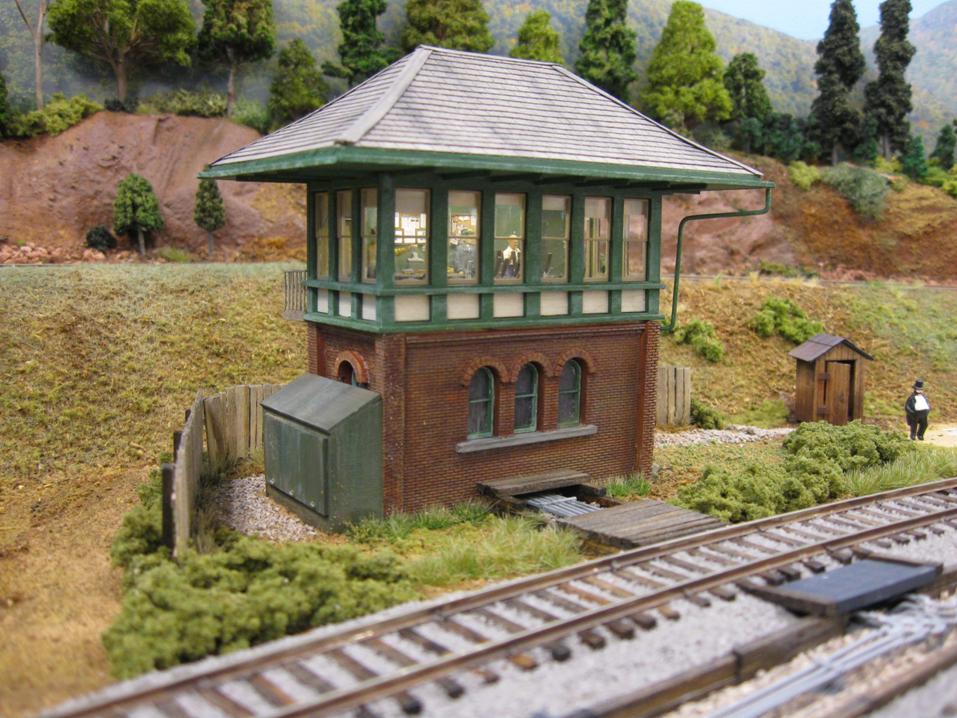
- Finished
the signal tower (except for the installation of downspouts), including
full interior and lighting.
Built the removable base and added ground goop around it; wired the lighting into the power system. - Installed dwarf signals for the south-end main line crossover.
- Installed mechanical point-control rodding for the same crossover and yard entry turnout (this was a lot of tedious work).
- Built and primed/painted (with spray bombs) the four background building shells; also painted all windows and accessories.
- Completed the flour mill background building, including lighting and weathering, and an expanded loading dock.
- Painted and flock trees brother Steve gave me; some Chinese, some he made by dipping ragweed in oil-based paint (they look GOOD).
- Finished the scenery on the “removable” south-end section and the area below it.
- Finished scenery on the west side down to the flour mill.
- Painted the “Fireproof Storage” background building, installed windows.
- Installed backgrounds on the south end, around the east-side corner, and a little on the east side.
Here’s where it sits on the layout:
Here’s the flour mill and the completed
scenery along the west side backdrop:
From the other direction:

The south end “removable” section (with the wood retaining wall) – I need to hide the seam a little better:
The south end, looking west; you can see
the switch rodding between the mainline tracks,
and one of the dwarf signals in the lower left corner. Ballast and weeds have
not yet been added.
A close-up of the “removable” scenery:
The
south-east corner, with the additional backgrounds in place. Note the new dwarf signals in the lower-right corner:
An overview of the south-west corner; it’s starting to look like a model railroad!
Mid-September to Mid-November 2014
I though I wasn’t getting much done, but after updating this blog I guess I got a good amount done in the last two months after all.
- Bought/Made/improved a bunch of trees, added them to the bridge area.
- Added lots of shrubs, weeds, foliage, and ground cover in that area.
- Started
building the signal tower for the lower level near the bridge; it’s a
craftsman kit by CH&R Structures, based on a NYC prototype.
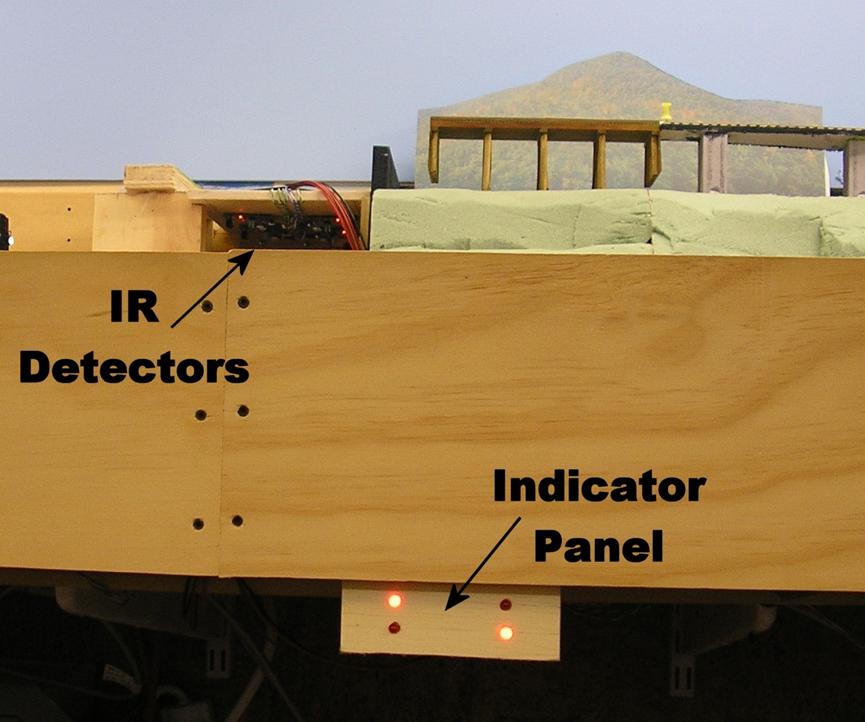
More details with the pictures to follow. It is mostly complete, and consumed much of my time since the last update. - Built
and installed infra-red detectors for the tunnels. It lights a panel to
indicate if trains are in the tunnel, and also controls dwarf signals at
the tunnel entrances.
This was also a big time consumer, as the Chinese detectors I bought had to be re-engineered to actually work (at least I got the parts cheap). - Replaced the fixed uncoupling magnet at the yard throat with an electromagnetic version, with my delayed release circuit.
- Replaced a defective Tortoise switch motor in the yard; it had intermittent contacts for the frog power, causing the 0-6-0 switchers to stall.
- Painted lots of rail. Lots more to go, but this was a big step in the right direction.
- Re-painted the tunnel portal and wing wall to a consistent concrete color.
- Also
attended two NMRA meets, one in Quakertown and one in
A shot of the branch line with Steve’s #23, showing the addition of many trees:
Another shot, showing the grass tufts
and static grass to good effect:
An overview of the area (almost ready to commit to pouring the “water”!!):
Here’s the IR detectors and panel. I
wanted to get these in before I did any more scenery work in this area.
Even so, the whole detector can be unplugged and easily slid out if maintenance
is needed.
The top two LEDs are for the back track, the bottom two for the front track.
The IR transmitter LEDs are to the far left and right, they basically aim right
down the track from the ground to up over the trains:
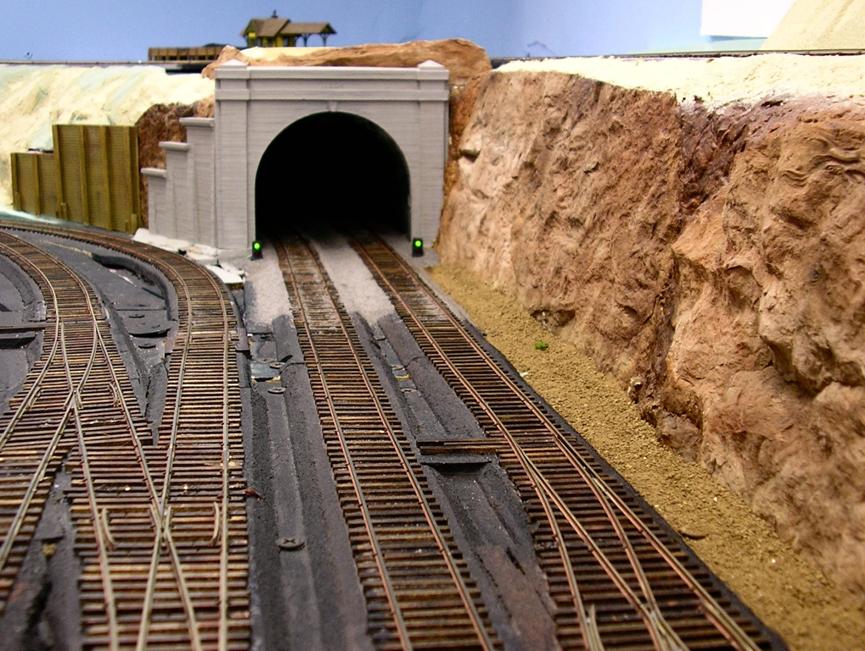
Here are a couple shots of the tunnel
entrance with the dwarf signals installed.
These are very inexpensive Chinese items I got on EBay. I had to “build them
up” with matte medium to hide the nasty wiring job.
The first shot has “all clear”:
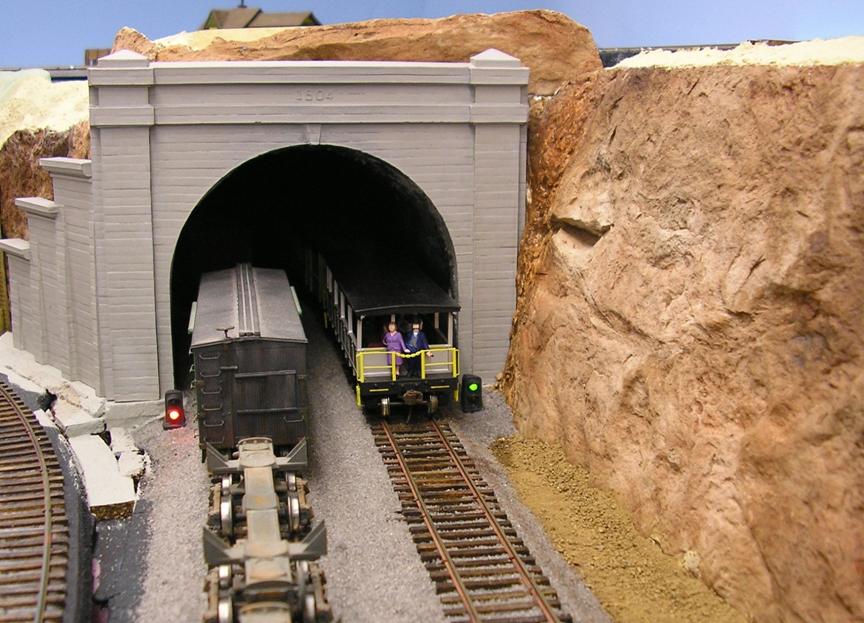
Now, the left train is exiting the
tunnel (and still triggering the detector), the right is entering and hasn’t
been detected yet:
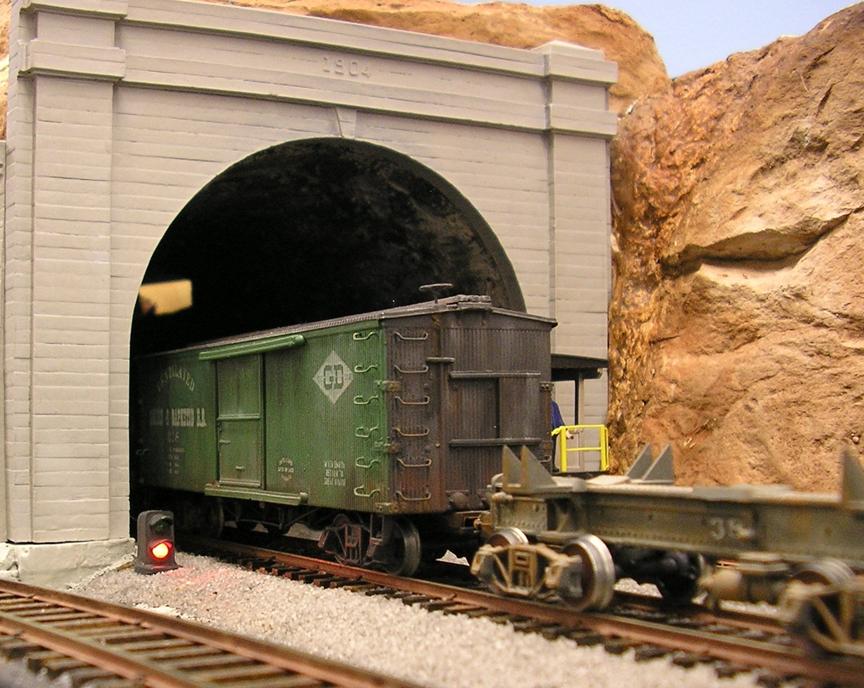
Here’s what they look like up close
(they still need some weathering):
Now for the
signal tower. First, a couple of overview shots. Resin 1st
floor, laser cut second floor and shingles:

I used real glass for the second floor
windows. The second floor has a full interior and is lighted.
Here’s the interior. The figures are Revell, Weston, and Atlas. The furniture is Scale
Structures Limited.
The levers are from American Model Builders. The bulletin boards are printed
from internet pictures.
This is it lit up. Since it will be
close to the front of the layout, I figured I better do it up good:
- Lots more scenery work done.
- Foamed and ground-gooped the branch line down to the start of the grade
- Added two retaining walls
- Added “filler” backdrops for distant hills
- Built and installed the north-end main line electromagnetic uncoupler delay control
- Ballasted much of the branch line
- Added dirt ground cover between the south-end main line and rock castings
- Added static grass, underbrush, and weeds
- Worked on the interlocking tower
- Worked on a bunch of cheap-o Chinese trees, soon to be installed.
- Ran trains with Steve and took these some pictures:
A shot of the branch line with Steve’s Heisler climbing the grade.
Steve’s 0-6-0 coming down the branch line. Note the static grass next to the track. Lots of foliage added (next, more trees!).
An overview of the branch line.
A view of the retaining wall and weeds. More static grass.
A view of the south-end, ground goop added. The section with the retaining walls is removable at the arrows to access the window.
Steve’s Climax logging train on the east-side branch line.
- Mostly scenery work, installing photographic backdrops.
- Scenery in place on the branch line up to the girder bridge
- Painted and prepped the pond, almost ready to pour “water”
- Installed the south end rock castings and stone retaining wall.
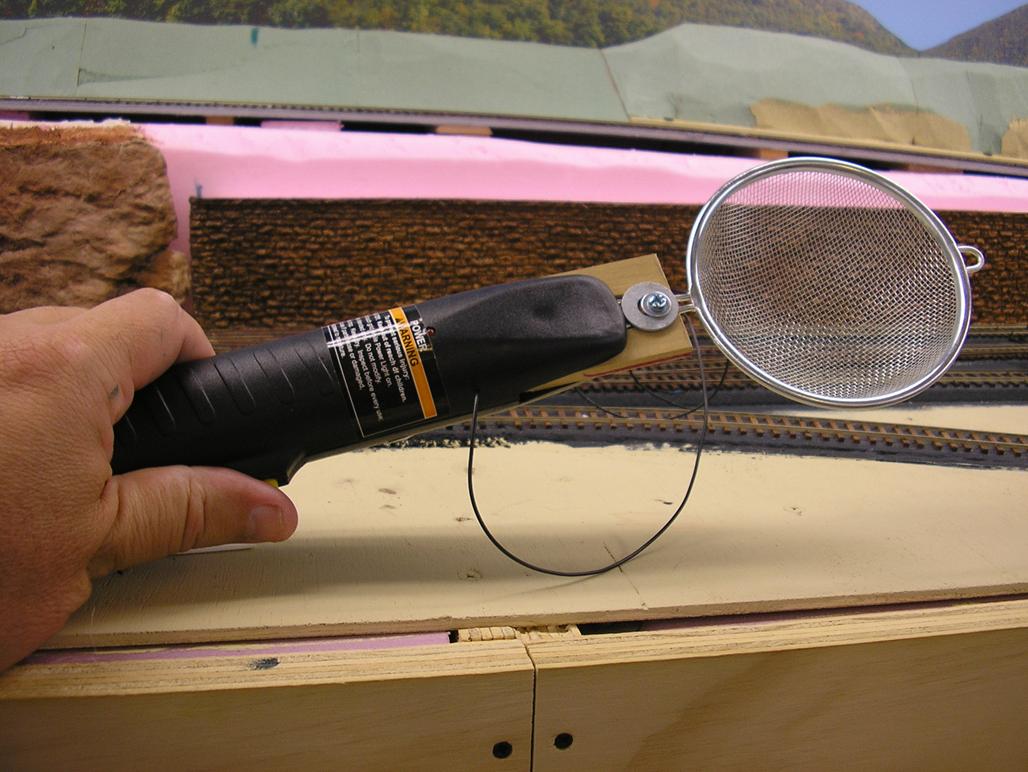
- Built a static grass wand using a Harbor Freight hand-held “bug zapper” and a dollar store strainer.
A panoramic shot of the installed
backgrounds (the string hanging down is the ceiling fan control, I need to
shorten it):
A view of the west side branch line. Note the green “pond” area:

A view of the southwest corner. The girder bridge is still wrapped in protective plastic wrap:
A wider shot of the south side branch
line:
My home-made
static grass applicator.
The wire has a pin on the end to stick in the “ground”.
Press the button and about 14KV is generated on the strainer. Now I just need
some static grass!!
- Stained a bunch of ties
- Finished the branch line up to the trestle bridge
- Built the SE corner tunnel portal infrastructure
- Cut and fitted the SW corner “mountain” from the old layout
- Airbrushed and hand-painted lots of the rail, especially in the tunnel and branch line areas
- Ballasted the tunnel area and the girder bridge
- Re-painted the girder bridge abutments and wing walls, and fitted them with foam supports under the bridge. Added bridge shoes and weathering.
- Wired in 16v regulated DC supply for the Kadee Electro-magnetic uncoupling ramps
- Designed and built a electromagnetic coupler “hold” circuit, gives about 10 seconds of time after button press; one is installed for the South end uncoupler.
- Cast six rock castings from my own rubber molds (made 15 years ago!)
- Tuned several turnouts that had tight gauge in the point and frog areas after some of Steve’s cars mis-behaved and highlighted the problems.
- Painted the SW corner mountain a couple of times to “dial in” the color of PA red shale.
- Stained/painted the rock castings, then fitted and installed some of them.
- Cut, painted, and installed the tunnel liner.
- Added “ground goop” around the SW corner bridge abutments and “mountain”.
- Added Sculptamold around the rock castings near the tunnel portal.
- Added a Chooch culvert in the swamp/pond basin of the SW corner.
- Steve added Sculptamold to the SW corner connecting to the mountain, creating the path up the hill, and carving rock strata – nice job! I then stained/painted it the next week.
- Added initial scenery on a short section of the west side, between the branch line and the backdrop – ground cover, weeds, bushes, and small trees. It still needs dead-fall, talus, etc. but is a good start.
The small section that has been “scenicked”:
The SW corner
“mountain”. Steve’s Sculptamold hillside with path is to the left. This area
will get lots of ground cover and vegetation.
The area under the girder bridge will have “water” in it.
Moving east, the eventual rock castings
are temporarily placed in their approximate locations. They need more
stain/paint, of course.
The green foam hill section to the left, behind the branch line, is removable
for access to the window latch behind it.
The SE corner rock castings, with Sculptamold blending into each other and the tunnel portal.
The “roof” of the tunnel area is removable for access to the tracks in the
tunnel. The stone retaining wall to the right is mounted on foam-core.
A close-up of
the tunnel portal. It is not
fastened in place yet, but the fit is evident. Note the painted rail. The
ballast will be weathered once the ground cover is in place.
The initial east-side hill between the
yard and the branch line; this whole section is removable for tunnel track
access.
Made from foam, it (currently) weighs only a couple of ounces. It will be
covered with “ground goop” and/or Sculptamold and/or
latex paint.
The overall view looking south-west. The icing platform mock-up is in the foreground.
The overall
view looking south-east. The
little station will eventually go on the branch line (almost directly above it
in the back corner).
It is, believe it or not, made of white metal (from
- Built turnouts for, and added a yard feeder to the north end inner main line.
- Finished laying and wiring all the yard tracks
- Built the double scissors crossover for the north end mains and it’s control panel
- Built mock-ups of the engine facilities structures (coaling tower, ash pit, and sanding tower)
- Planned the engine facility layout on a large piece of cardboard, refining and reworking many times
- Cut and stained six sets of turnout ties
- Finished the north end foam base installation and many additional support cleats to firm everything up
- Built roadbed for the scissors crossover
- Cut and installed the sandply base for the engine facilities
- Rolled the backdrop with a final coat of blue
- Added roadbed supports for the branch line, where the small trestle will go
- Added the branch to the icing platform track (where my Fine Miniatures John Allen Icing Platform will eventually go, there is a cardboard mockup there now).
- Installed an electro-magnetic uncoupler in the north end inner-main track near the yard feeder
- Did demolition on the “old” layout in the garage, pulling rock castings, tunnel portals, and the tall trestle
- Glued in scenery backers behind all the existing branch line track
- Painted all the un-finish PC ties
- Built branch line roadbed up to the short trestle
The scissors crossover (needs a few
adjustments still). This took ~two weekends of hobby time to build:
The scissors crossover control panel – selects one of three routings (frog power NOT included yet):
South-east corner of the room, showing
the new branch line extension and short trestle bridge:
The north end, with the Mantua Mikado
pulling a freight of mostly Gorre & Daphetid cars
Scenery here will need cliffs and/or retaining walls, and a tunnel portal at the left:
The icing
platform siding (with a cardboard mockup standing in).
It is removable to allow the kit to be built/attached on the bench:
The yard feeder and icing platform siding turnouts:
Steve’s G&D 0-6-0 on the branch line with two LaBelle flats and a scratch-built G&D bobber Steve gifted me:
Overview of the east side:
Overview of
the west side. Note the
scenery forms behind the branch line.
Final contours will be made with florist’s foam, which is easier to carve and will take and hold trees easily:
The tall trestle, removed from the old layout. Hopefully Steve can use it, I probably can’t:
October 2013 – Mid-January 2014
- Finished the south end caboose track and spur (to eventually service a livestock pen)
- Stained a batch of 100 ties “special walnut” for the yard tracks
- Re-motored
(Helix Humper) and added a DCC decoder to the
Mantua Mikado Tom Adams gave me (was his Dad’s)
It needs lighting wired in and a decent connector between the loco and tender. - Built three turnouts for the yard
- Decided to make one yard track a “through” track to the north end main line
- Painted the girder bridge, bridge piers; weathered the bridge and added a GD logo
- Tweeked/leveled some of the south end roadbed
- Cut/painted the yard sandply
- Installed the three turnouts, wired them, built the control panel and wired it
- Layed ties and rail for the three stub-end yard tracks
Here is the completed south-end trackwork, with the Mantua Mikado parked in the caboose
track:
Here is a close-up. Lighter ties, wider
spaced, code 70 rail on the siding.
Here’s the yard ladder. The back track
will pass through to the north-end main.
The PC ties have not yet been painted, and the uncoupler
needs to be centered/glued and ties added.
Note the plywood stiffeners under the sandply.
Here are the yard tracks looking south.
With the code 70, you can get some wobbles (vertical and horizontal),
but I think it is appropriate for the yard, where slow speeds and spotty
maintenance prevail. Perfect track here would look unrealistic.
Late
September – Early October 2013
- Finished south-end mainline track
- Installed Kadee electro-magnetic uncoupler and controls
- Installed DCC decoders in Bachmann Baldwin 2-8-0 and Mantua Classics 2-6-6-2
- Installed a Digitrax PR3 and loaded JMRI software to program the decoders
- Adjusted the speed curves of the locos; they now run super smooth with prototypical speed
- Installed DCC supply, controller, and throttle jacks in benchwork
- Tweeked the branch line grade to even it out
- Laid south-east end stub track with uncoupler
- Laid roadbed for south-west end sidings
- Filled in wood ties and painted and touched up PC ties
- Sanded and painted the backdrop sky blue (what a contrast to the pink foam!!)
Loconet jack plate in north-west corner
Loconet jack plate and uncoupler
push-button under south end fascia
West side backdrop
South side backdrop
East side backdrop
Stub track (feeds a siding), with uncoupler
Here is the roadbed for the south end
sidings – may be a good place for cattle pens…
I had to throw in a picture of a train
running…
- Finished the south end switch installation
- Wired all the turnout feeders to the DCC bus
- Installed Tortoise switch motors, wired connectors to them
- Wired the frogs to the proper Tortoise contacts
- Secured the sandply to the benchwork, leveled it
- Connected the outer main line (both ends) and the inner main line (one end) to the existing trackwork
- Ran
a 10-car train through both cross-overs, forward and reverse, with no derailments or
problems!!!
South End trackwork,
looking east
South end trackwork,
looking west
- Worked on the south end trackwork – six #6 turnouts to add yard access, industrial spurs, and a main line crossover
- Laid cork roadbed, finished the turnouts, painted, and now in the process of installing ties and turnouts
- Had an operating session over the labor day weekend, and was able to test the district short protection – it worked perfectly, even with brother Steve’s 3-amp DCC supply.
Here’s the SE corner branch line trackwork; code 70, siding with hidden uncoupling magnet
(the cove spackle needs another coat).
All the wiring has connectors so this
section can be lifted out for maintenance and detailing.
The south end roadbed is being laid in
here (yard lead sandply roadbed has yet to be
trimmed).
Gluing ties down (the gallon paint can
makes a great weight). Turnouts are all fitted and ready to place after the
ties are down.
This will take some time. Then the Tortoise switch machines will need to be
added, and the foam cut to fit them.
- Brother Steve did 1st coat of spackle over backdrop joints and coves, I did initial sanding.
- Re-built branch line SE corner turnout with code 70 rail (works fine in the Fast-tracks code 83 jig)
- added SE branch rails and feeders, using removable connectors
- installed an uncoupling ramp on the branch line siding
- ran remaining romex for more districts with Molex connectors (7 total, 8 once the programming track is defined)
- ran remaining switch machine power feeders
- built and installed the distict power control module
The bulbs (automotive 12v 1156 type) are effectively 0 ohms
until they heat up, like when a track short occurs.
Then they light up, and the resistance
increases and limits the current to prevent the DCC supply from auto-tripping.
We’ll see how well it works.
The point-point wiring includes
resistors (current limiting for the red indicator LEDs) and reverse polarity
clamping diodes (to prevent high LED reverse voltages).
Here’s the panel, wired with DPDT/center
off switches to allow DCC, off, and DCC programming or DC operation in each
district.
The red LEDS will light when there is voltage across the 1156 lamps (when there
is a track short).
Here’s the whole thing wired up. The
terminal strip will be used to connect the male Molex connectors that will
connect to the track busses.
The connector at the left goes to the
DCC supply.
Finally, here it is installed on the
layout. It’s easily remover with four screws if maintenance is needed. When
operations begin, a schematic will be kept nearby.
- added wire supports to back of all lighting support shelves
- installed backdrop corner coves
- added ties to the SE corner branch line
- installed turnout, feeders, and Tortoise on SE corner branch line
- ran 12-gauge Romex for track feeders, using Molex connectors
- defined
6 power districts, connected existing feeders into first two district busses
These will be isolated by 1156 automotive bulbs for short circuit protection - installed/connected some missing feeders
- added 0.100 pin connectors for the SE corner branch line module feeders so it can be removed for maintenance work
- painted (most) PC ties with acrylic paint
- adding caulk to backdrop coves, beginning to fill/smooth it out
- laid rail connecting branch line to SE corner module
- installed the East branch line risers over the main
SE Corner backdrop coving and branch
line ties
Branch Line SE switch, future Kadee uncoupling ramp, backdrop seam caulked/taped
Branch Line rail (code 70), SW corner
coving (note temporary trackwork on main line)
East side branch line risers (main line
will be in tunnel)

PC ties painted with acrylic paint, now
virtually invisible
SW corner backdrop cove
- Completed NE corner track and East side track
- Completed temporary track-work (north and south) to get a full running loop
- Put up
masonite backdrop panels (the kind with one side
finished white – for a couple of bucks a sheet extra I don’t have to prime
it)
The corners will be “coved” with aluminum, joints spackled, then sky blue paint applied.
This masonite will also be used to build the valence panels later, so that you don’t see the light bulbs from normal viewing angles. - Built two turnouts; four more to go, then I can assemble the south end track-work permanently
- Built
and painted the girder bridge for the SW corner branch line (from
The west side:
The north side (and my thumb):
The east side, with a running train (this will eventually be a tunnel,
hence the backdrop up 6 inches):
- Layed NW corner main line tracks
- Layed SW corner mainlines tracks
- Layed/painted NE corner cork/roadbed
- Brother
Steve brought three DCC-equipped engines, and we ran them through all the trackage with no issues;
we did some switching on the branch line stub and backed a long train, pushed by a 2-6-6-2, through the crossover and into the branch line with no issues!
NW corner main line (SW corner ties being glued):
NW corner main line:
NE Corner roadbed:
- Installed the branch line turnout and tail track previously built at the bench
- Layed first section of branch line with code 70 rail and “light” stained ties
- Finished west side crossover and branch-line connector at bench, including two new turnouts and Tortoise mounting
- Installed the above on the layout
- Wired and connected feeders from track/turnouts
- Wired frogs to Tortoise contacts for polarity switching
- Layed cork, ties, and rail on the south-east main line roadbed
- Wired +/- 12v Tortoise power supplies and a power strip under layout
- Drilled 1 inch holes through joists for running wiring on north and north-west sides
- Ran Tortoise feeder bus, using 3-pin connectors, through joist holes from supplies to south end
- Wired turnout control switches to the Tortoise harnesses (for 4 turnouts)
- Mounted the switches, along with LED indicators, on small panels along the bottom edge of the fascia
- Had a successful test run of an engine (Bachmann 2-8-0) and cars through all turnouts
West side main line and temporary branch line connector (note that the final
track will be curved to match the roadbed):
Branch line with “test train”:
Turnout control switches with LED indicators below fascia:
South-east corner main line tracks:
East side main line, will be in a tunnel, so
only a few ties are used:
North-west main line curves:
- Started building turnouts at the bench with “FastTracks” jig, all #6
- Added risers for the branch grade, and the corner upper deck base
- Finalized the branch and yard track arrangement
- Staining batches of Kappler ties with Minwax Dark walnut (main) and special walnut (branch)
- Built a tie “piano jig” with sections of flex track spaced apart (ME code 83 for ~21.75 “ space on main, Atlas code 100 flex for ~25.5 space on branch)
- Layed cork roadbed, ties, and track on branch line switch-back (at the bench), including a Kadee under-track uncoupler
- Cut mounting pads for Tortoise switch machines from ¼” sandply


- Finished frame sections
- Mounted, bolted together, and leveled the frame
- Added 2 inch foam base
- Made preliminary track layout with corrugated cardboard
- Installed eight dual-bulb T8 fluorescent fixtures with 3800K bulbs, hung from wire shelving units
- Cut roadbed from ¼” “sandply” plywood

- Installed wall brackets
- Built frame sections